![]()
In my earlier post vCenter Server 6.* – Replacing SSL certificates with Custom VMCA I described how you can replace SSL certificates with Custom CA certificates. Today in post vCenter Server 6. – Replacing SSL certificates with Enterprise VMCA* I would like to guide you through replacement of VMCA self-signed SSL certificate with Microsoft CA certificates. This will allow you to take advantage of VMCA as a single point of certificate management in your environment while ensuring that
Prerequisites
- Certificate Authority.
- Template for VMware in Certificate Authority – follow VMware Knowledge Base Article for details: Creating a Microsoft Certificate Authority Template for SSL certificate creation in vSphere 6.0 (2112009)
- XCA – Optional to store all certificates, requests and private keys.
VMCA Topologies
As mentioned in my earlier post I suggest to read about VMCA topologies from which you can choose from. Below you will find two best articles to familiarize yourself:
Replacing SSL certificates with Enterprise VMCA
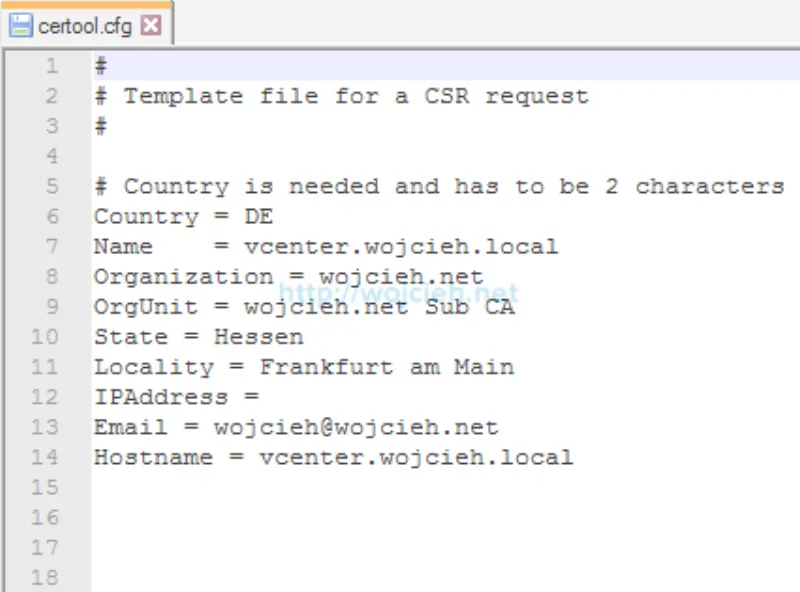
- Before we will start with certificate replacement I suggest to begin with editing file certool.cfg in C:\Program Files\VMware\vCenter Server\vmcad. In this file we will provide all information needed to issue certificate.
- Country = US
- Name = CA
- Organization = VMware
- OrgUnit = VMware
- State = California
- Locality = Palo Alto
- IPAddress = 127.0.0.1
- Email = email@acme.com
- Hostname = server.acme.com
- This is how my certool.cfg looks like.
- Login to your vCenter Server and start command prompt as administrator.
- Change directory to vCenter Server installation directory. In my case I have default path which is: C:\Program Files\VMware\vCenter Server\vmcad.
- Start script: certificate-manager.bat
- Select option 2 and enter Y to use previously edited certool.cfg.
- Enter administrator@vsphere.local as username and provide password to this account.

- Immediately we have to configure first of certificate machine_ssl. It is kind of strange because we were asked in previous step if we want to generate all certificates using configuration file. If you edited certool.cfg file before you just need to hit enter several times. Pay attention that at the end you have to provide FQDN of vCenter Server.
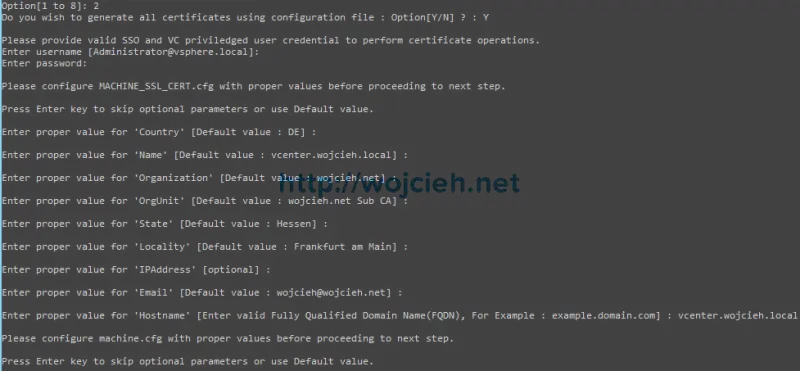
- Same steps have to be done for other certificates:
- machine_ssl - was created in previous step
- machine
- vpxd
- vpxd-extension
- vsphere-webclient
- At the end we have to export Certificate Signing Request and Key for VMCA Root certificate. Select 1.

- Enter directory where all files will be stored. In my cases it is C:\SSL. If you will be asked to reconfigure certool.cfg you can skip it.

- Once we have files let’s sign them with Certificate Authority.
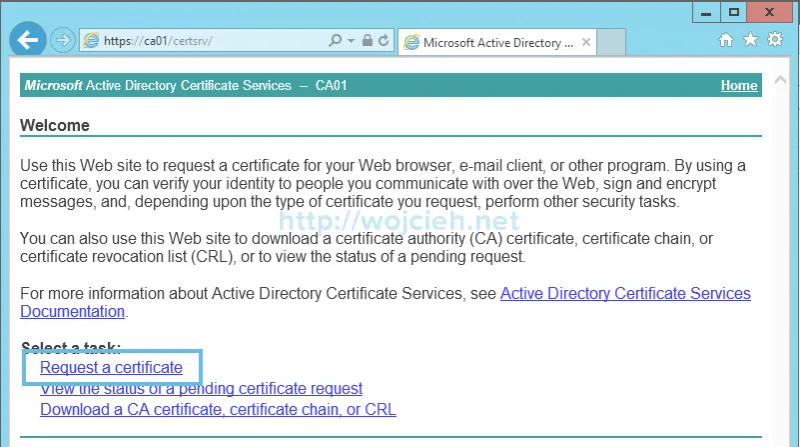
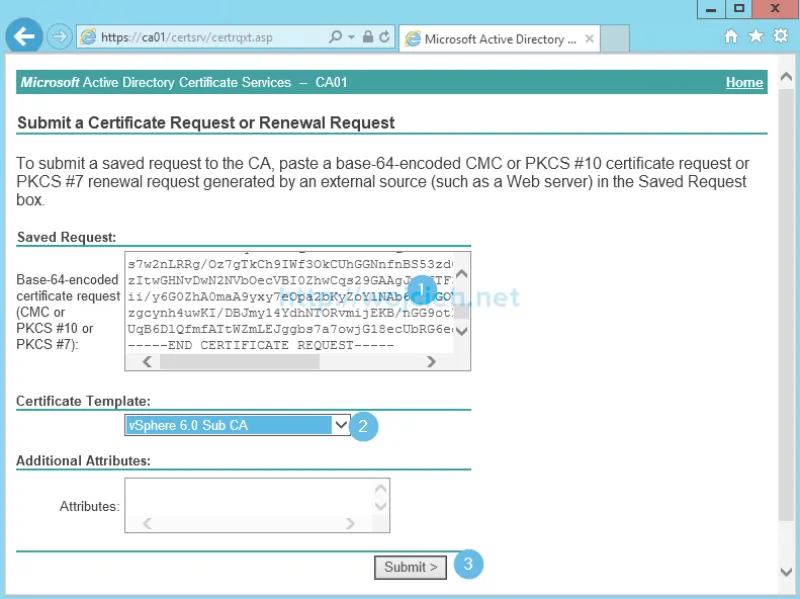
- I am using Internet Explorer to sign certificate. Go to https://CA-FQDN/certsrv.
- Click Request a certificate.
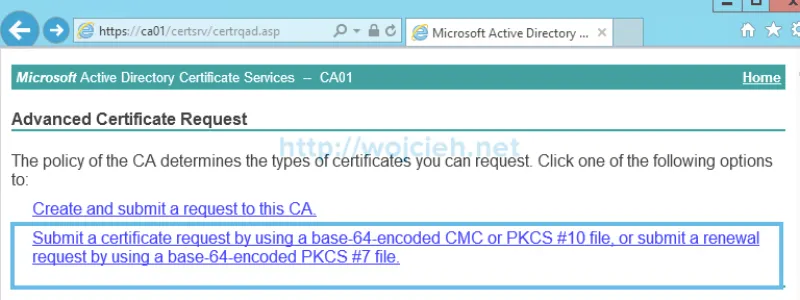
- Choose advanced certificate request.

- Choose Submit a certificate request by using a base-64-encoded CMC or PKCS #10 file, or submit a renewal request by using a base-64-encoded PKCS #7 file.
- Paste previously generated CSR to field and as certificate template select Sub CA template previously created and click Submit.
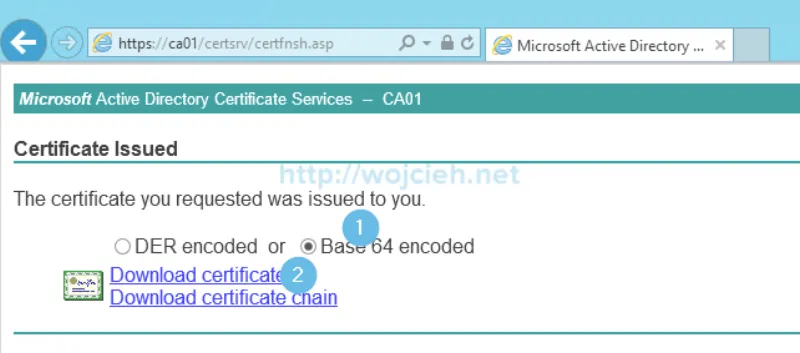
- Once the certificate is approved export it as Base 64 encoded. To do it simply click Download certificate. Export Root CA certificate, because we will need it later on.
- Next step is to combine Root CA certificate (from your Certificate Authority) with Sub CA certificate. Below you will find format how to do it.
1
2
3
4
5
6
—-BEGIN CERTIFICATE—- Sub Certificate Authority certificate —-END CERTIFICATE—- —-BEGIN CERTIFICATE—- Root Certificate Authority certificate —-END CERTIFICATE—- - if everything done correctly you should see that chain is working fine.
- Next step is to import combined certificates (I called them chain certificate) to VMware Certificate Authority (VMCA). Return to certificate-manager script and select option 1.

- Provide path to chain certificate and private key.
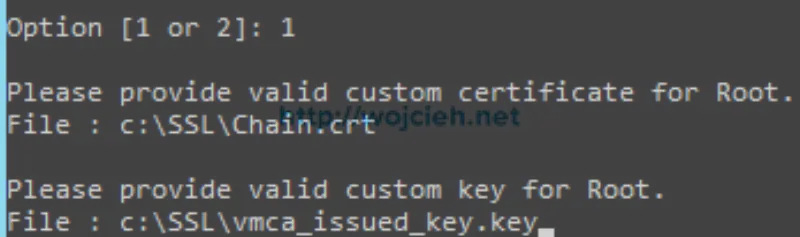
- Choose Y to replace Root Certificate and all other certificates.
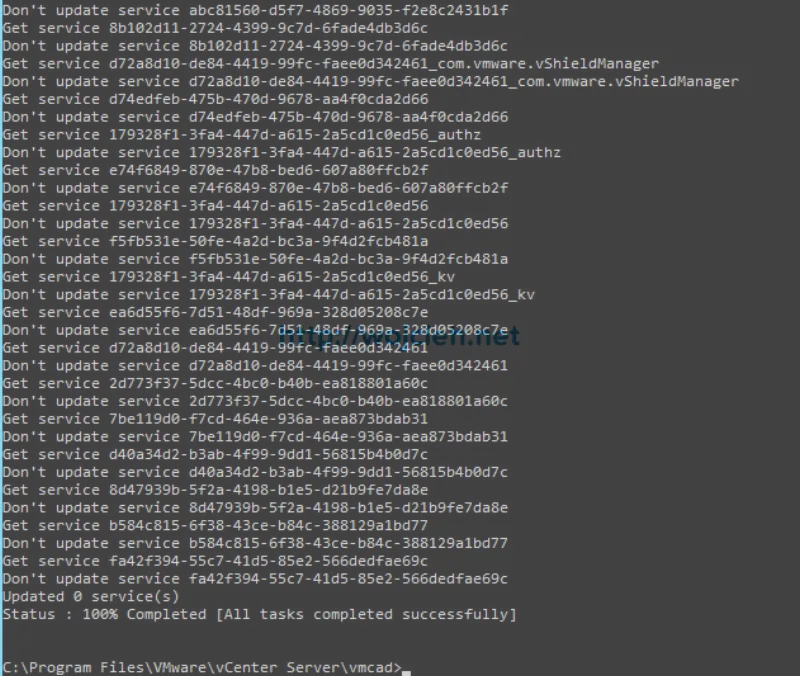
- If all steps were followed carefully all certificates will be replaced. It takes few minutes to complete.
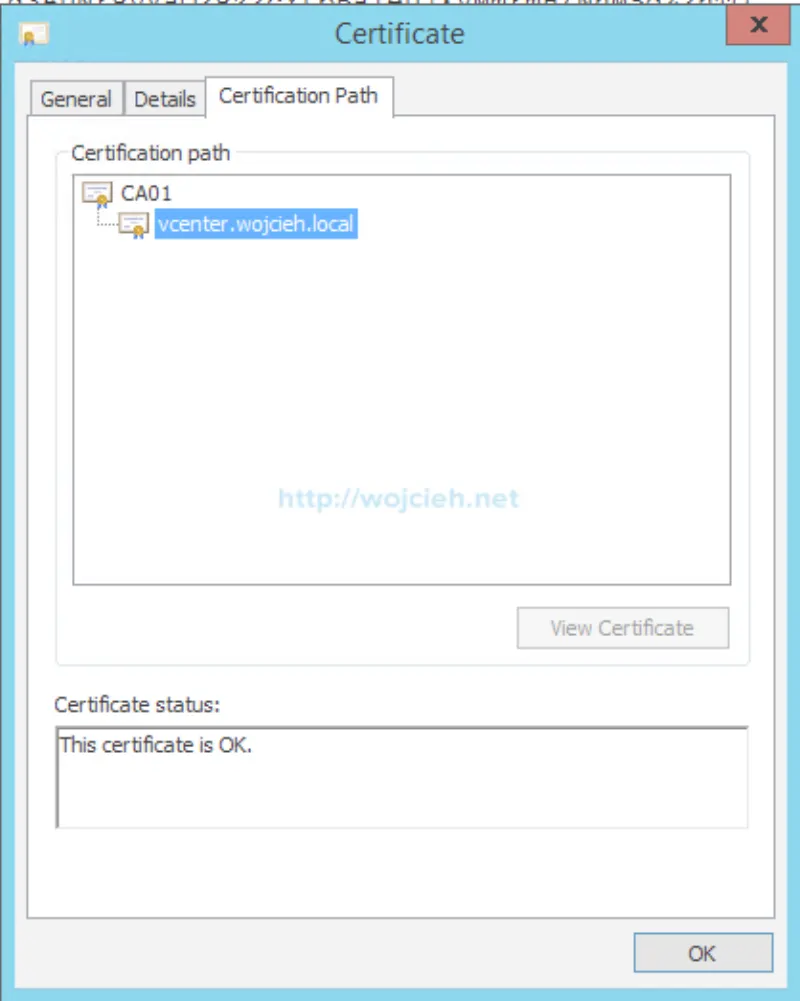
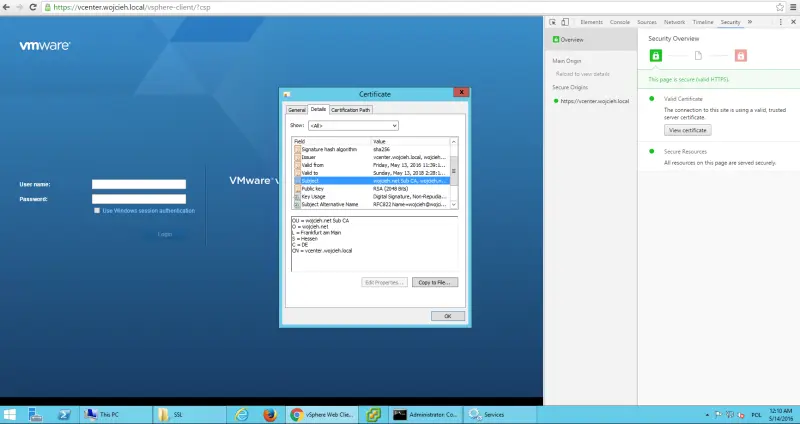
- Once logged in to vSphere Web Client you can easily check that certificate was replaced.
Summary
This post is quite long, but I hope it will be useful to all of those who can use VMware Sub CA in your environment. For those who have to use VMCA in custom mode you can simply follow my post how to replace SSL certificates with custom VMCA mode vCenter Server 6.* – Replacing SSL certificates with Custom VMCA.