![]()
Google Cloud VMware Engine is on the market for quite some time. It’s functionality, price attractiveness, rapid release cycles and close proximity to other Google Cloud Products allowed to gain many happy customers and users. In Today’s post I will show you how to configure Google Cloud VMware Engine and how to start using it.
In this post I will deploy single node GCVE Private Cloud. Single node GCVE was announced at November 30th 2021 - Google Cloud VMware Engine Release Notes.
Prerequisites
As with every Google Cloud Products there are some prerequisites. The main one will be GCVE Quota, GCP project and Billing ID and IAM rights to enable GCVE API. You can find your quota it for your current project in IAM & Admin and then in Quotas.
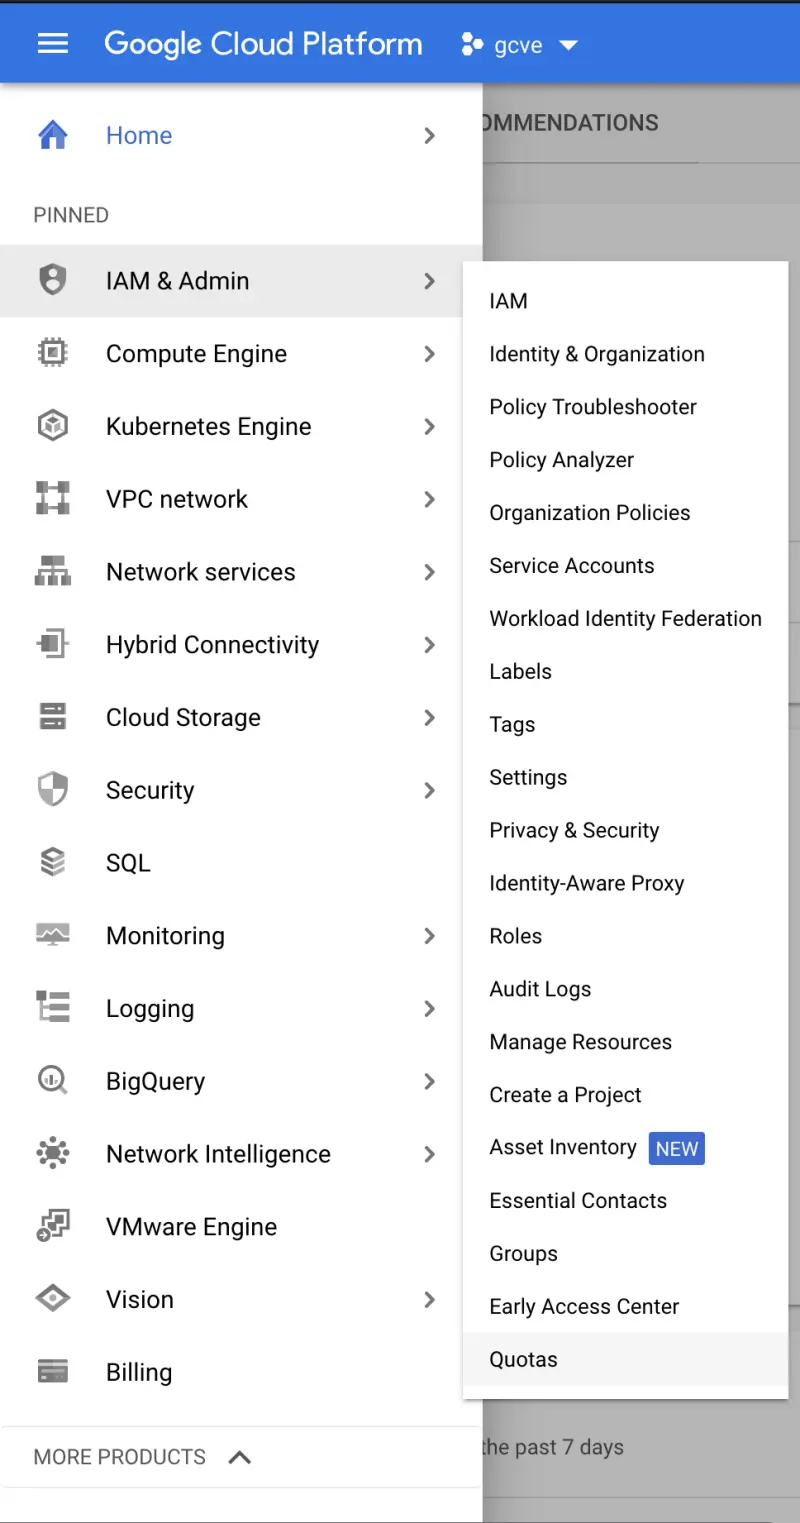
Type VMware and all related Quotas will be displayed.
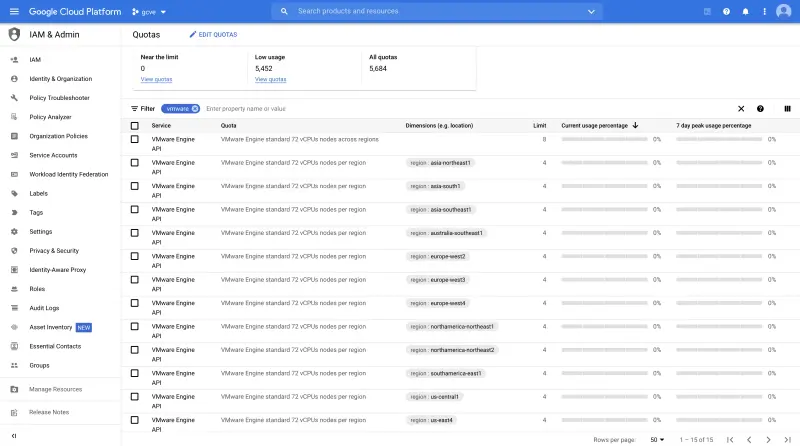 To change the quota simply follow GCP article Google Cloud Quota increase procedure
GCVE API Enablement
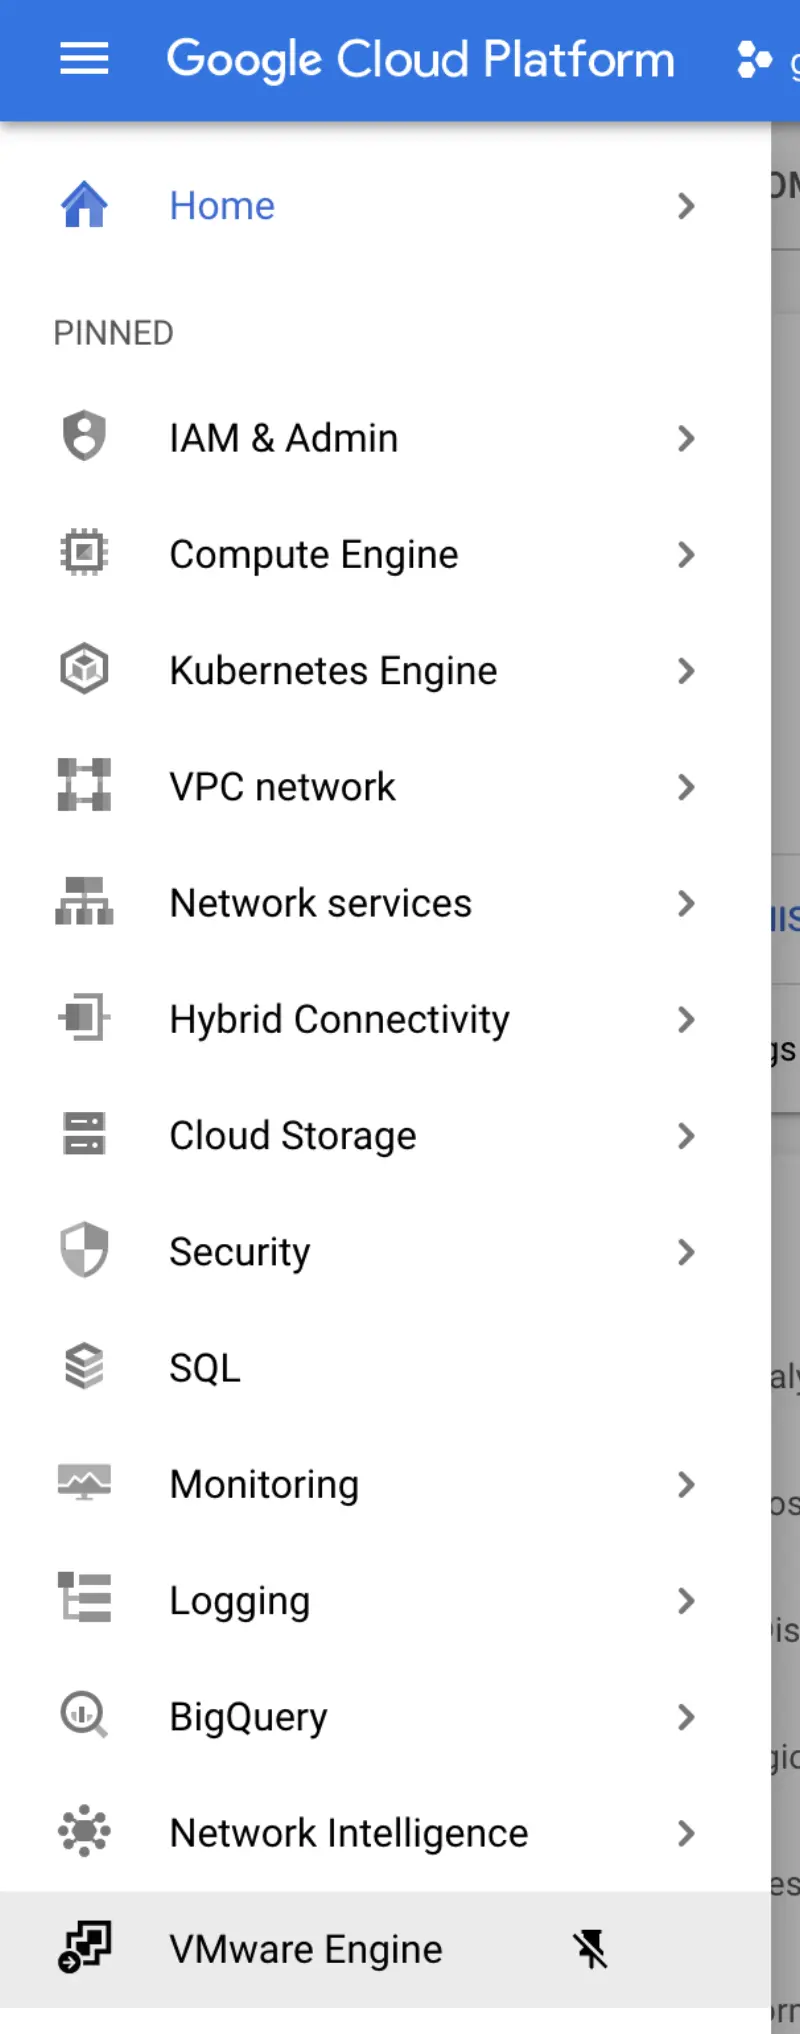
In GCP menu click on VMware Engine and a new link will be opened.
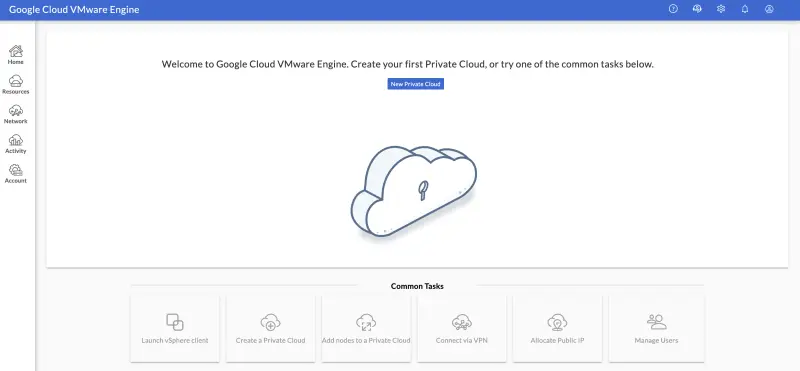
In the new link we first need to enable GCVE API. Simply click Enable API.

Once the GCVE API is enabled we can initiate GCVE Private Cloud creation.
GCVE Private Cloud Creation
In the GCVE portal https://service.cloudvmwareengine.google click New Private Cloud.
 I will deploy my GCVE Private Cloud in Frankfurt in a single-node setup.
Please remember that a single node GCVE has following limitations:
|
|
Provide following information in the portal:
- Private Cloud name
- Choose desired Private Cloud location
- Choose between multi-node or single-node setup
- Provide vSphere/vSAN subnets CIDR range
- Provide HCX Deployment Network CIDR range
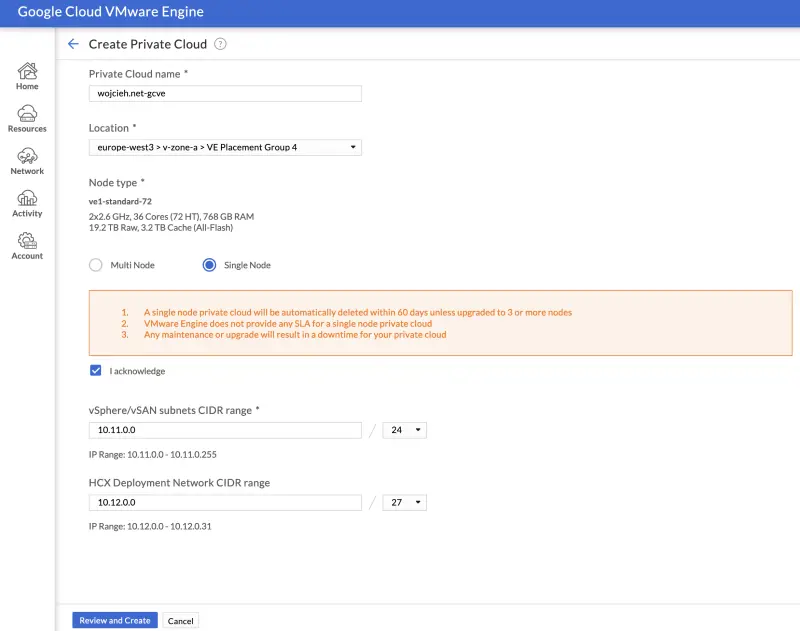

Once all the information is provided click Review and Create.
As mentioned in my previous post GCVE Overview deployment of the GCVE takes around 45 minutes up to 1 hour for base services (ESXi, vCenter). NSX and HCX might take additional 30 Minutes. Once the deployment is done I will continue with connecting Google Cloud VMware Engine with GCP resources.
Connecting GCVE with GCP resources
In this section I will guide you through the process of connecting GCVE and GCP resources. First part will be the configuration of VPC.
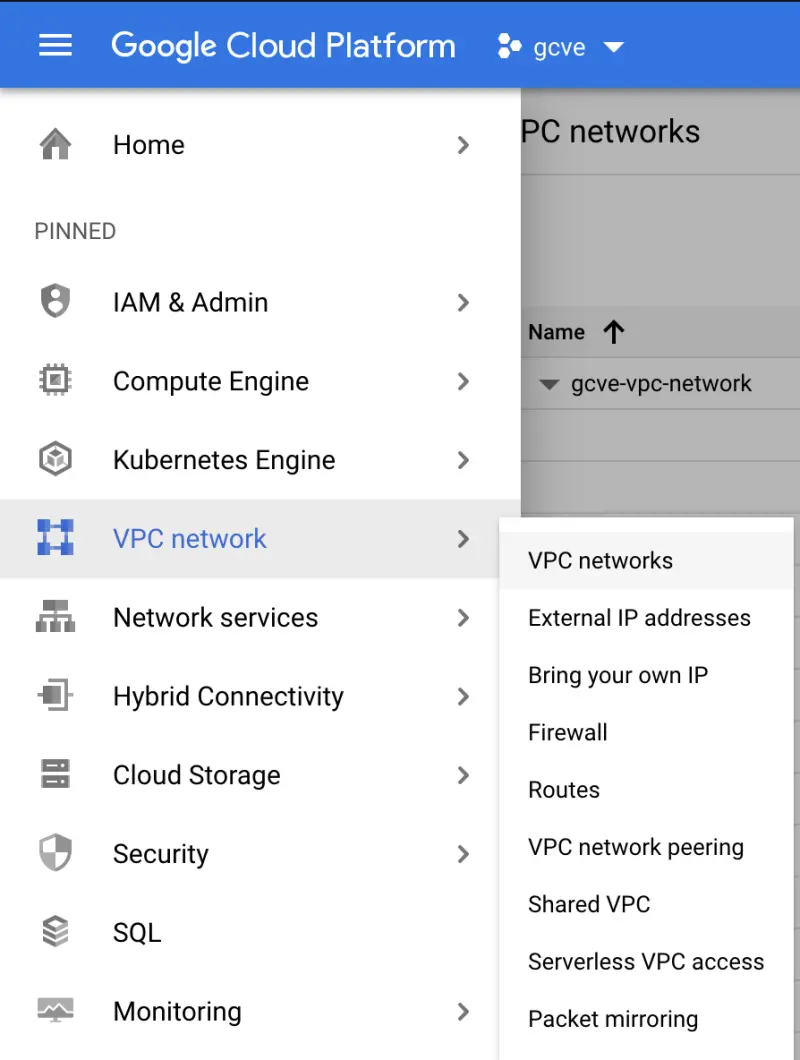
- Go to the VPC network and click VPC networks
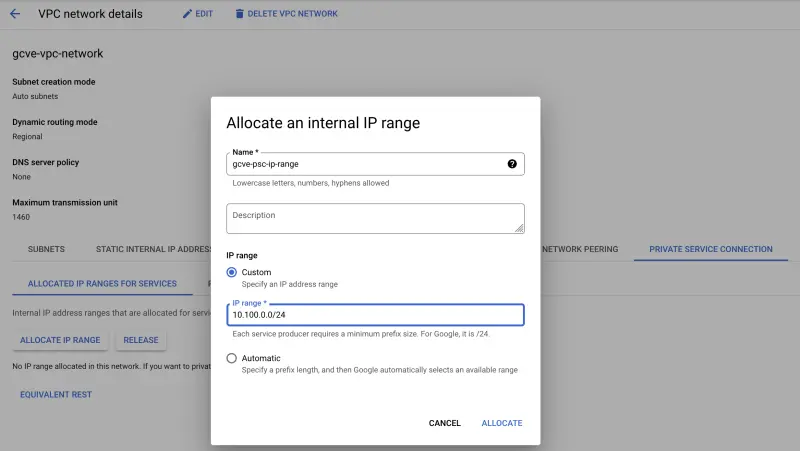
- In the VPC click Private Service Connection where we will allocate an IP Range for PSC.
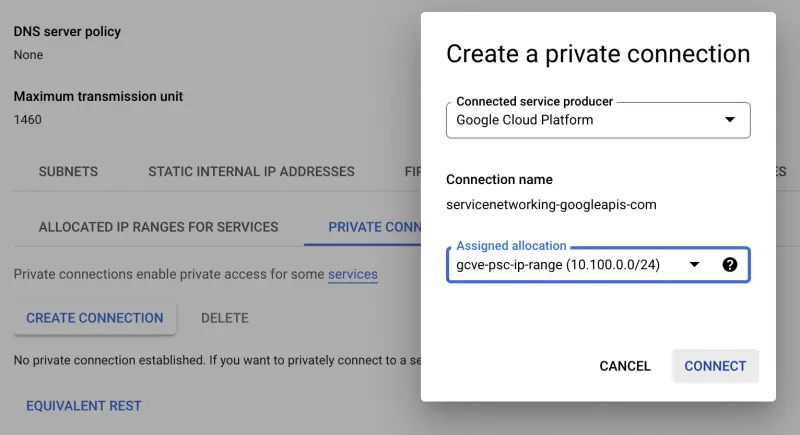
- Once the IP Range has been allocated for PSC we can now initiate connection Private Connection to Services. In Private Service Connection click Create Connection, choose Google Cloud Platform and you created IP Range.
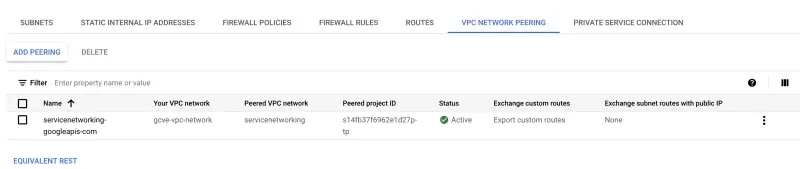
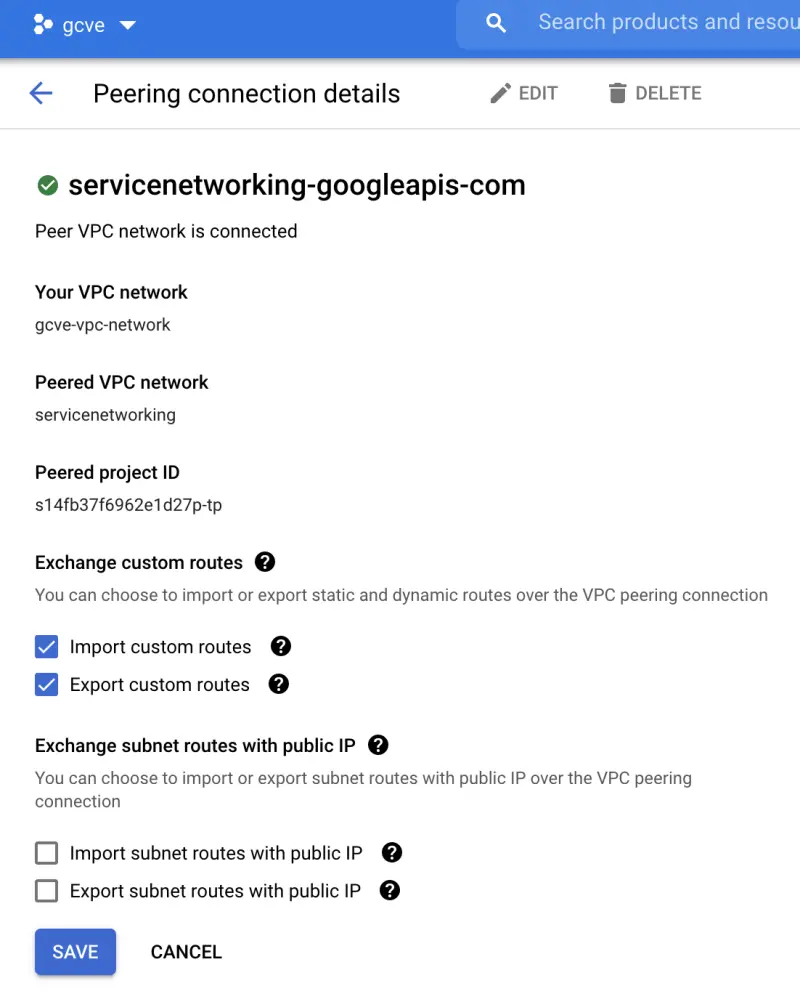
- If you wish you can enable import and export custom routes. It can be very beneficial if your GCVE Private Cloud need to connect to other GCP VPC’s resources. I will enable both. Click on the *servicenetworking-googleapis-com and click Edit to edit peering details.
- Select import and export. This will allow to export GCP routes towards GCVE and vice-versa - all GCVE ranges into GCP.
- In next step we need to peer GCVE project with GCP project. This will allow us to reach GCVE resources from our GCP project.
- We need to note Peered project ID from peering connection details, Peer Project Number and Peered VPC.
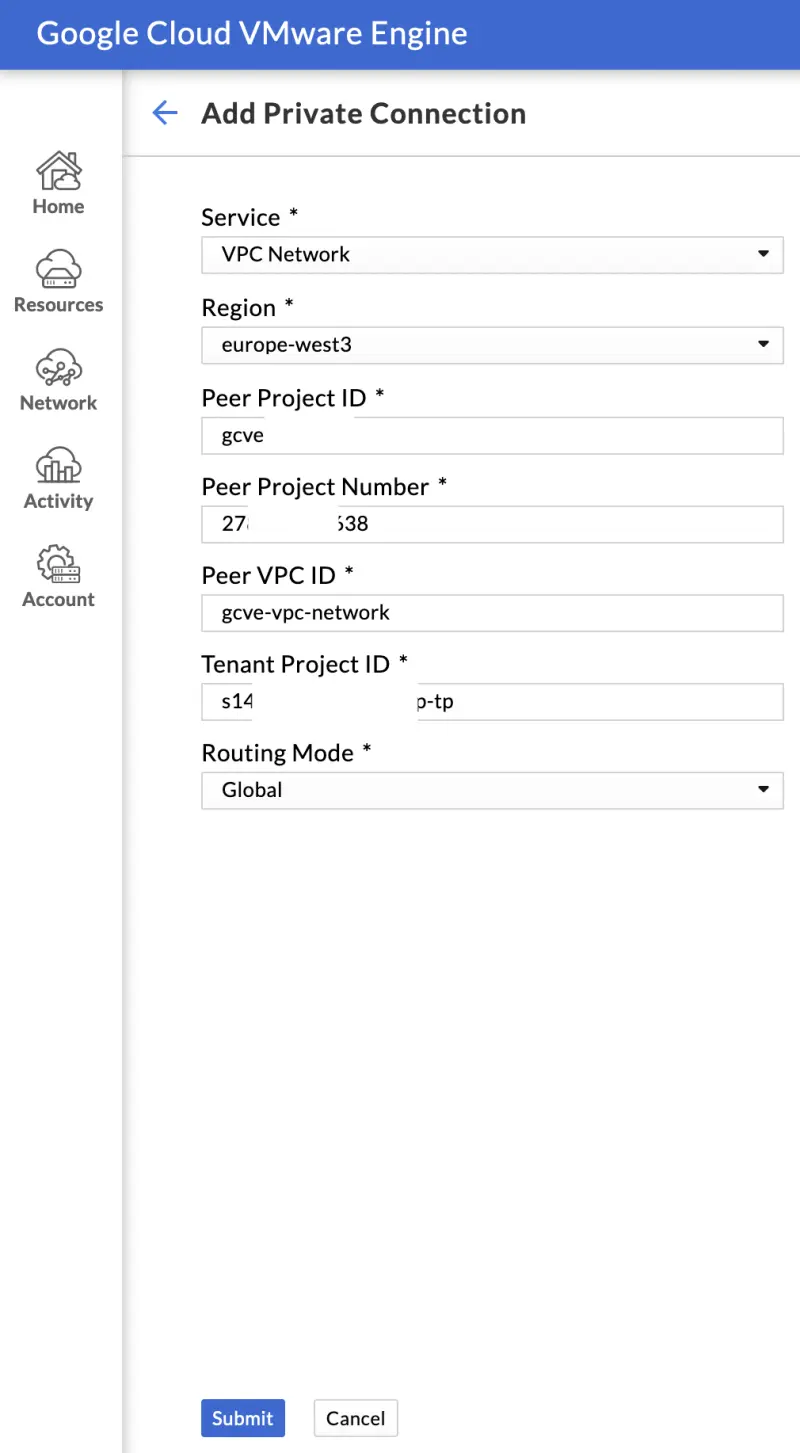
- In GCVE Portal go to Network and then to Private Connection. Click Add Private Connection.
- We enter Peered project ID from peering connection details, Peer Project Number and Peered VPC and click Submit. Process of connecting might take a few minutes.
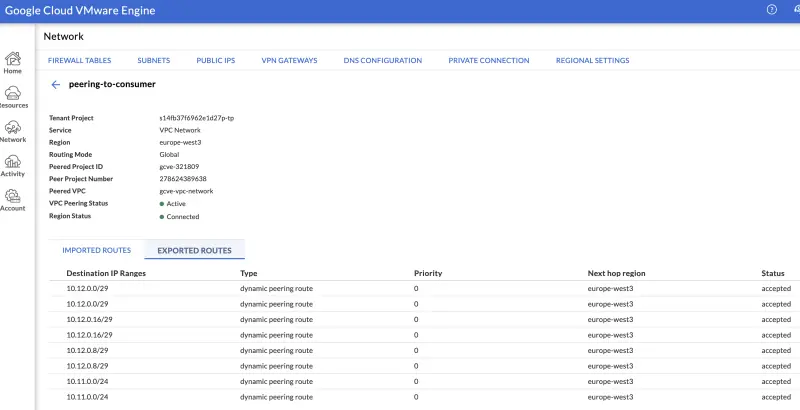
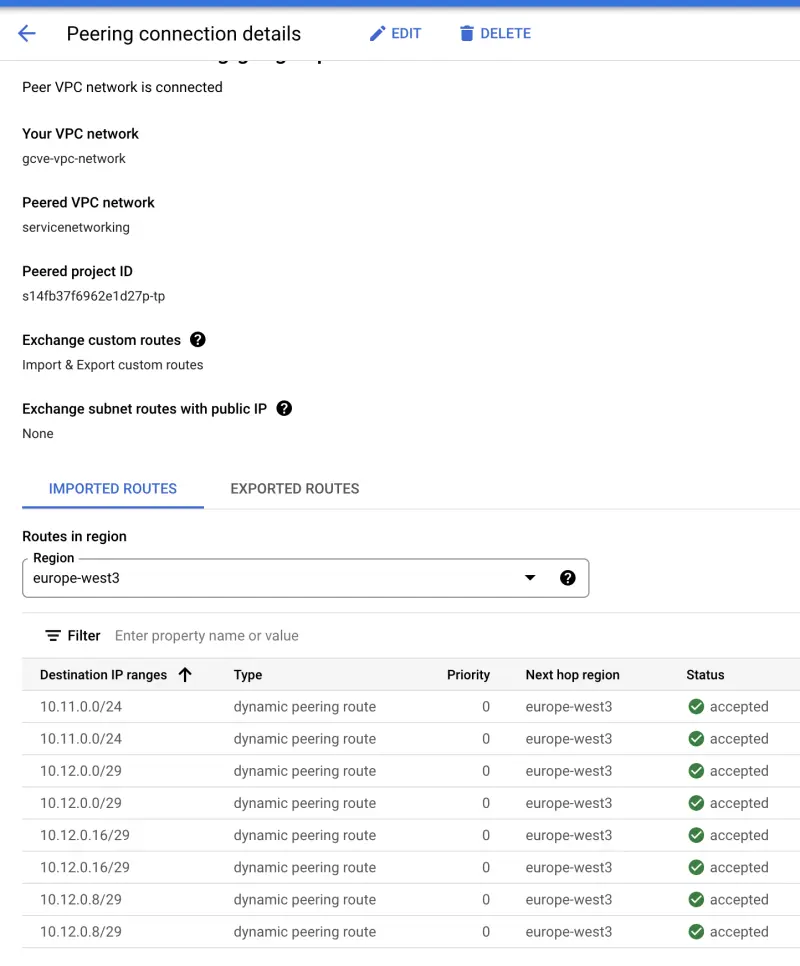
- Once connected we will see GCVE routes in GCP and GCP routes in GCVE portal.
- GCP to GCVE imported routes

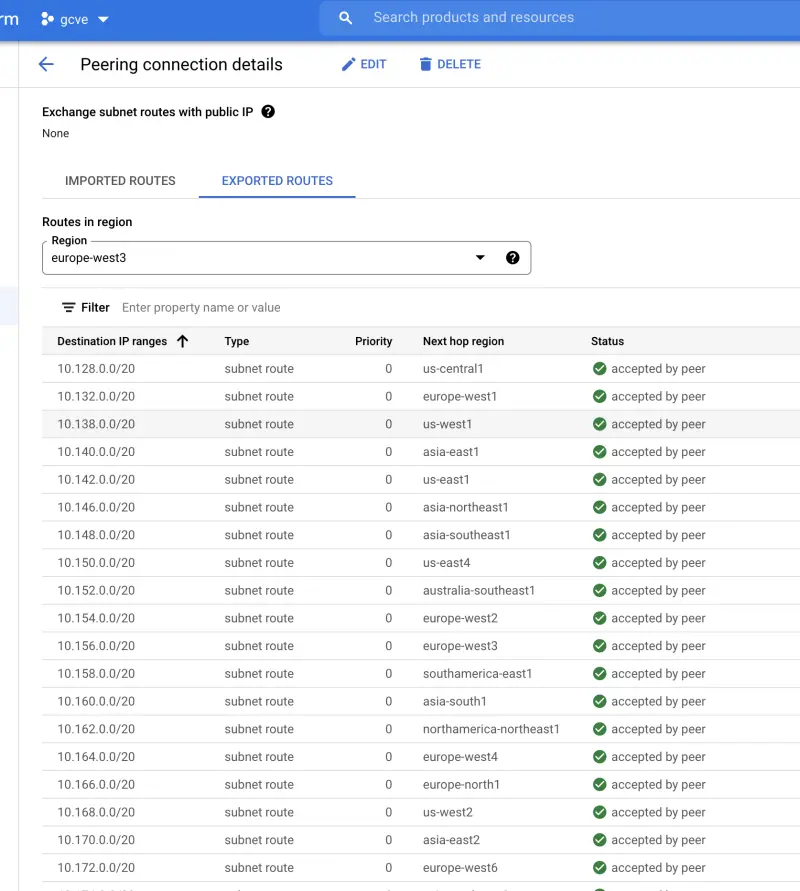
- GCVE to GCP exported routes
- GCVE to GCP imported routes
- GCP to GCVE exported routes
Connecting from GCP to GCVE resources
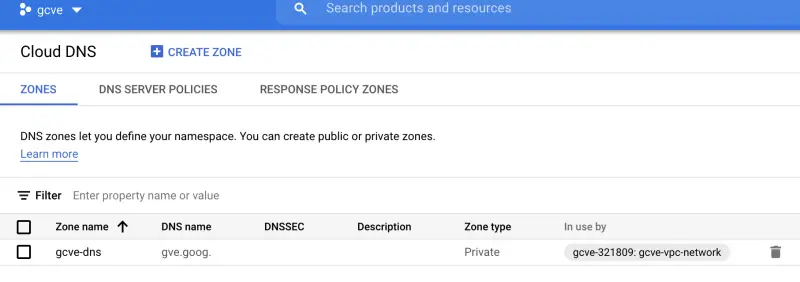
In my case I have a Windows Bastion VM created in GCVE project which I access via RDP. To have easier management I created a private GCP DNS zone where I entered my GCVE resources FQDN’s. It looks like that.
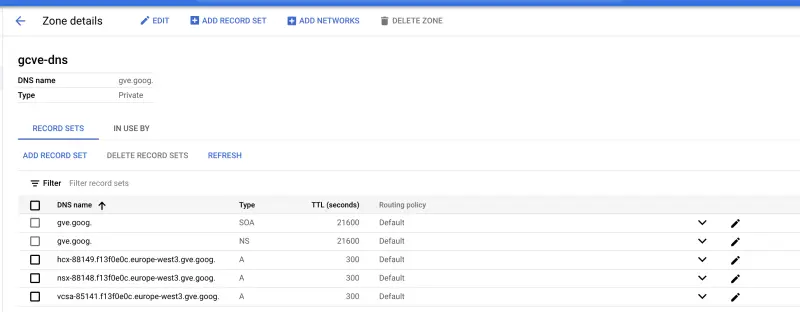
 In that zone I added vCenter, HCX and NSX DNS entries with corresponding IP entries.
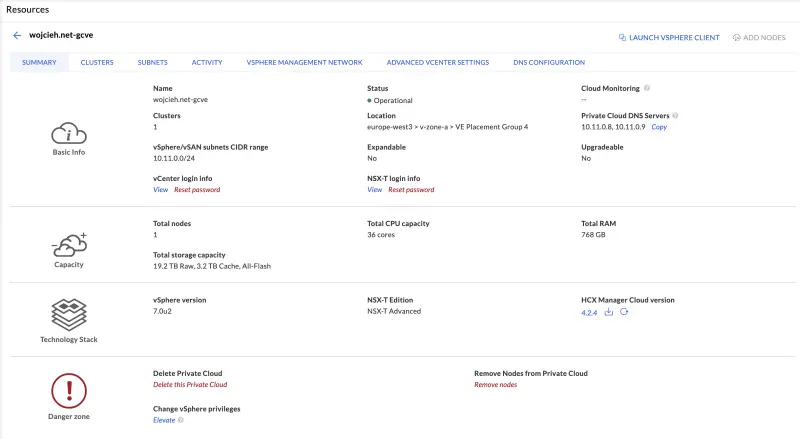
 In GCVE portal we see that Private Cloud is deployed and we are ready to consume it.
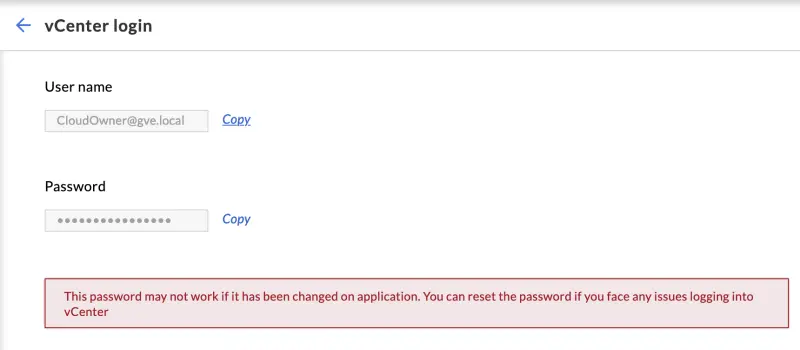
 To login into our vSphere management resources we need to retrieve vCenter Server username and password. We do the same for NSX.
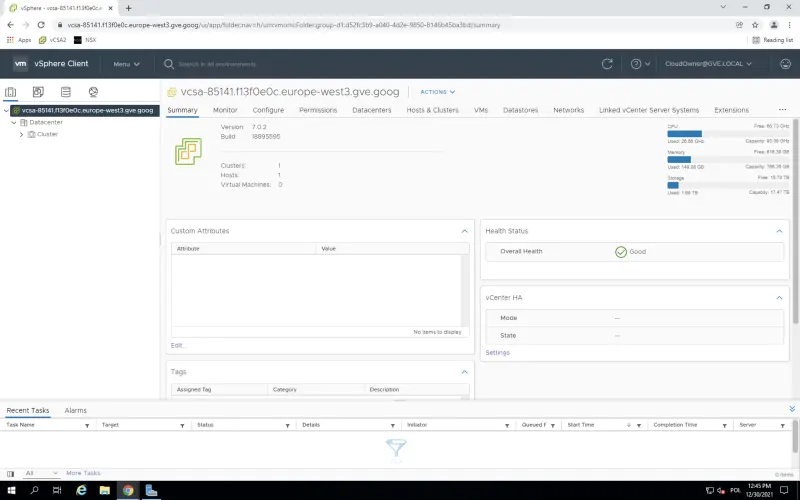
 After login we have access to vCenter Server and we can create virtual machines.
Summary
In this post I guided you through the Google Cloud VMware Engine single node deployment. I showed you how to connect GCP and GCVE resources and how to manage them. In next posts I will show you how to create NSX-T Segment and how can you migrate virtual machines by using HCX.
GCVE Documentation
If you want to try out GCVE, you can check Google Cloud VMware Engine Hands on Labs or visit Google Cloud VMware Engine website to learn more about the product.