![]()
Having reliable and performing backup solution is very important for all companies. I had pleasure to work with Nakivo Backup & Replication software and I would like to invite you to read full review of it.
Nakivo Backup & Replication features
Deployment
- As virtual appliance in vSphere environment.
- On Synology or Western Digital NAS.
- In Amazon cloud.
- On Linux.
- On Windows.
Data Protection and Data Recovery
- Backup can be done on schedule, ad hoc.
- VM replication creates and maintains an identical copy of virtual machine on desired host.
- Nakivo supports application aware backups like: Microsoft Exchange, Microsoft Active Directory, Microsoft SQL Server or Oracle.
- Automatic virtual machine protection. Simply select pool, folder, hosts or cluster and you are ready to go.
- Flash VM boot allows you to start virtual machine directly from compressed and deduplicated virtual machine backup.
- Instant File Recovery allows you to restore in moment to Windows or Linux based virtual machines.
Storage Space Reduction
- VM Backup Deduplication allows you to dramatically save space up to 30 times.
- Data Compression
Performance
- Data compression allows to reduce network traffic up to 50%.
- Multiple jobs can be initiated simultaneously which speeds up data processing and shortens backups.
- Nakivo supports fibre channel and iSCSI.
- Forever-Incremental allows you to reduce backups. It leverages VMware Change Block Tracking technology to backup only data which was changed since last backup.
To learn more about Nakivo features visit website Nakivo Backup and Replication Product Features.
Installation
After short introduction I would like to show you installation process of Nakivo Backup & Replication .
To download Nakivo Backup & Replication software please follow link http://www.nakivo.com/vmware/vmware-backup-trial.html. Once downloaded let’s start installation. As I am big fan of appliances I will use appliance in my lab.
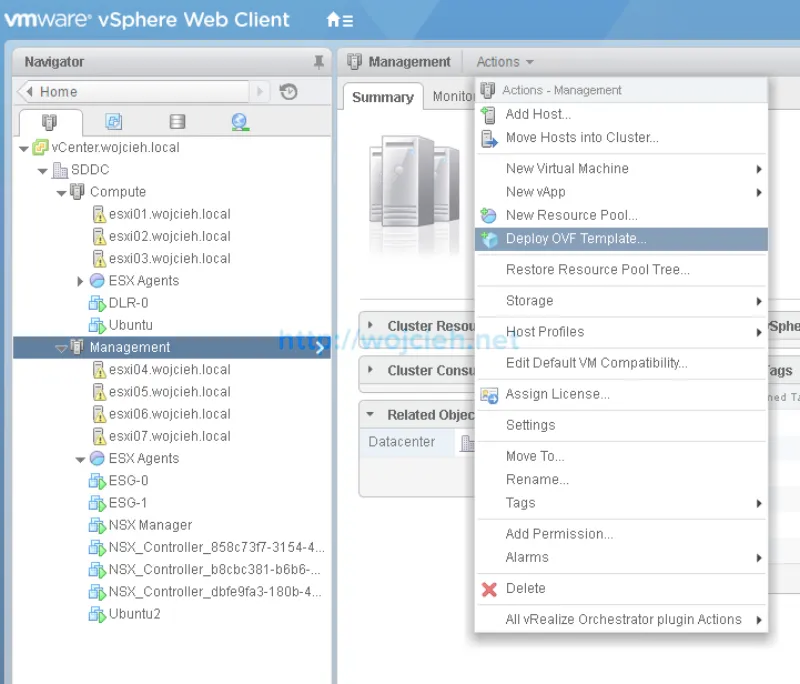
- Login to vCenter Server and select desired Cluster. Click Actions and Deploy OVF Template.
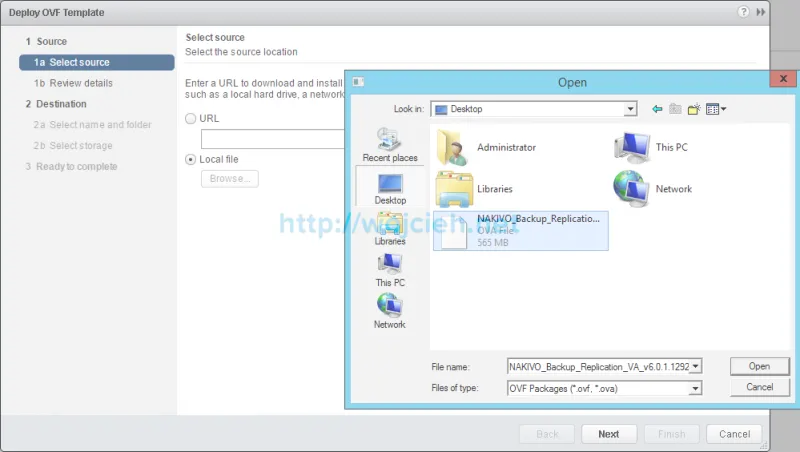
- Choose - Local File as a source and point to downloaded appliance.
- Review details and click next.

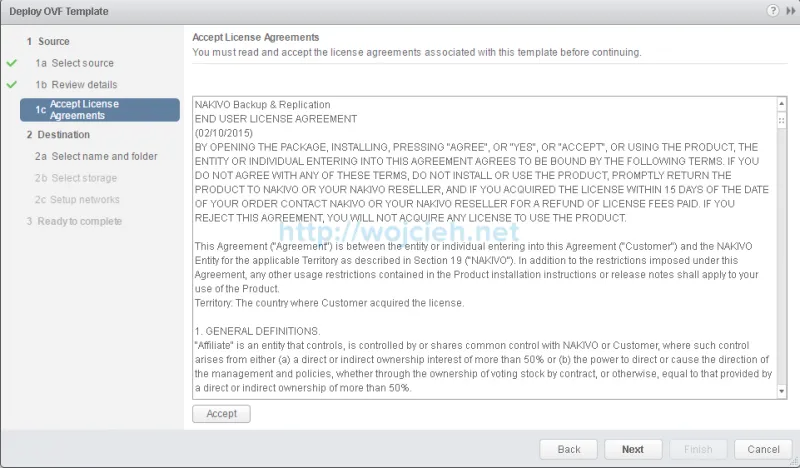
- Accept License Agreement and click next.
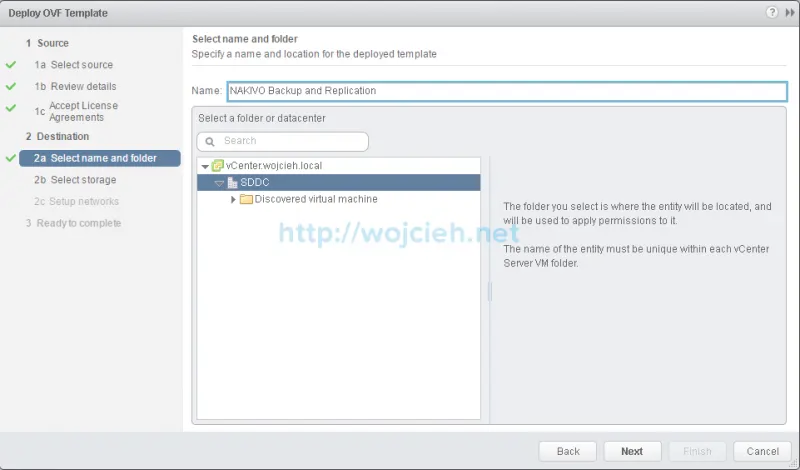
- Choose name of VM and folder where it should be placed.
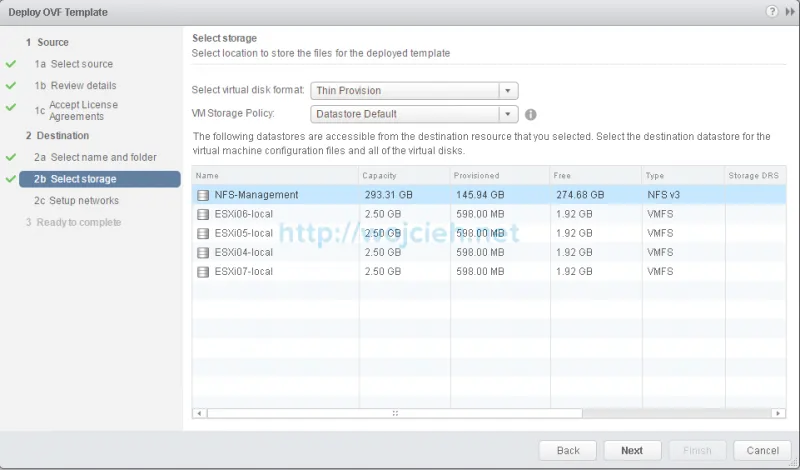
- Choose virtual disk format and datastore. I will go with Thin Provision disk since I don’t have that much storage available.
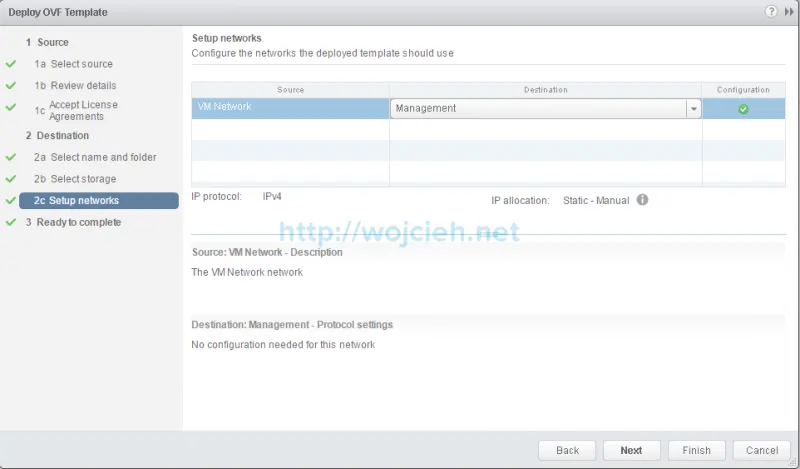
- Select port group where appliance will be connected.
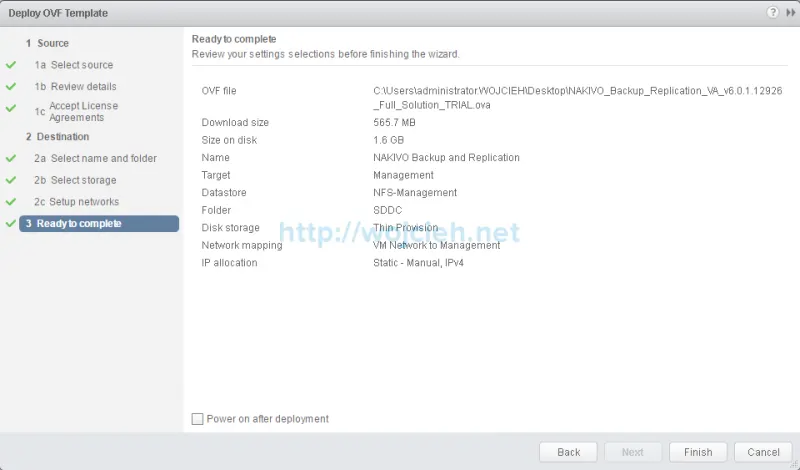
- Review the details and click Finish to complete deployment.
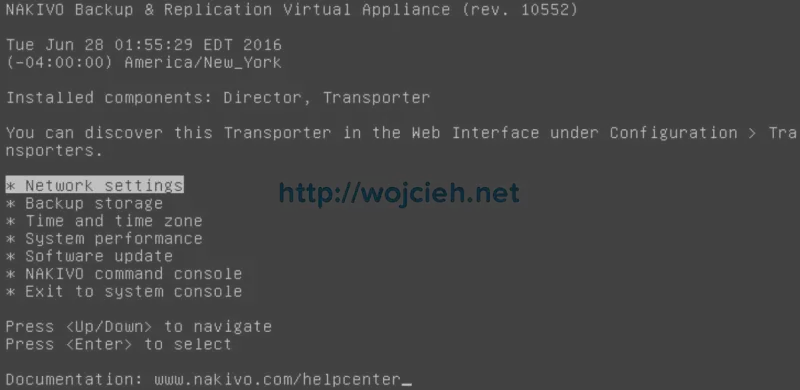
- Once the appliance is deployed simply power it on and wait for boot. You should see initial configuration screen.
Initial configuration
After not that difficult installation let’s start with initial configuration.
- Let’s start with network settings. Connect to console and choose Network settings.
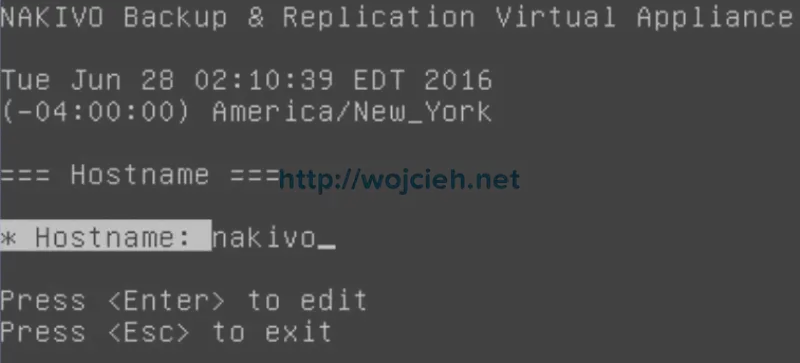
- Click on hostname and provide your desired name.
- Let’s get back to Network Card. Select Network card to configure interface.

- In my case I used static IP configuration, but you are free to use DHCP as well.
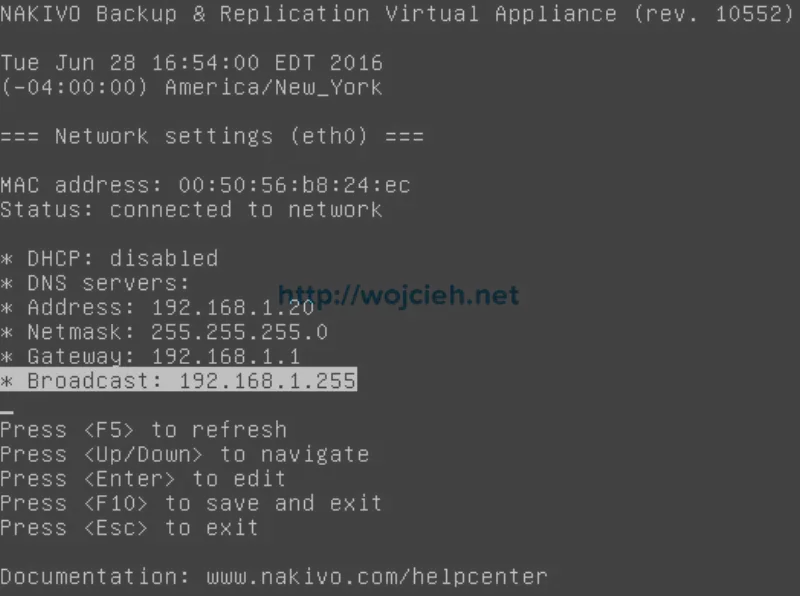
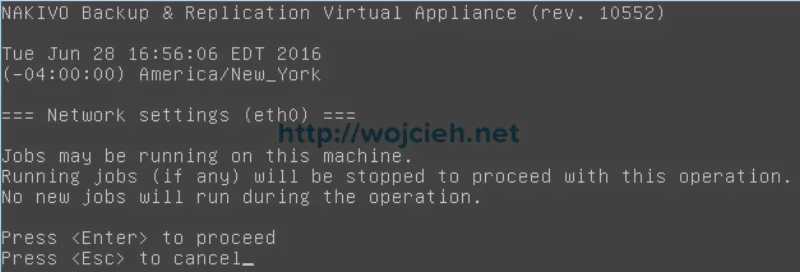
- Press F10to confirm and enter to proceed with changes.
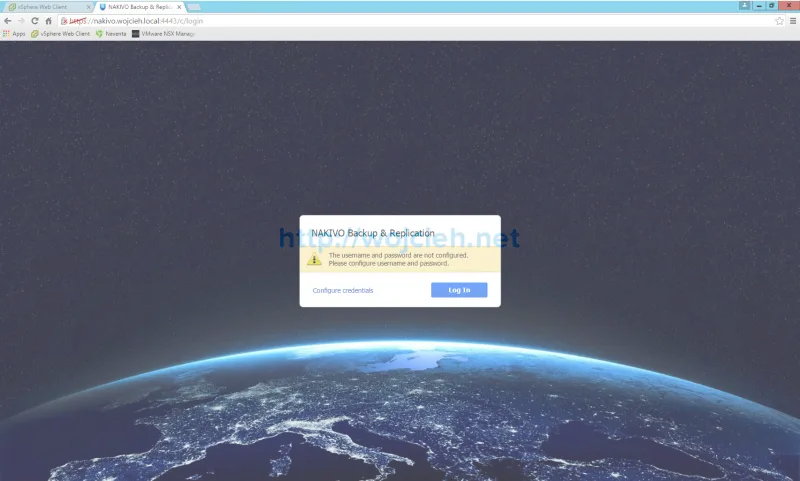
- Once the changes are set we can login to appliance. Use FQDN or IP in format https://IP or FQDN>:4443. Default username is root with password root. During first login we are asked to change the default credentials.
- Simply enter new password for root password and click Done.

Advanced configuration
After initial configuration we will configure few things like inventory, transporters and repositories.
Inventory
Before we can begin working with Nakivo software we have to import environment. In my case it will be homelab. Once we are logged in to environment we have to login to appliance and enter credentials.
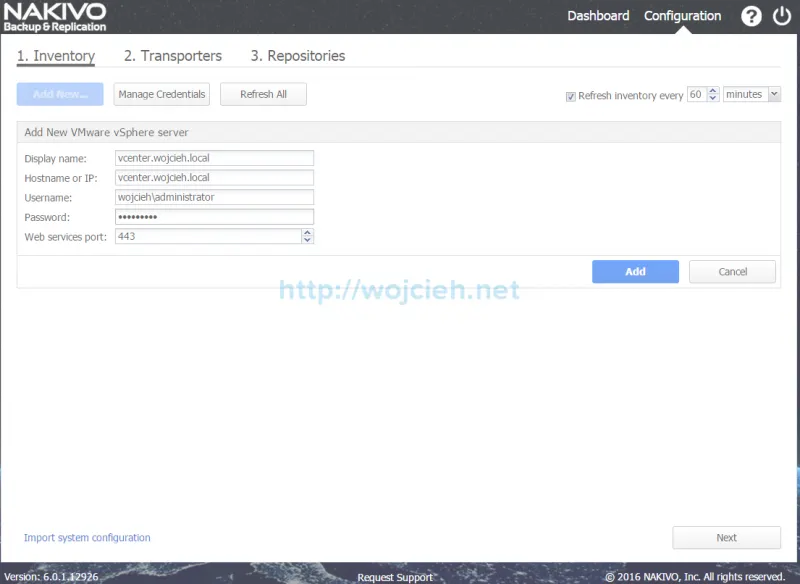
- First thing to do is add inventory.
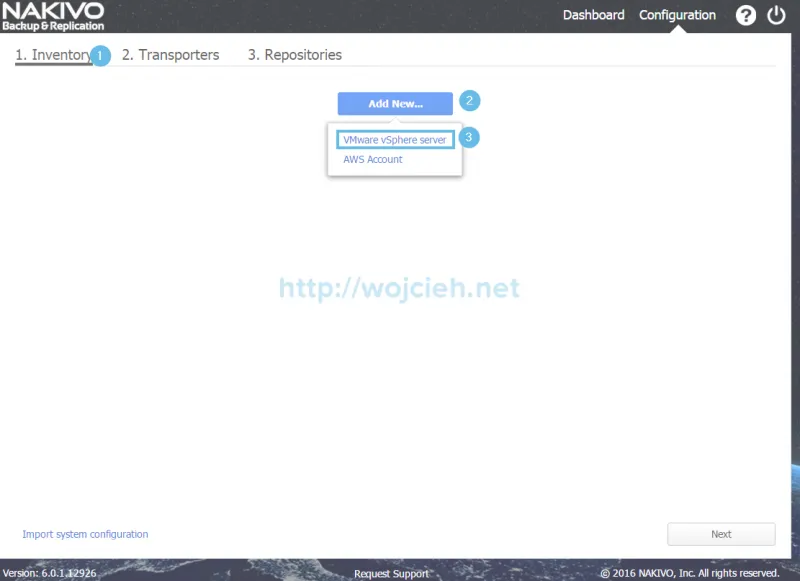
- Provide following information:
- Display name - your friendly name for inventory
- Hostname or IP
- Username
- Password
- Port
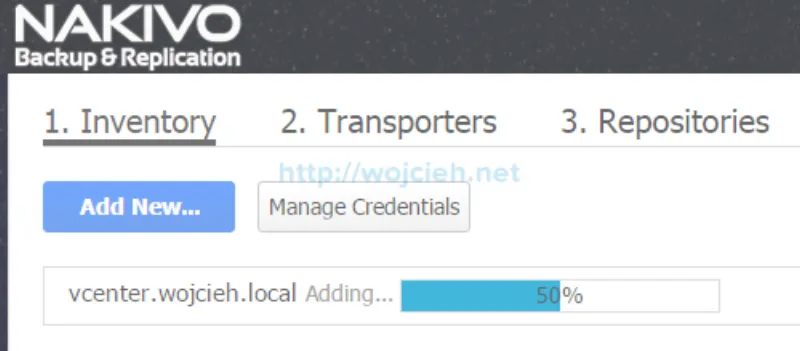
- After several moments vCenter will be added to inventory.
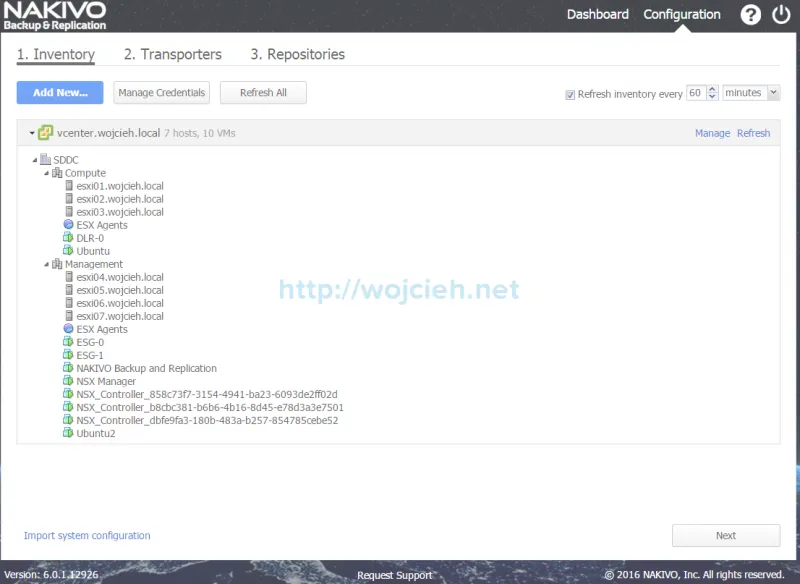
- From appliance GUI you can see as well your environment.
Transporter
Transporter is product component that performs backup, replication and recovery (of course it does more like compression, deduplication and encryption). In my case I will proceed with internal transporter included in appliance.
- In **Transporters **section choose **Onboard transporter **and click next.
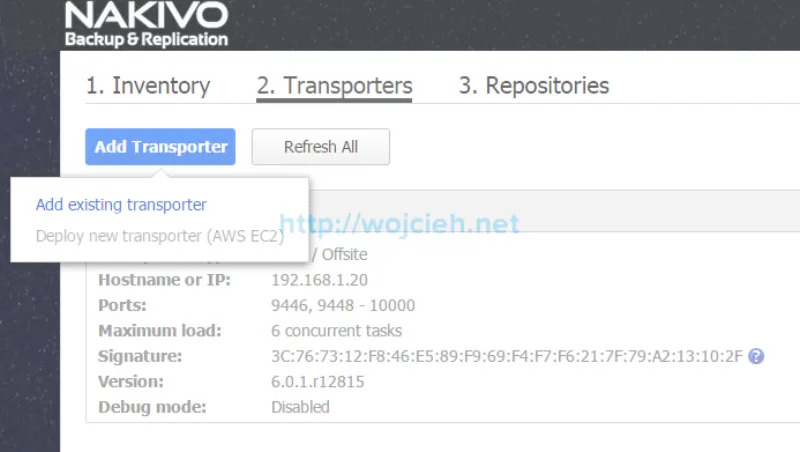
- As mentioned in features section Nakivo Backup & Replication supports Amazon Web Services as repository.
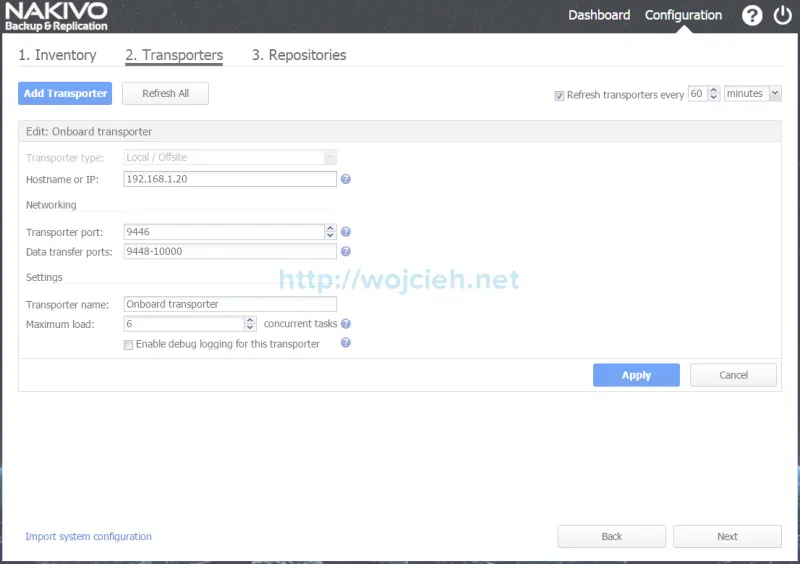
- We are able to manage settings of transporter. Click on manage to do it. We can change transporter port, data transfer ports or maximum concurrent tasks.
Repository
Last configuration item we have to do is to configure repository. Backup repository is nothing else but a place where the backups are stored. In my case I will proceed with repository included in appliance. Repository can be configured to fit enterprise needs.
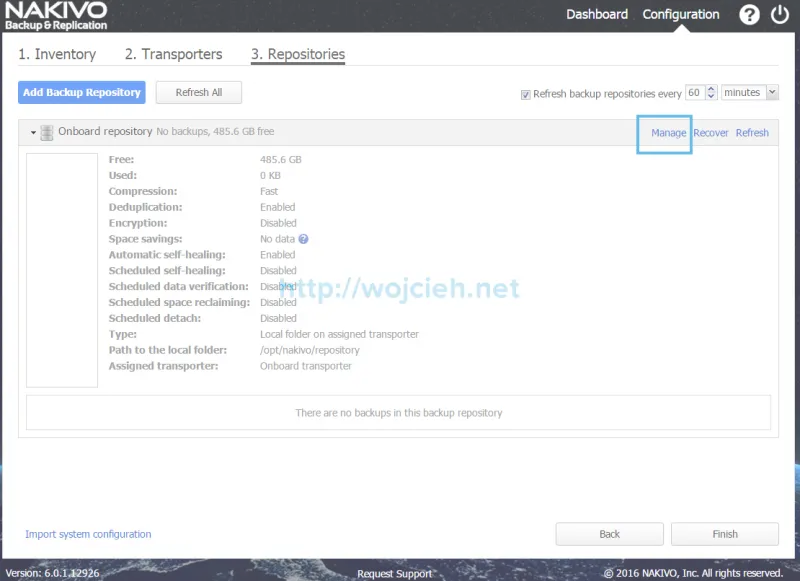
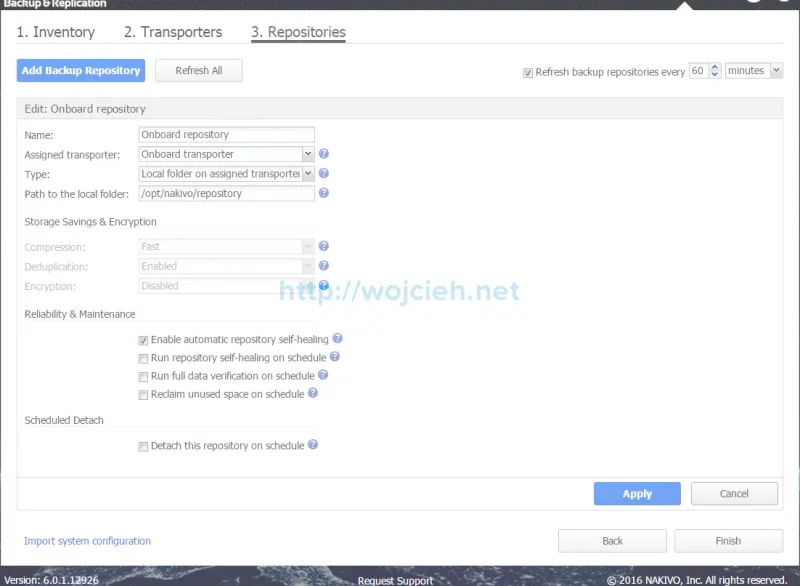
Appliance has some neat features like:
- Scheduled repository self-healing.
- Scheduled unused space reclamation.
- Detach repository on schedule.
- Click Finish to complete configuration. We will be redirected to backup jobs menu.
Backup
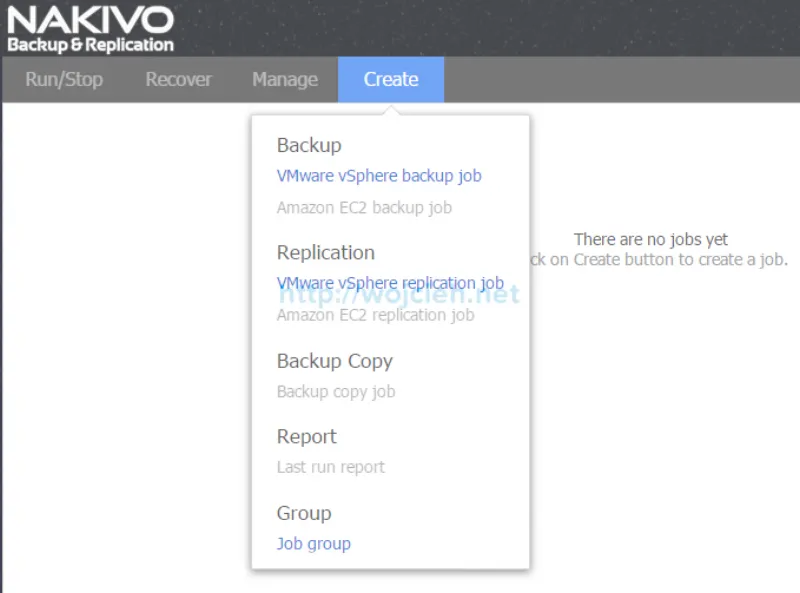
Creation of backup jobs with Nakivo is very intuitive and user friendly. Let’s create our first backup!
- Click on Create button and select VMware vSphere backup job.
- User can choose between two views - Host & Cluster view and VMs & Templates view. If you have larger environment as I have there is handy Search field.
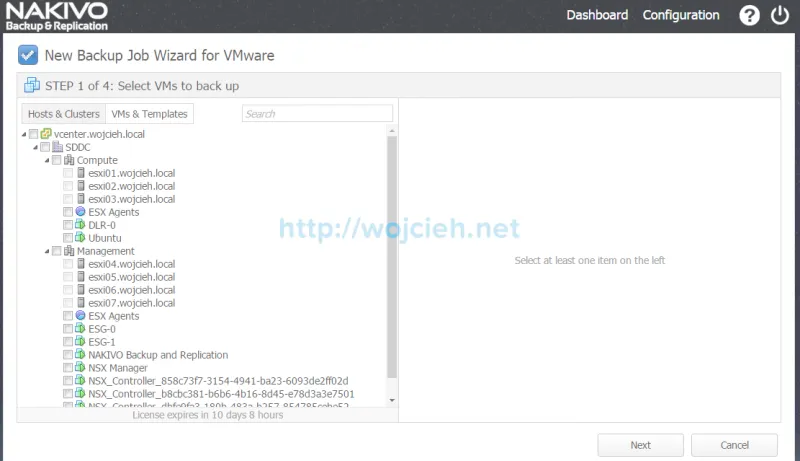
- I will choose two Ubuntu virtual machines to be backed up.
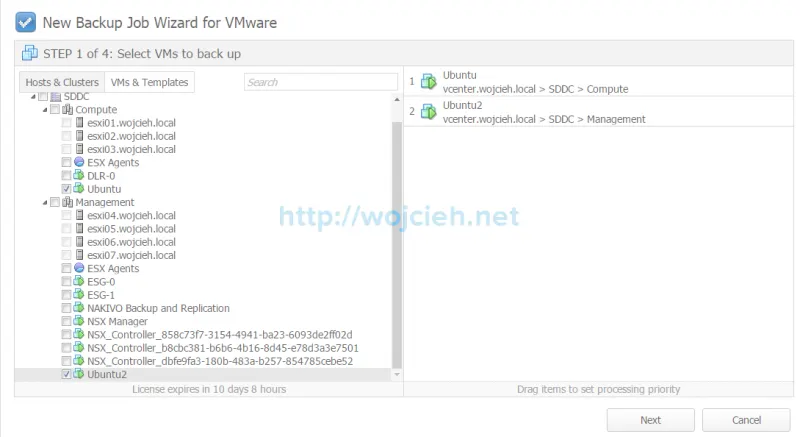
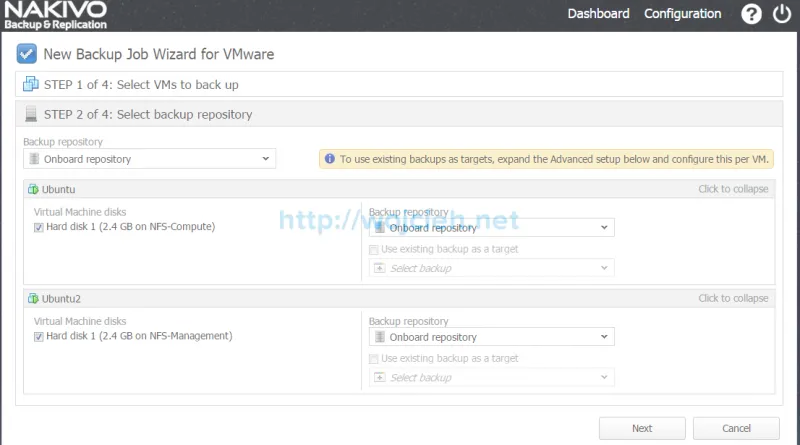
- Click next and you will be redirected to Step 2 where you can choose destination repository for selected backup source.
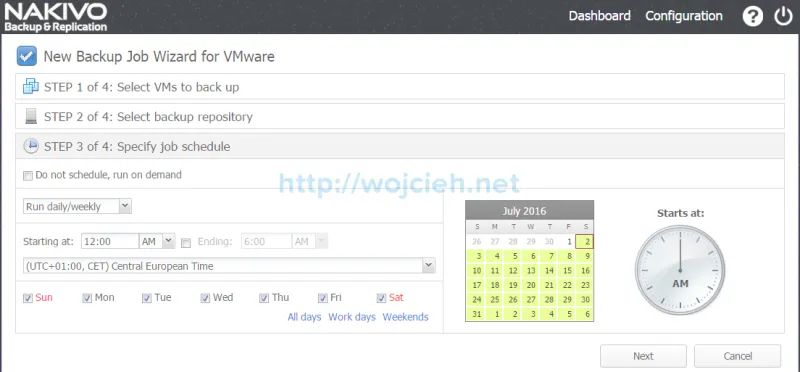
- In third step we will configure backup schedule. Backups can be run on daily/weekly basis, monthly/yearly or periodically. In my case I selected daily backup at 12AM.
- In last - fourth step we can configure advanced backup job settings:
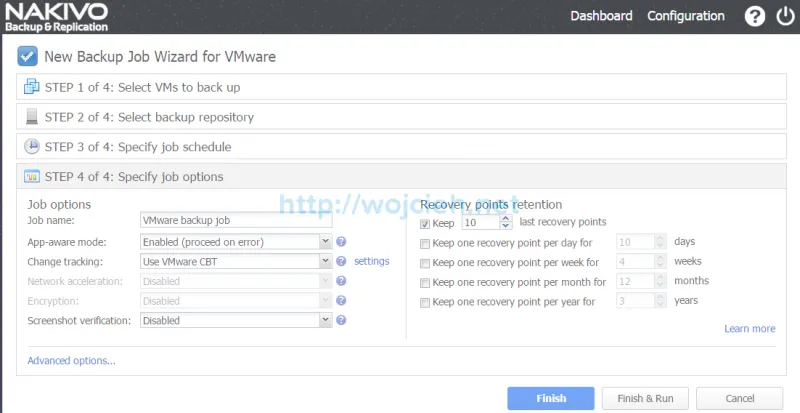
- Job name.
- App-aware mode, which is using Microsoft VSS.
- Change Block Tracking.
- Various recovery points retention.
- At the end simply choose to Finish job creation or Finish & Run job.
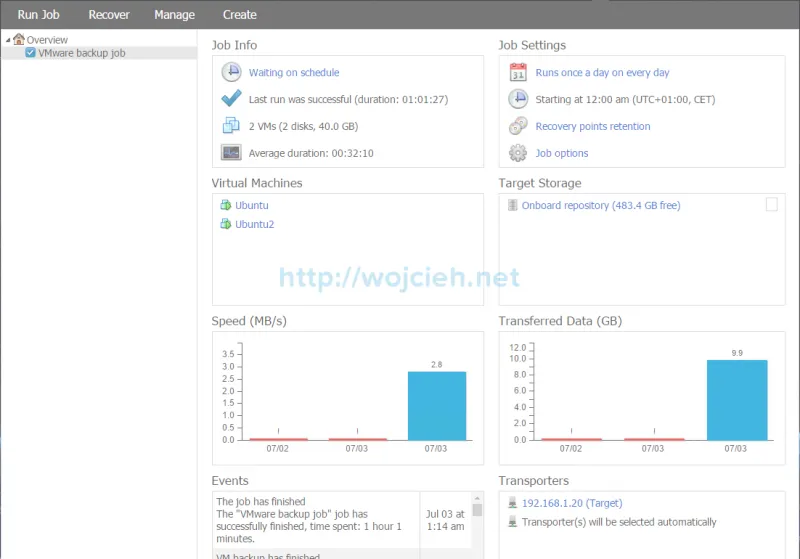
- I selected Finish & Run and immediately I am redirected to backup job overview.

- After few moments job will be started and virtual machines backed up.
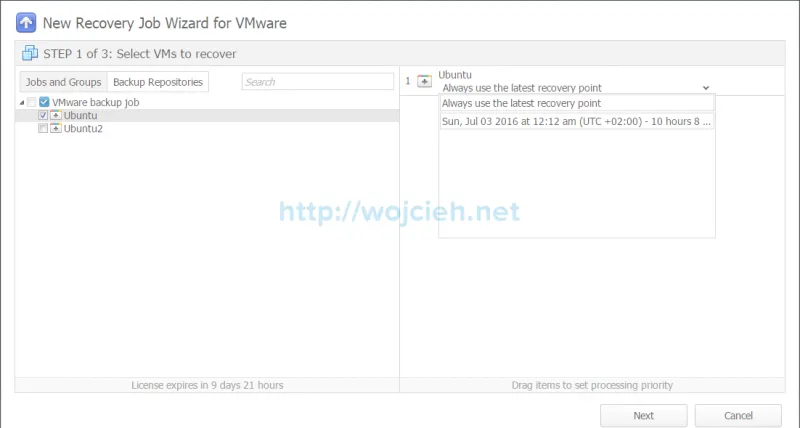
Recover
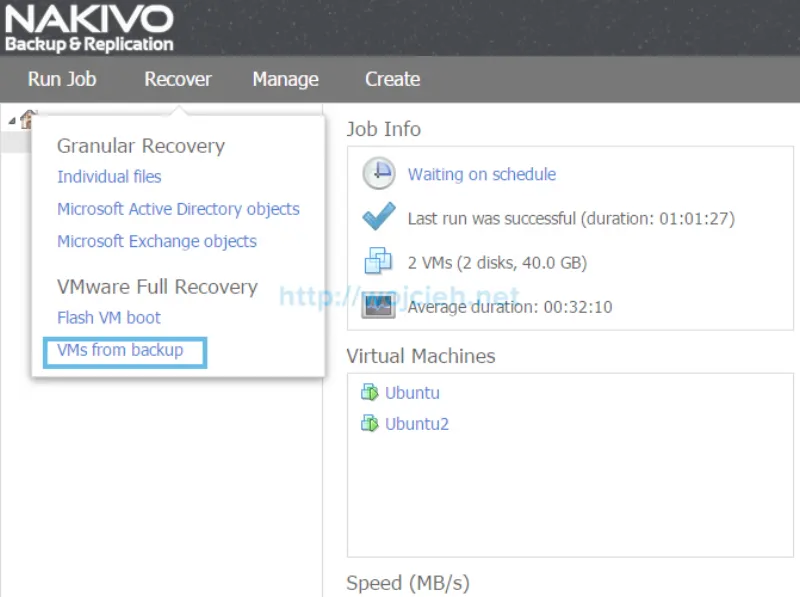
After successful backup we should try how restore works. I deleted virtual machine Ubuntu and we will try to restore it.
- Click Recover and select VMs from backup.
- Select virtual machine to recover and select recovery point.
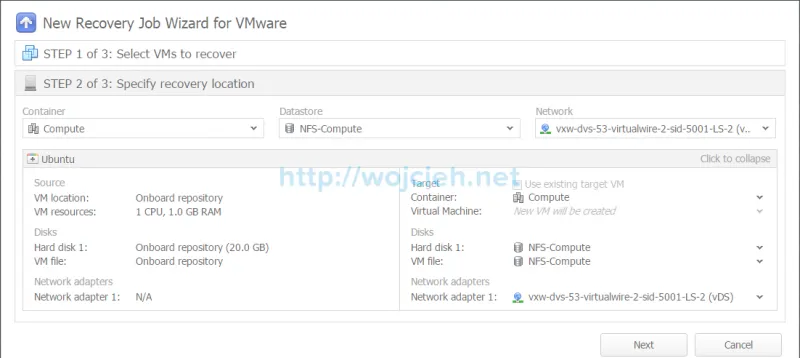
- Choose where you want to place virtual machine in terms of Cluster resource, datastore and network.
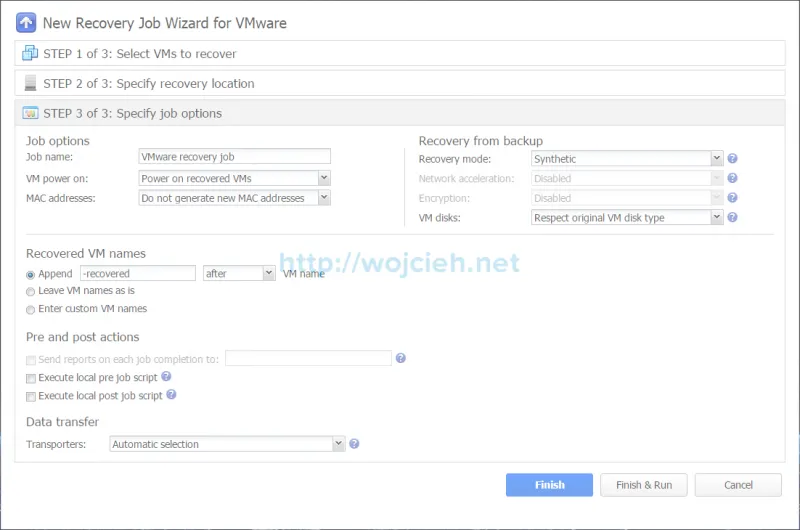
- In third step you can specify a lot of options. I decided to go with defaults, but feel free to explore all features by yourself.
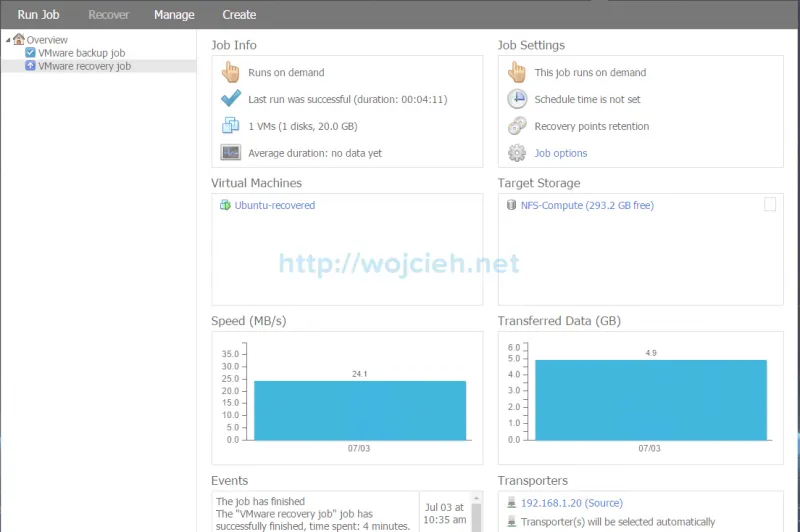
- After few minutes recovery is finished and virtual machine is up and running.
Additional features
NAS
If you own Synology or Western Digital NAS you can use your NAS as backup destination. You can store local backups on NAS and even push them to Amazon Web Services cloud.
Amazon Web Service (AWS)
Nakivo offers integration with Amazon EC2 cloud which allows you to have yet another copy of backups stored besides local copy.
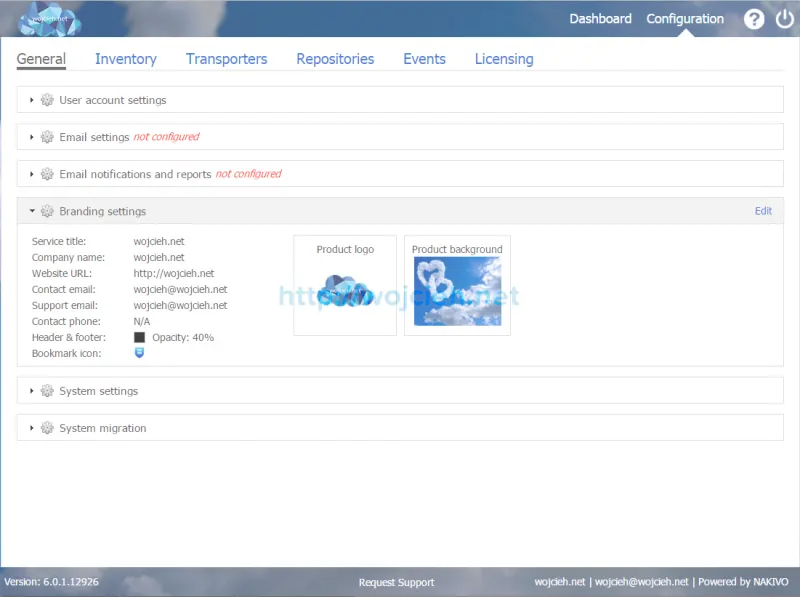
Appliance personalization
What I find very useful is that web interface can be personalized. Logo and background wallpaper can be changed. See my customization below.
Summary
Having backup and recovery software is a must. having software which works and you can rely on is even more important. After reviewing Nakivo Backup & Replication software I am pretty confident that it will meet your needs. I really enjoyed working with Nakivo Backup & Replication software and it has amazin HTML5 interface.
Nakivo Backup & Replication review was sponsored by Nakivo.