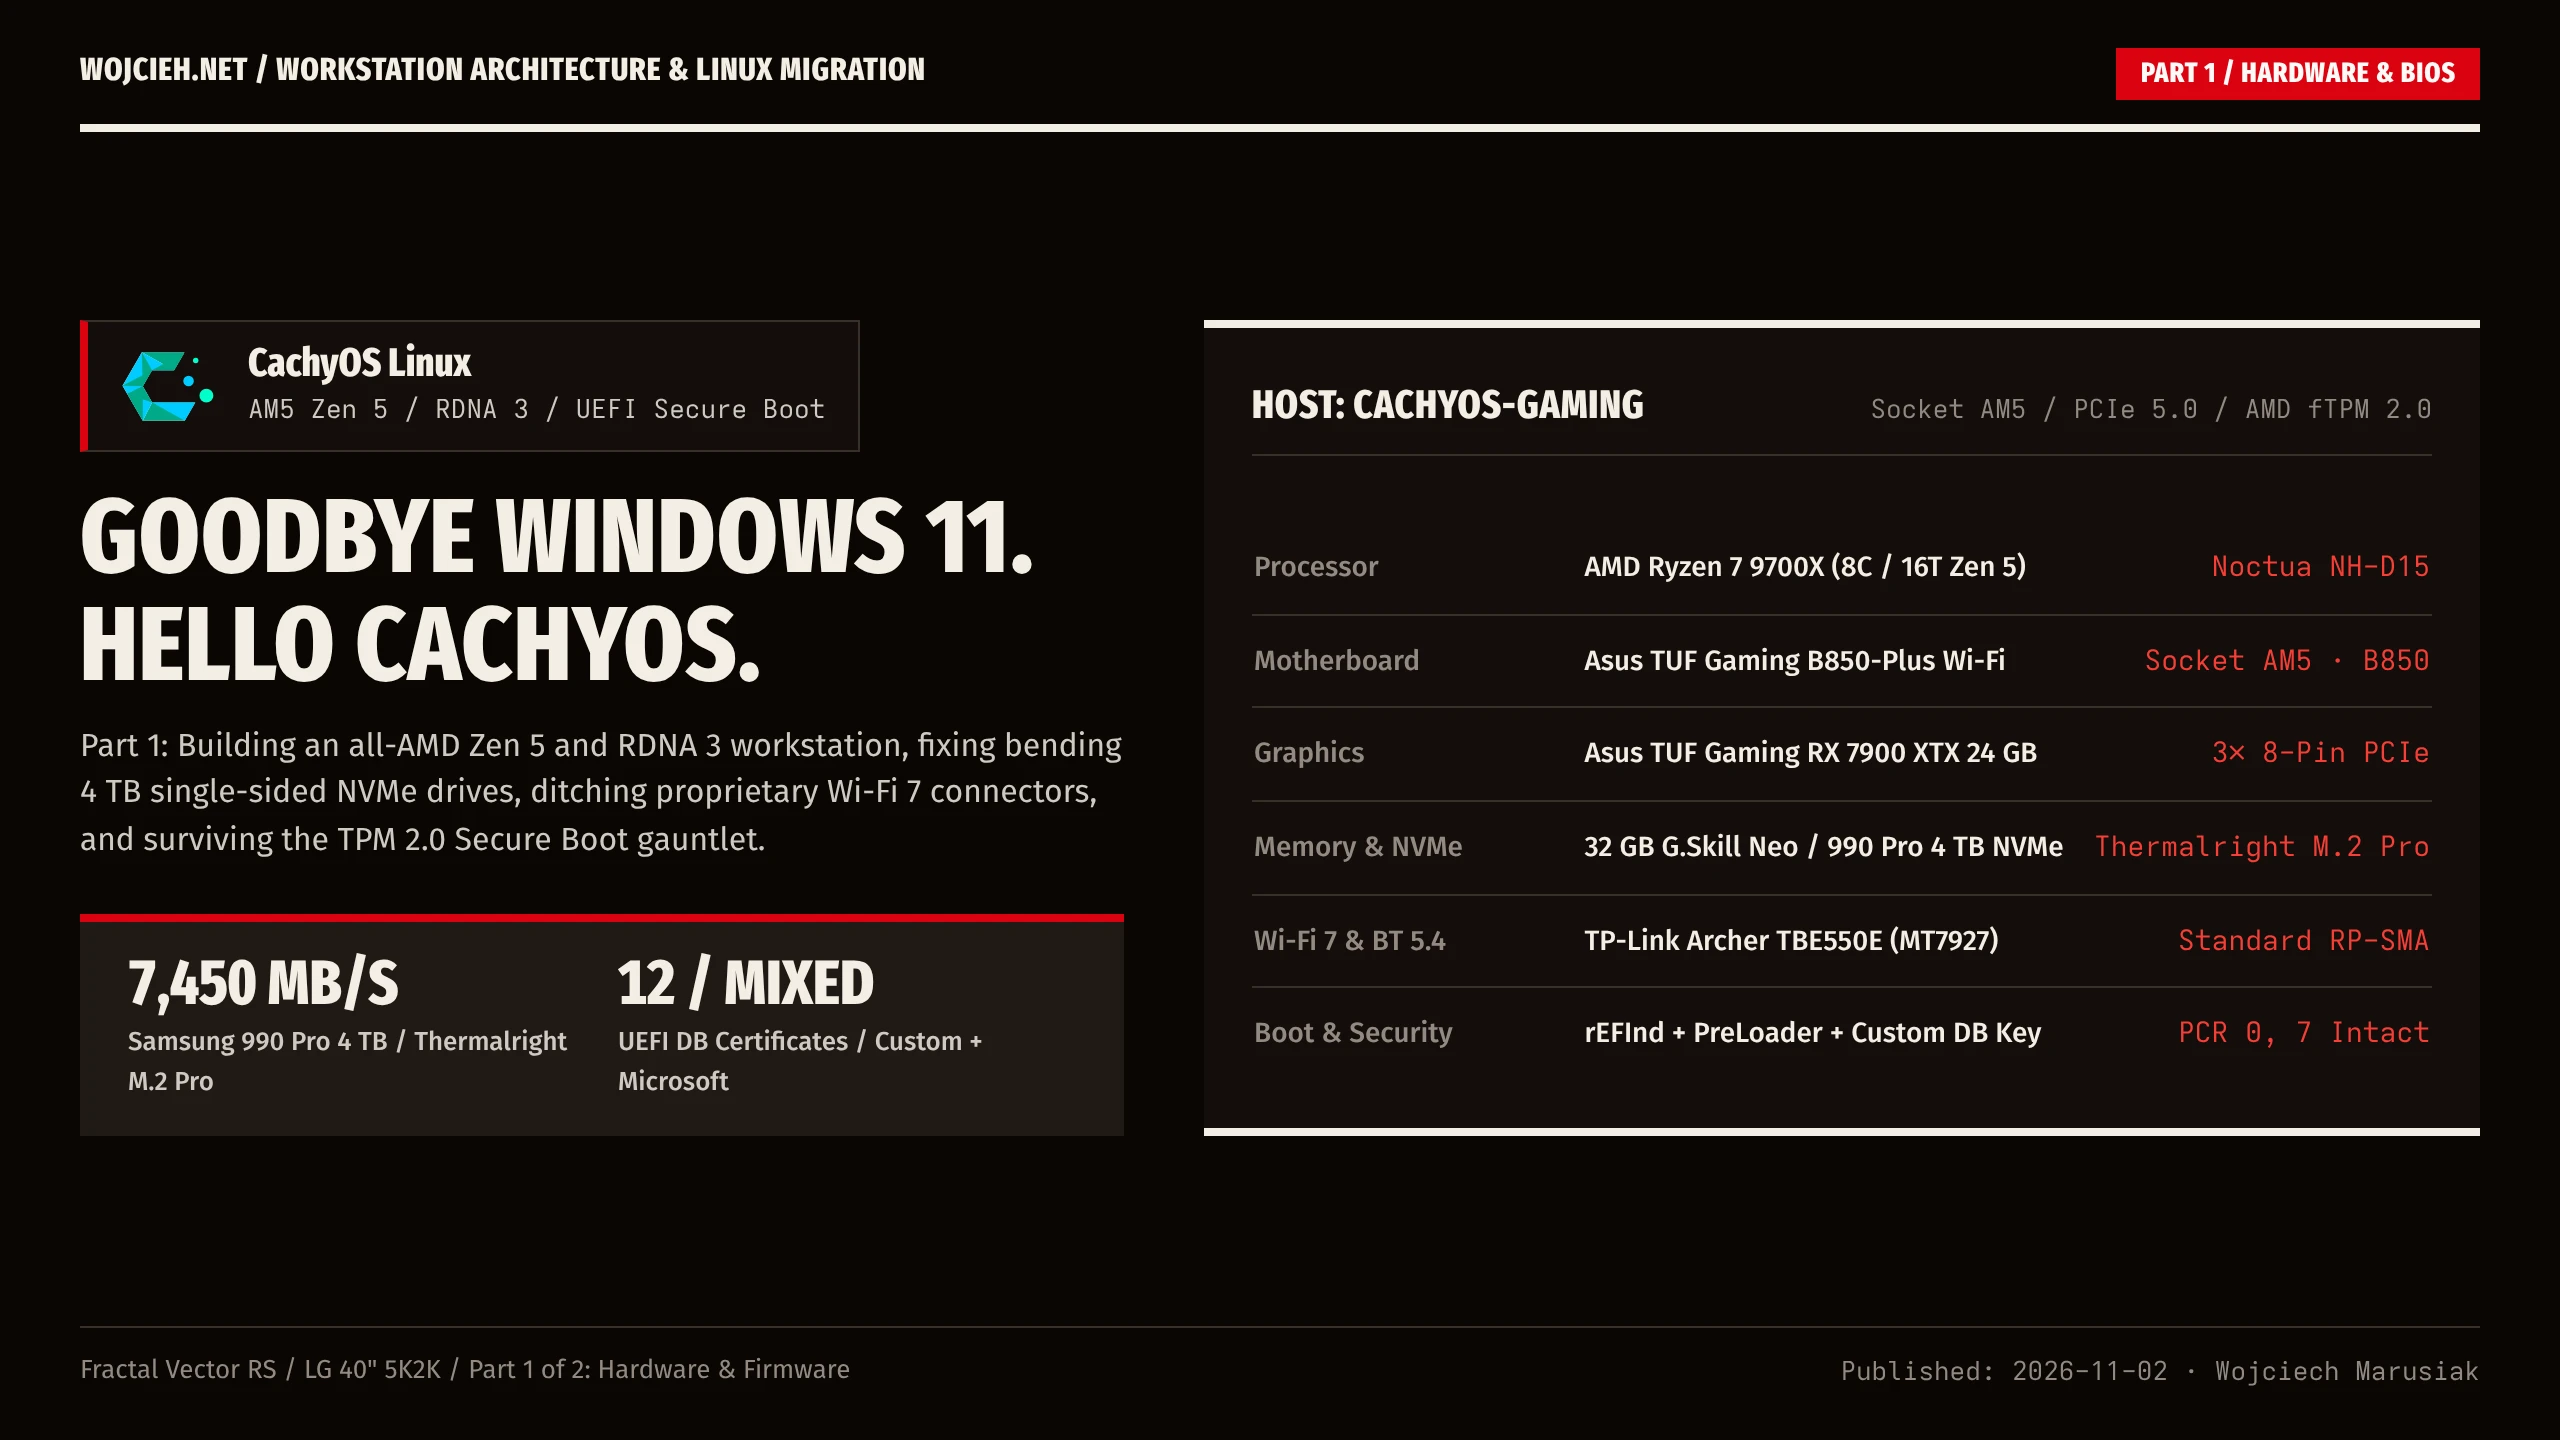
In my previous post, I showed how I removed ASUS Armoury Crate from my Windows 11 desktop and replaced it with OpenRGB and FanControl. That cleanup reclaimed over a gigabyte of RAM and stopped 14 background services from polling my CPU, but the operating system itself was still getting in my way every day.
Between Windows 11 24H2 hijacking hardware YubiKey SSH prompts, scheduled tasks flashing console windows mid-work, and the friction of running Model Context Protocol (MCP) servers through PowerShell, I hit my limit. Beyond any single bug, I had enough of Windows 11 itself. I decided to upgrade my core hardware from AM4 to an all-AMD Zen 5 (AM5) platform and move my daily driver workstation to CachyOS Linux.
In today’s post, the first of a two-part series, I will walk through the hardware build, two frustrating motherboard design flaws I had to fix, how I migrated my drives without risking data loss, and how I got past the TPM 2.0 and UEFI Secure Boot traps:
- Part 1 (this post): Why I left Windows 11, the AM5 Zen 5 / RDNA 3 hardware build, why single-sided 4 TB NVMe drives bend on modern motherboards (and how a Thermalright M.2 Pro sandwich heatsink fixed it), why proprietary motherboard Wi-Fi 7 antenna connectors are a terrible idea, the NVMe/Btrfs storage migration, and fixing TPM 2.0 & UEFI Secure Boot.
- Part 2: Living on CachyOS Linux (
x86_64_v4/znver4), fixing MediaTek MT7927 Wi-Fi 7 & Bluetooth 5.4 on PCIe, Gaze TPM 2.0 biometric face unlock, 9-zone OpenRGB, KDE Plasma 6 on a 5K2K ultrawide, and running my Antigravity AI engineering stack natively.
Why I Finally Left Windows 11
For years, Windows was a workable compromise on a desktop that split its time between cloud architecture work and gaming. Over the last year, four things pushed me to drop it completely:
- I Had Enough of Windows 11 as an Operating System: Windows 11 stopped behaving like a workstation OS and started acting like an ad-supported thin client. Between Copilot buttons shoved into every menu, Start menu “recommendations”, OneDrive and Microsoft Account prompts coming back after feature updates, and sluggish WebView2 panels for basic system dialogs, I was tired of fighting my own computer just to keep it clean and predictable.
- Broken FIDO2 SSH Ergonomics (
webauthn.dll): Every time I opened an SSH connection to my homelab or cloud nodes using a hardware FIDO2 resident key (sk-ecdsa-sha2-nistp256@openssh.com), the Windows 11 Passkey Manager intercepted the request and defaulted to “Use a phone or tablet” (Bluetooth QR code) instead of my plugged-in USB YubiKey. Having to click “Back” and select “Security key” dozens of times a day before touching the YubiKey was maddening. Even disabling the Windows Bluetooth Support Service (bthserv) only partially fixed the popup. - Agentic Coding & Local Tooling Friction: My daily workflow relies on autonomous AI pair programming in Antigravity, connected to local MCP servers (
mcp-unifi,mcp-homeassistant,mcp-pangolin,mcp-unraid,wazuh-mcp) and CLI tools (sops,age,ggshield,uv,kubectl). Running UNIX-native tooling on Windows without WSL meant fightingCP1250/UTF-8codepage mismatches, PowerShell quoting quirks, and slow NTFS file I/O across thousands of small git objects. - Constant Background Bloat: Even after removing OEM utilities, Windows Updates kept re-enabling telemetry tasks, Edge background helpers, and unasked-for driver updates.
The New Workstation Build (cachyos-gaming)
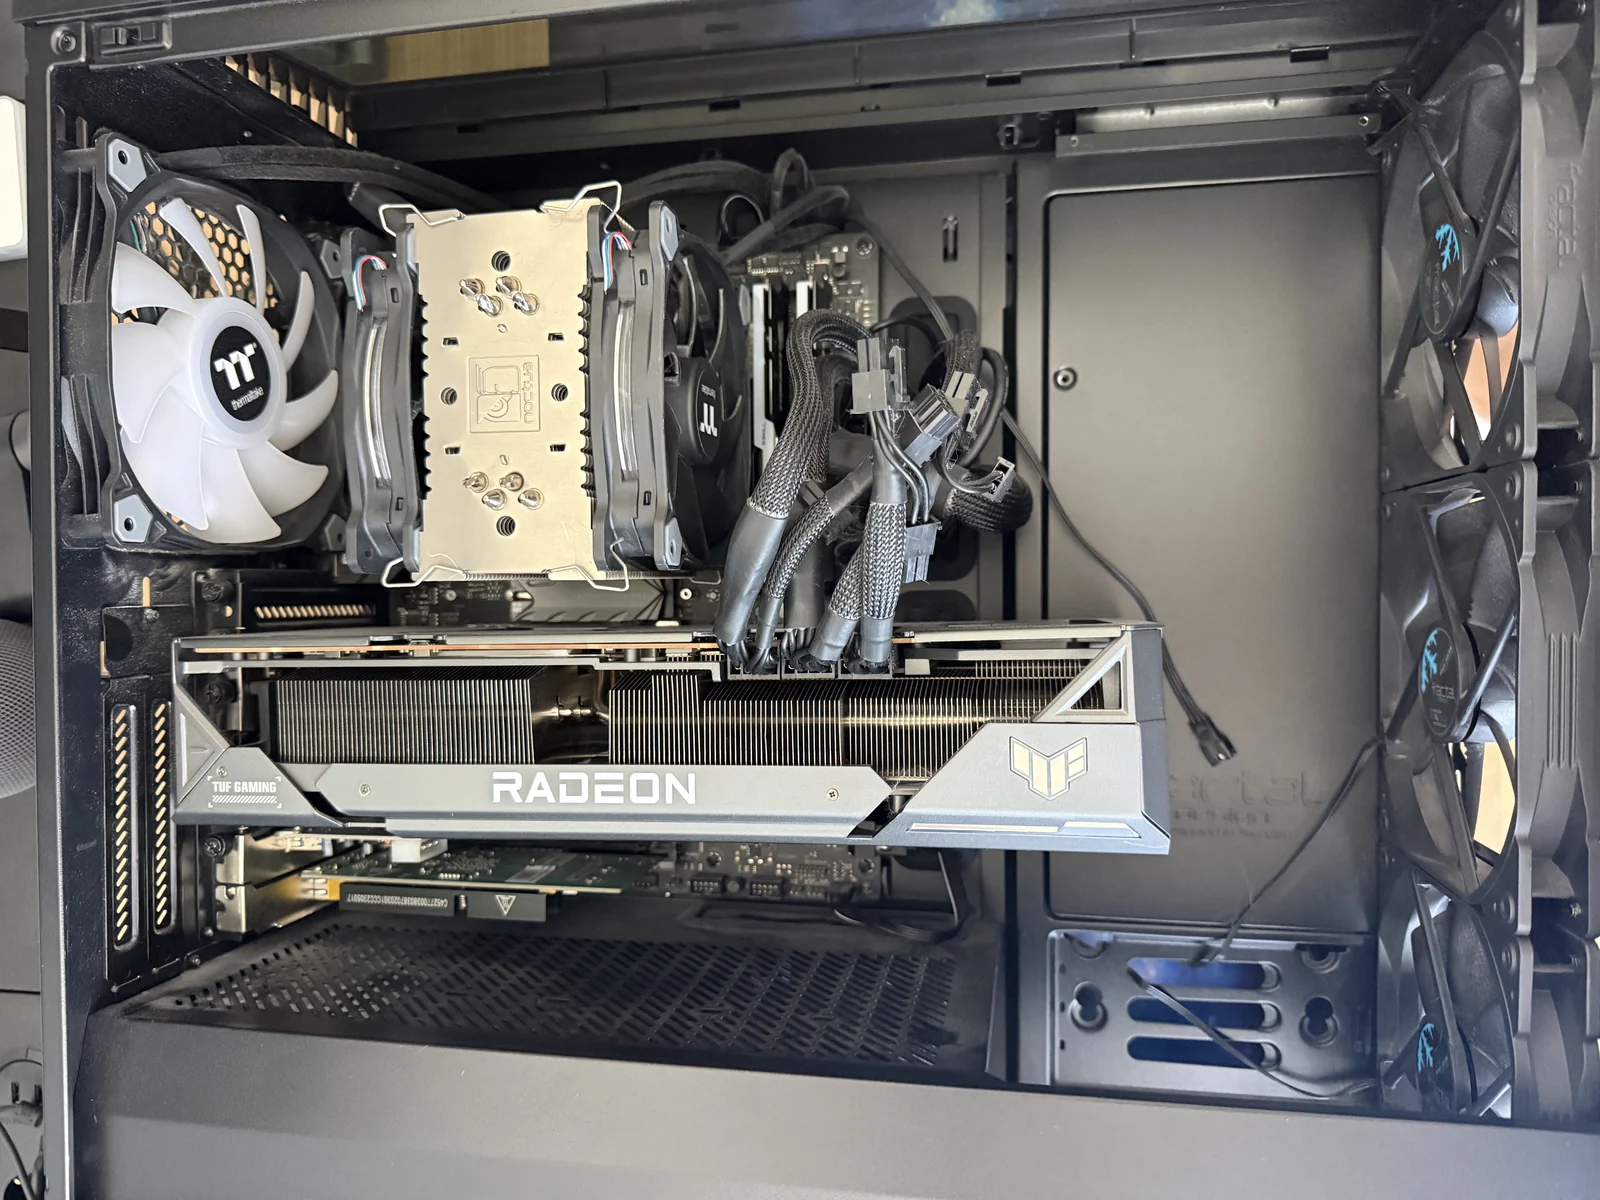
Since I was rebuilding my software stack from scratch, I retired my AMD Ryzen 7 5800X (AM4 / B550) components (which now run my custom 12-bay Unraid NAS) and built a quiet AM5 workstation around Zen 5 and RDNA 3.
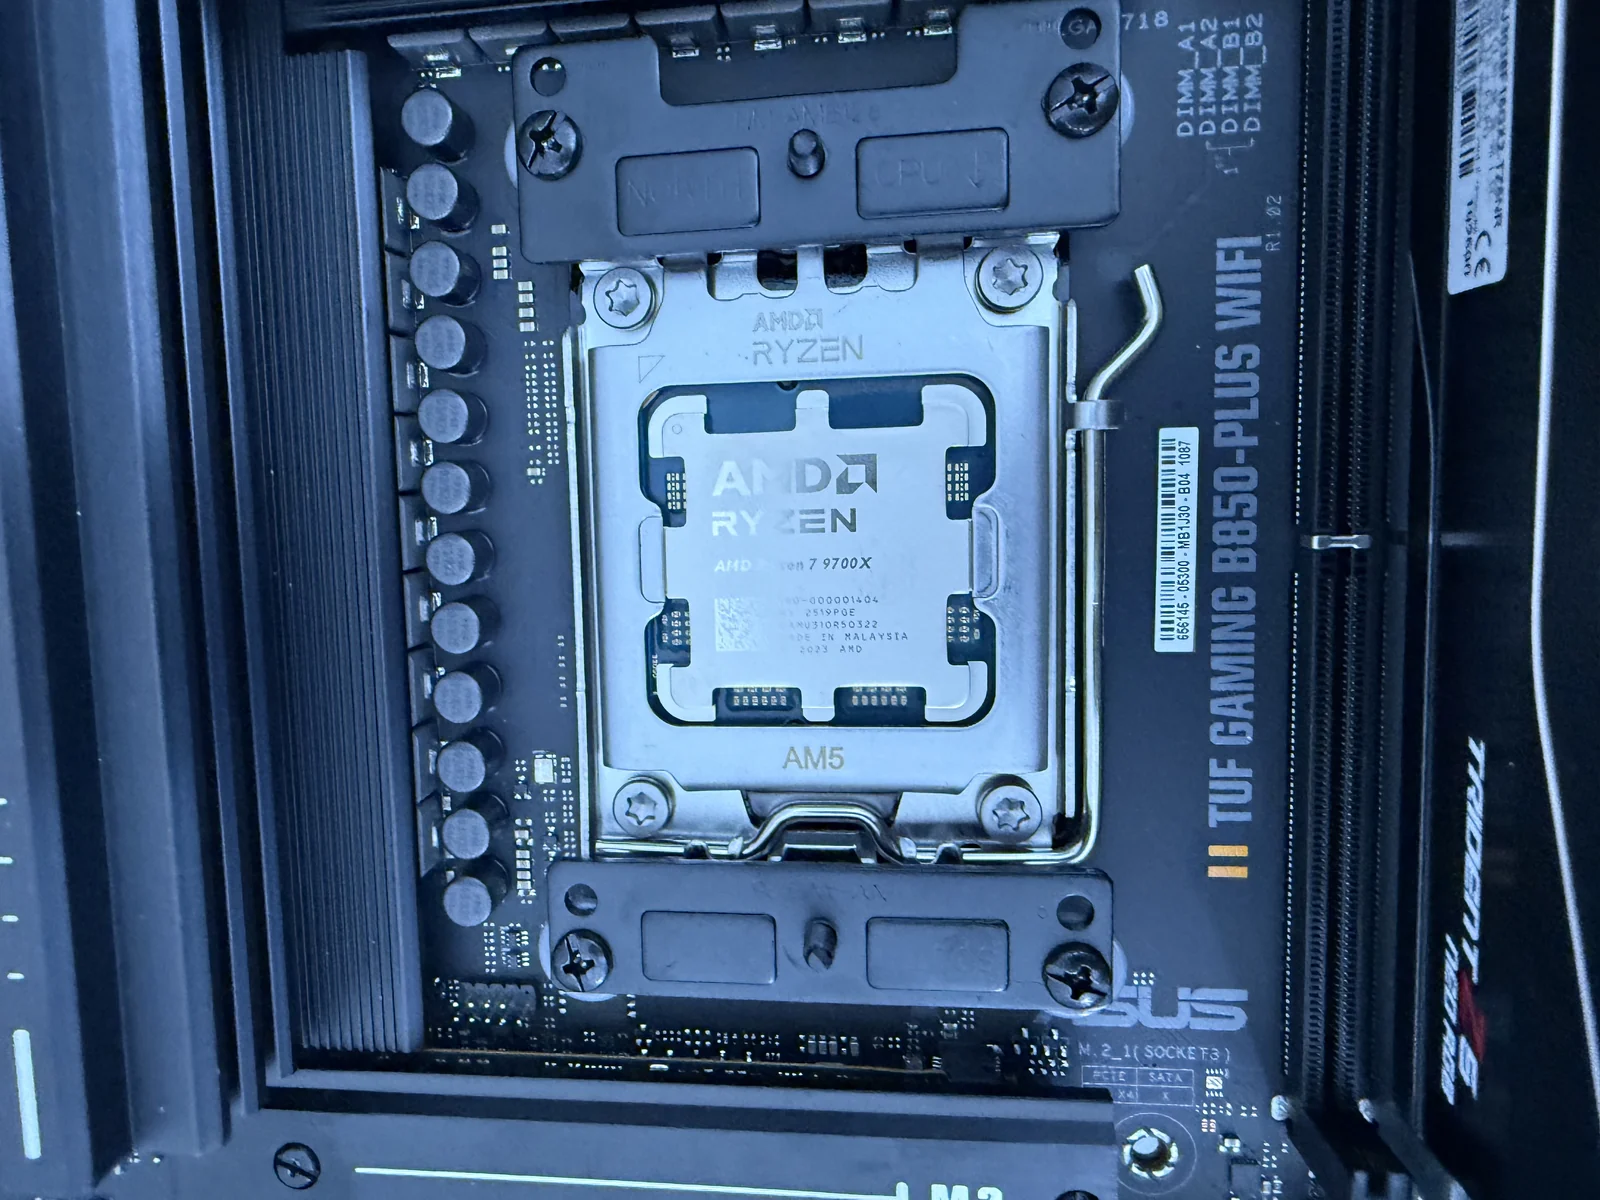
| Component | Model / Specification | Linux Driver / Role |
|---|---|---|
| Processor | AMD Ryzen 7 9700X (8 Cores / 16 Threads, Zen 5, AM5) | amd-pstate-epp (znver4 builds) |
| CPU Cooler | Noctua NH-D15 (Dual-Tower) | Controlled via nct6799 (pwm2) |
| Motherboard | ASUS TUF GAMING B850-PLUS WIFI (AMD B850, UEFI, TPM 2.0) | Sensor chip nct6799 + Aura USB HID |
| Graphics Card | ASUS TUF Gaming Radeon RX 7900 XTX OC Edition (24 GB GDDR6) | Kernel amdgpu + Mesa RADV (Zero RPM idle) |
| Memory | 32 GB G.SKILL Trident Z5 Neo RGB DDR5 | Dual-channel EXPO + SMBus /dev/i2c-14 |
| Primary Drive (OS & Work) | Samsung 990 PRO 4 TB PCIe 4.0 NVMe (~7,450 MB/s) | Thermalright M.2 Pro heatsink; CachyOS (Btrfs zstd + 30.5 GB zram0) |
| Former SATA SSD | SanDisk SSD Plus 4 TB SATA III (~550 MB/s) | Used for initial migration staging; moved to Unraid NAS as cache |
| Former Local HDDs | WD Black 8 TB HDD + WD Blue 4 TB HDD | Pulled from the PC and moved into the Unraid NAS storage array |
| Network Card | TP-Link Archer TBE550E PCIe (Wi-Fi 7 + Bluetooth 5.4) | Standard RP-SMA antennas (bypassing ASUS Q-Antenna); MediaTek MT7927 (mt76) / MT6639 (btusb) |
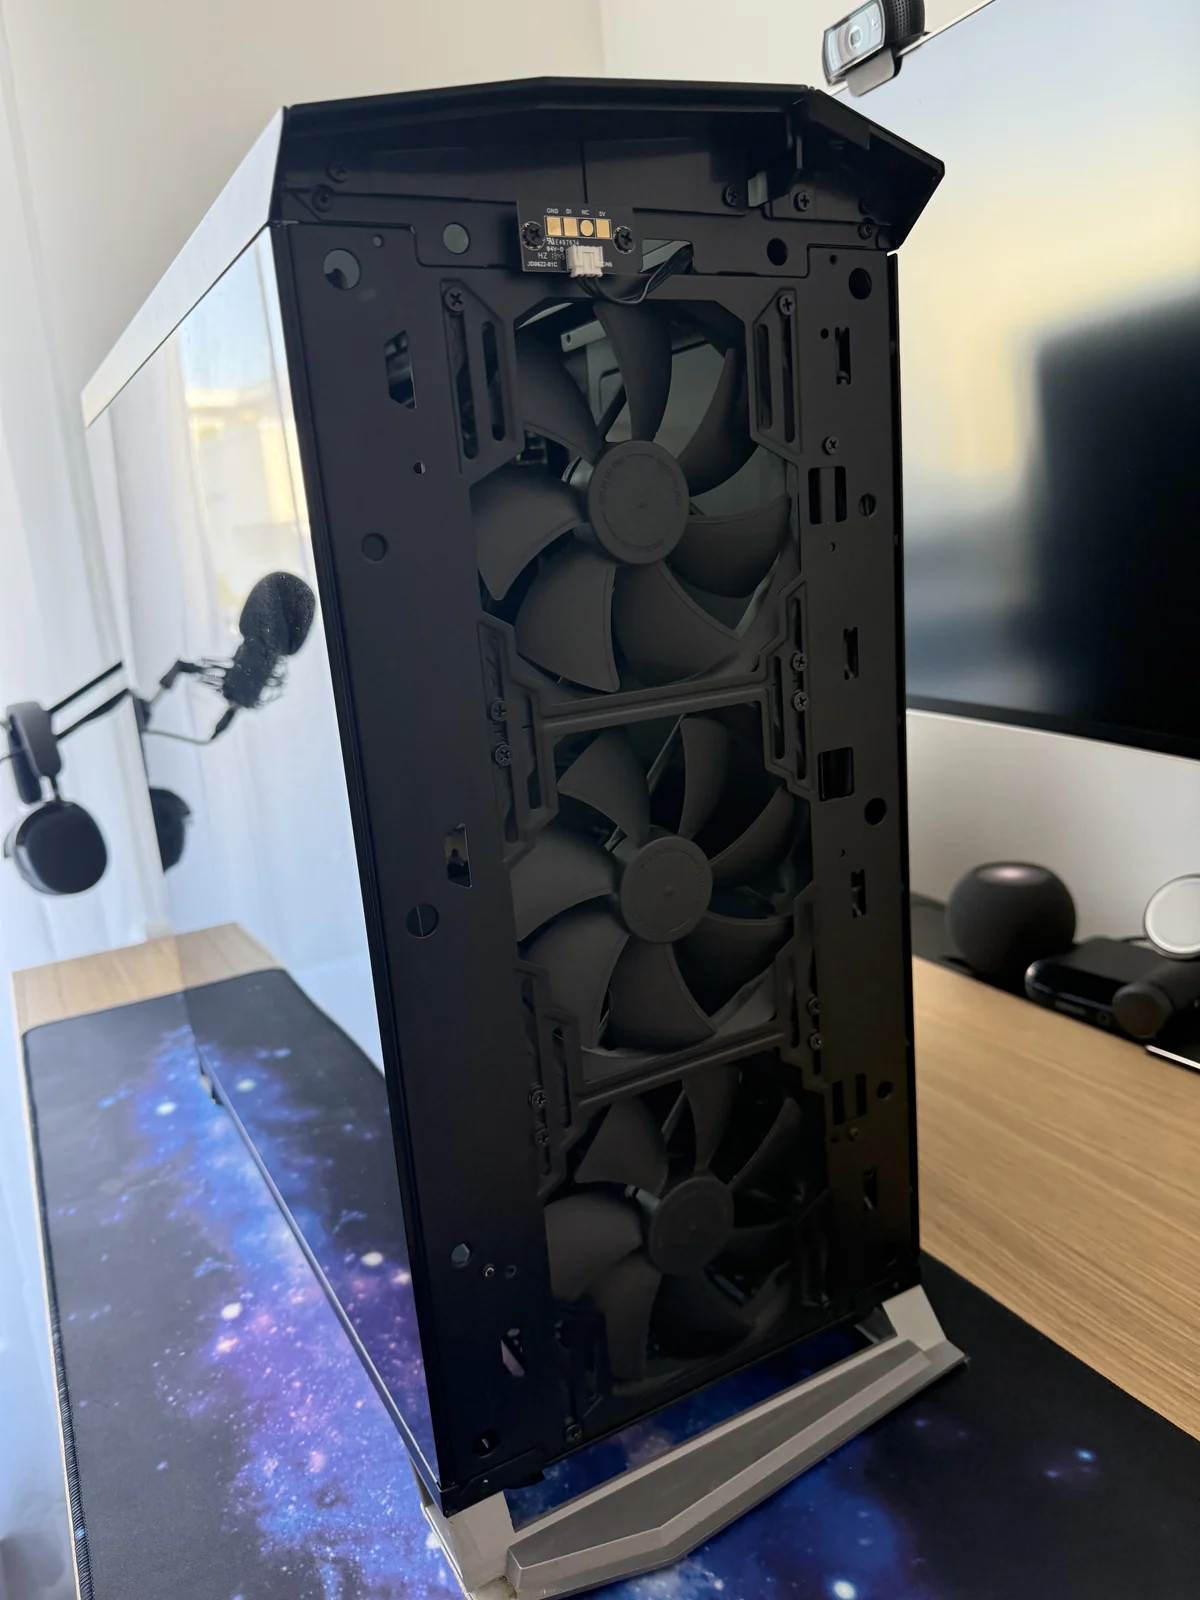
| Case & Fan Hub | Fractal Design Vector RS + Nexus+ Smart Hub | Triple 140mm front intake synced to CPU_OPT (fan5) |
| Display | LG UltraFine 5K2K 40" (5120x2160 @ 120 Hz, 21:9) |
DisplayPort, Wayland 160% scale |
| Audio | SteelSeries Arctis Nova Pro Wireless | linux-arctis-manager + PipeWire |
| Biometrics | Logitech BRIO 4K Webcam | Gaze ONNX daemon + hardware TPM 2.0 |
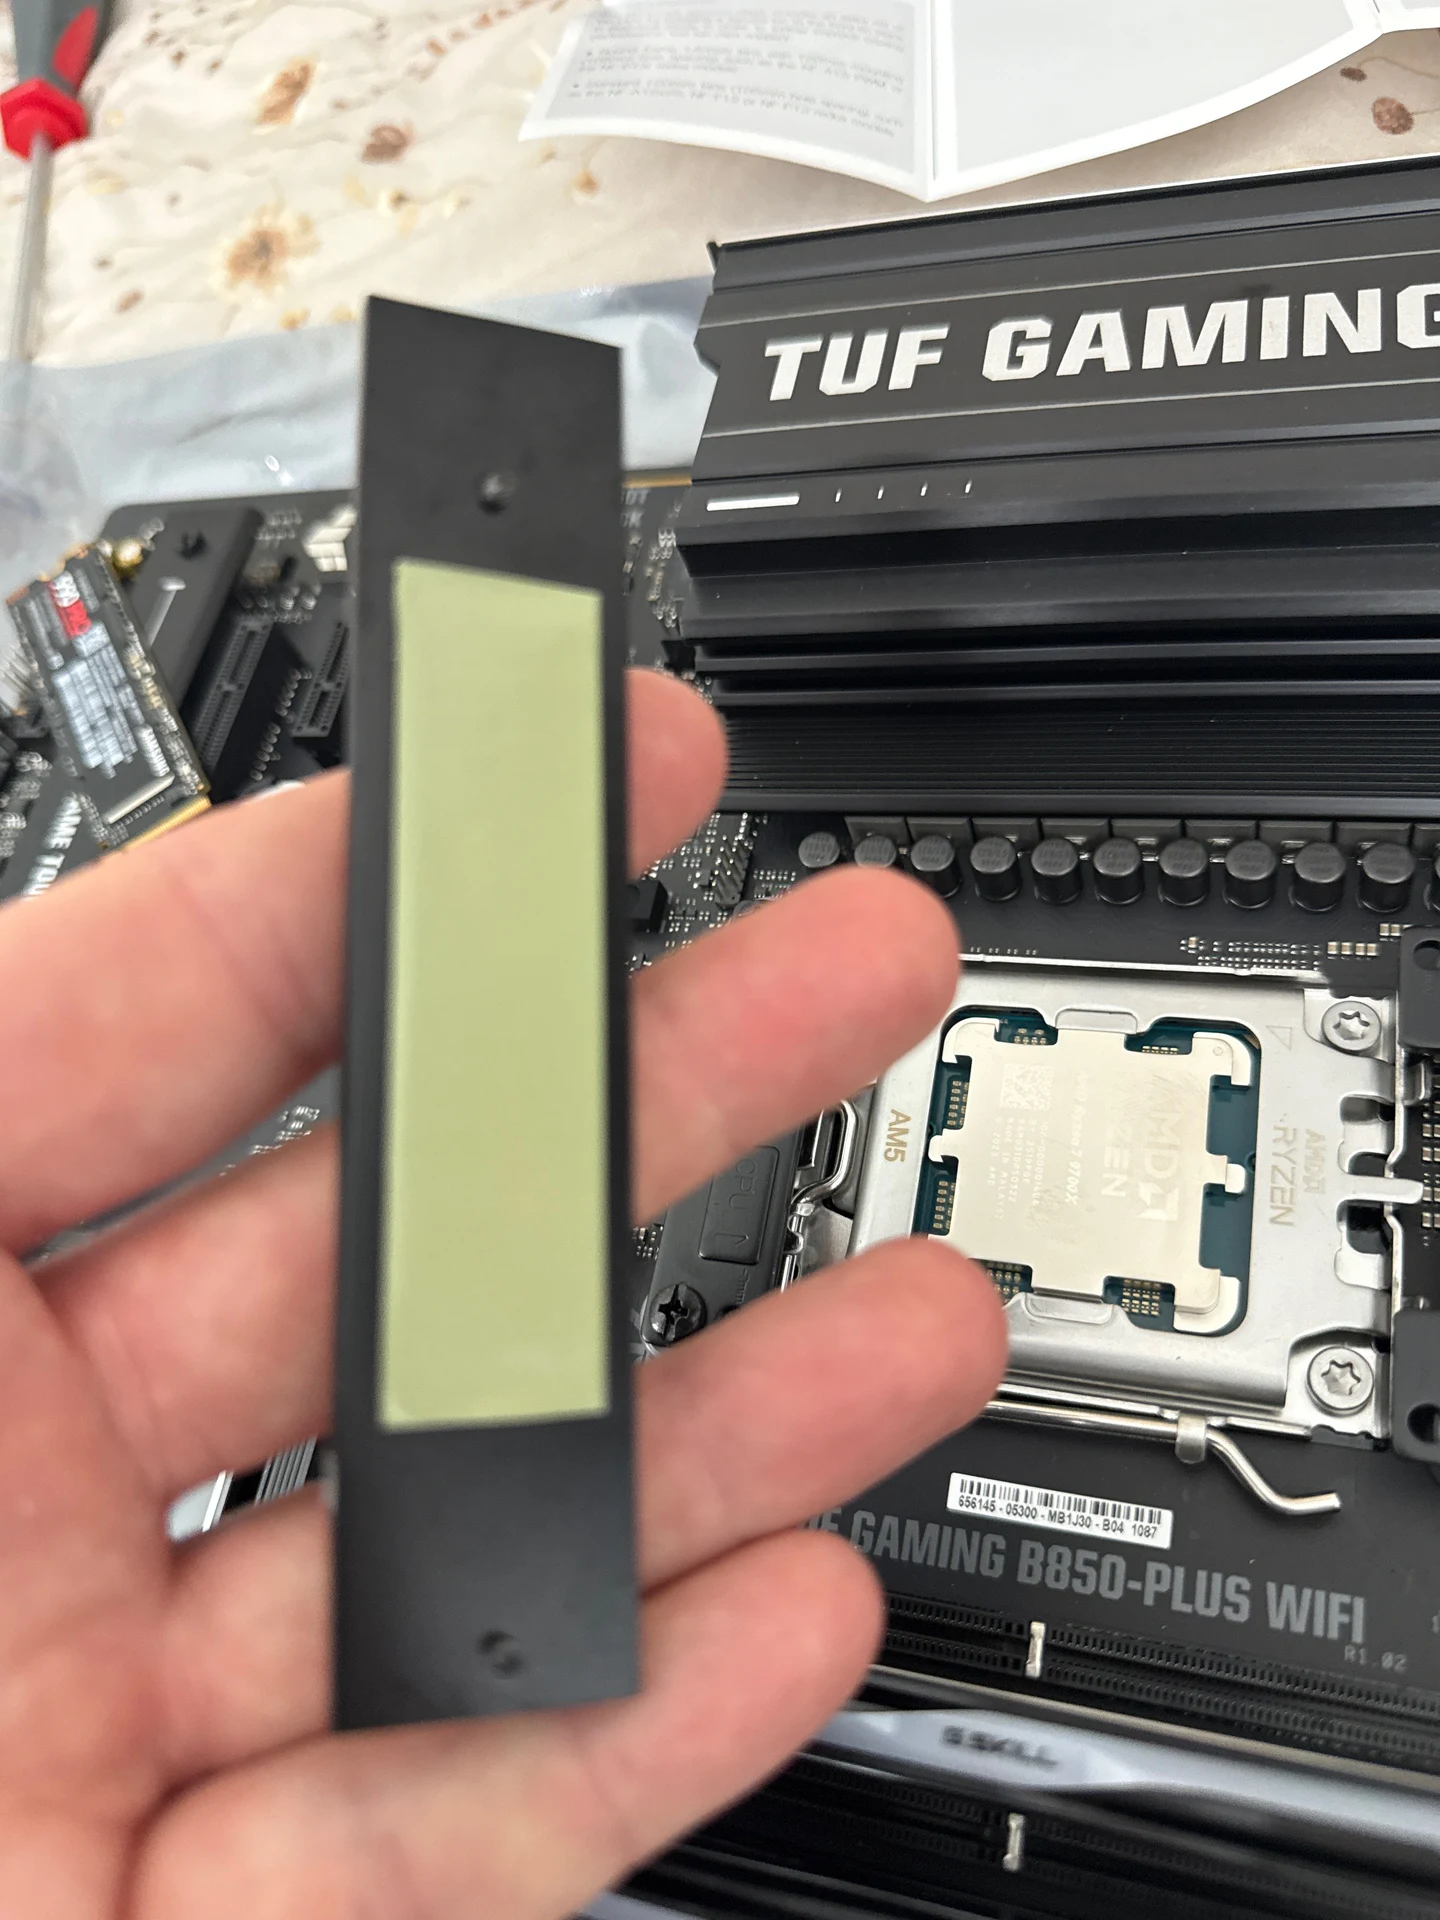
Hardware Gotcha #1: The Bending NVMe Problem (Single-Sided 4 TB Drives & The Thermalright M.2 Pro Fix)
Many current-generation motherboards have an annoying mechanical flaw that bends single-sided M.2 NVMe SSDs into a bow.
Even though the Samsung 990 PRO 4 TB is a 4 TB drive, Samsung built it on a single-sided M.2 2280 PCB. All the V-NAND packages, DRAM, and the Pascal controller sit on the top side of the board, while the underside is flat, bare fiberglass.
When you install a single-sided M.2 drive into the primary M.2 bay (M.2_1) on the ASUS TUF GAMING B850-PLUS WIFI, the factory mounting geometry works against you. ASUS pre-installs a raised rubber support block right in the middle of the M.2 bay (and includes extra stick-on rubber pads in the box). Because that center rubber block sits slightly higher than the plane between the M.2 slot connector on the right and the plastic M.2 Q-Latch clip on the left, it pushes the middle of the thin fiberglass PCB upward. If you remove the rubber block and tighten the motherboard’s heavy aluminum heatsink plate down on its thick factory thermal pad, the heatsink bows the unsupported center of the PCB downward into the gap instead.
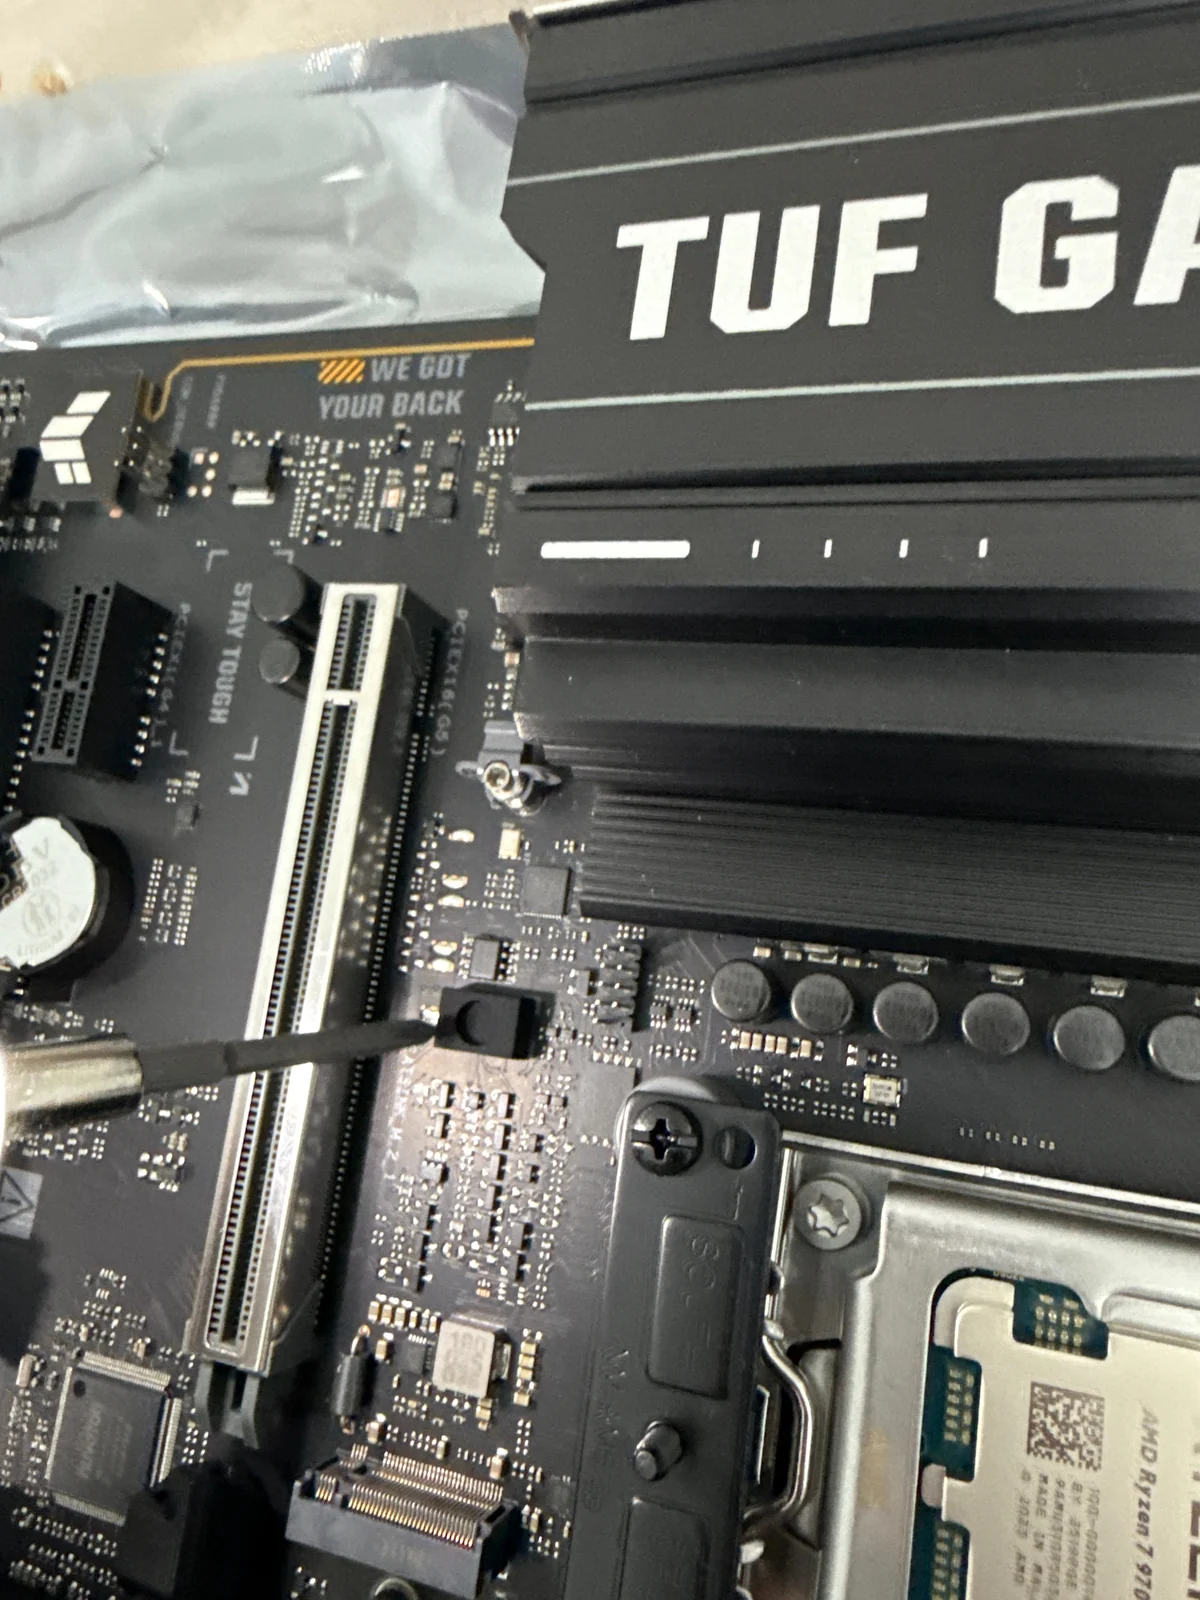
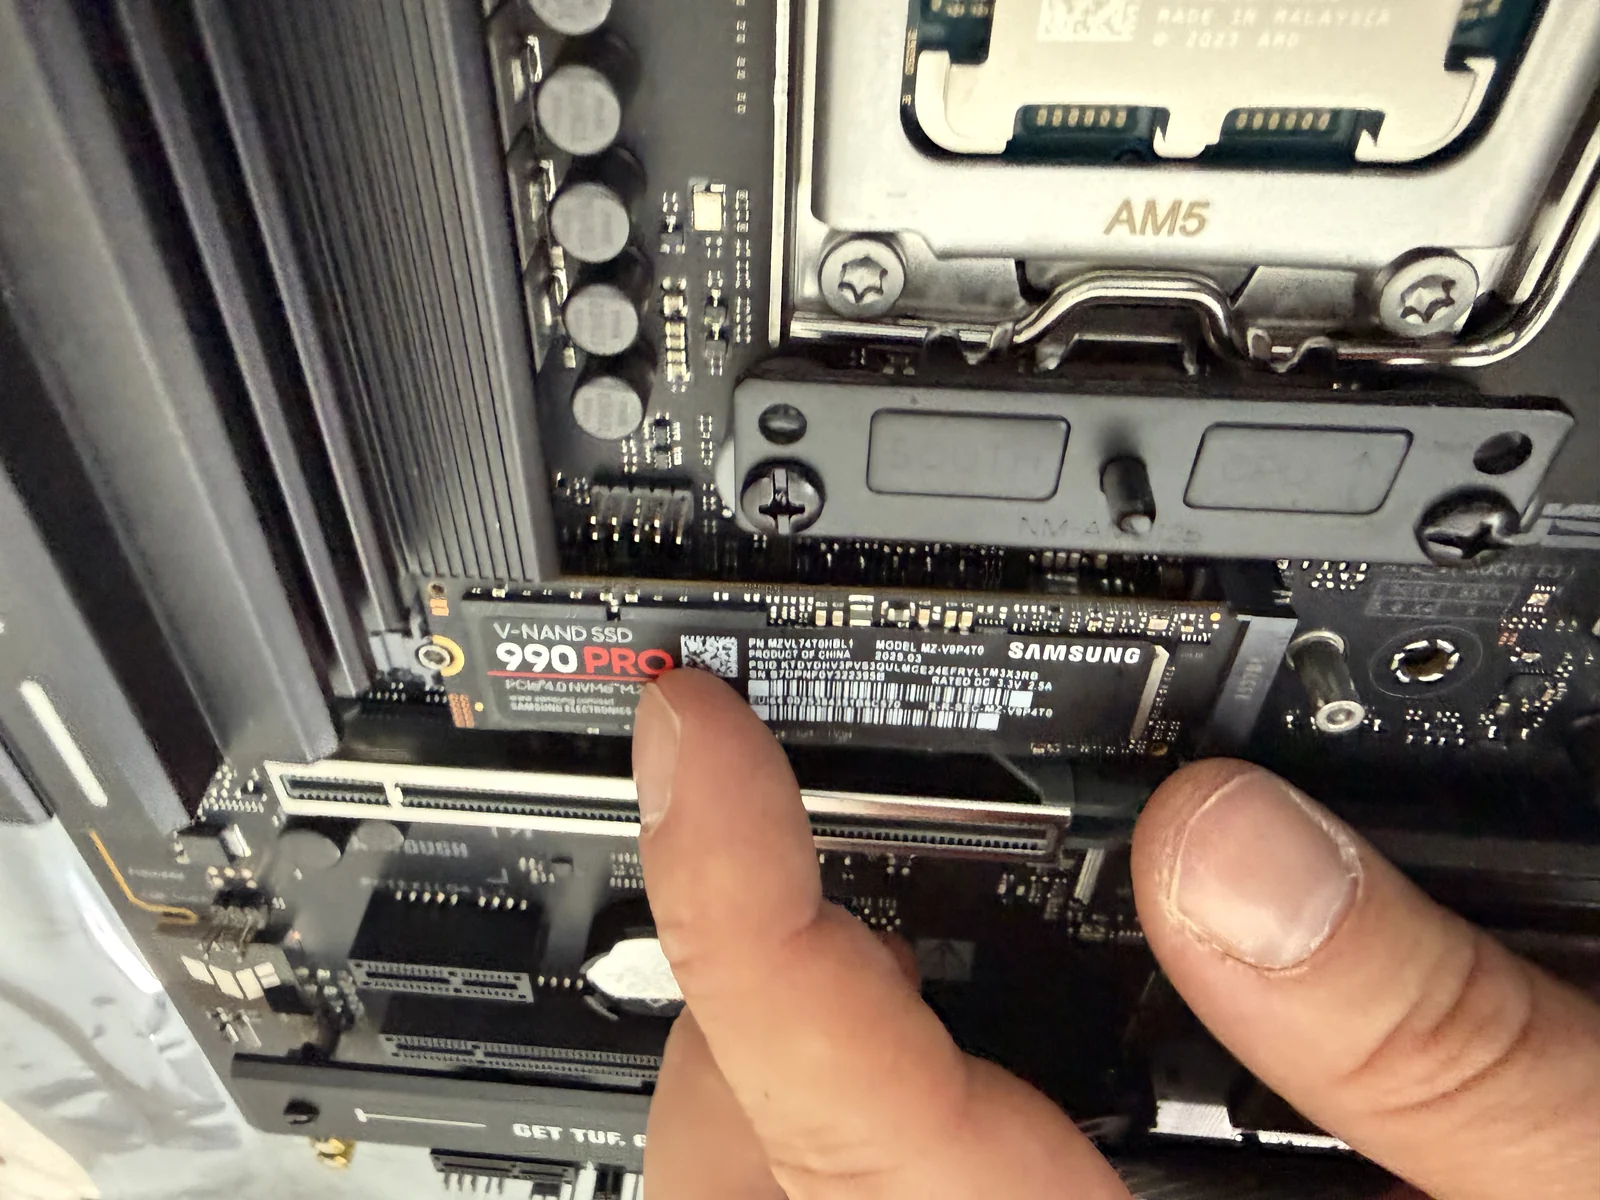
I was not going to leave a €300+ 4 TB NVMe drive visibly curved in the slot. Bending the PCB puts constant mechanical stress on the BGA solder balls under the controller and NAND packages, and it causes uneven contact with the thermal pad.
The Fix: Ditching the Motherboard Heatsink Cover for a Thermalright M.2 Pro
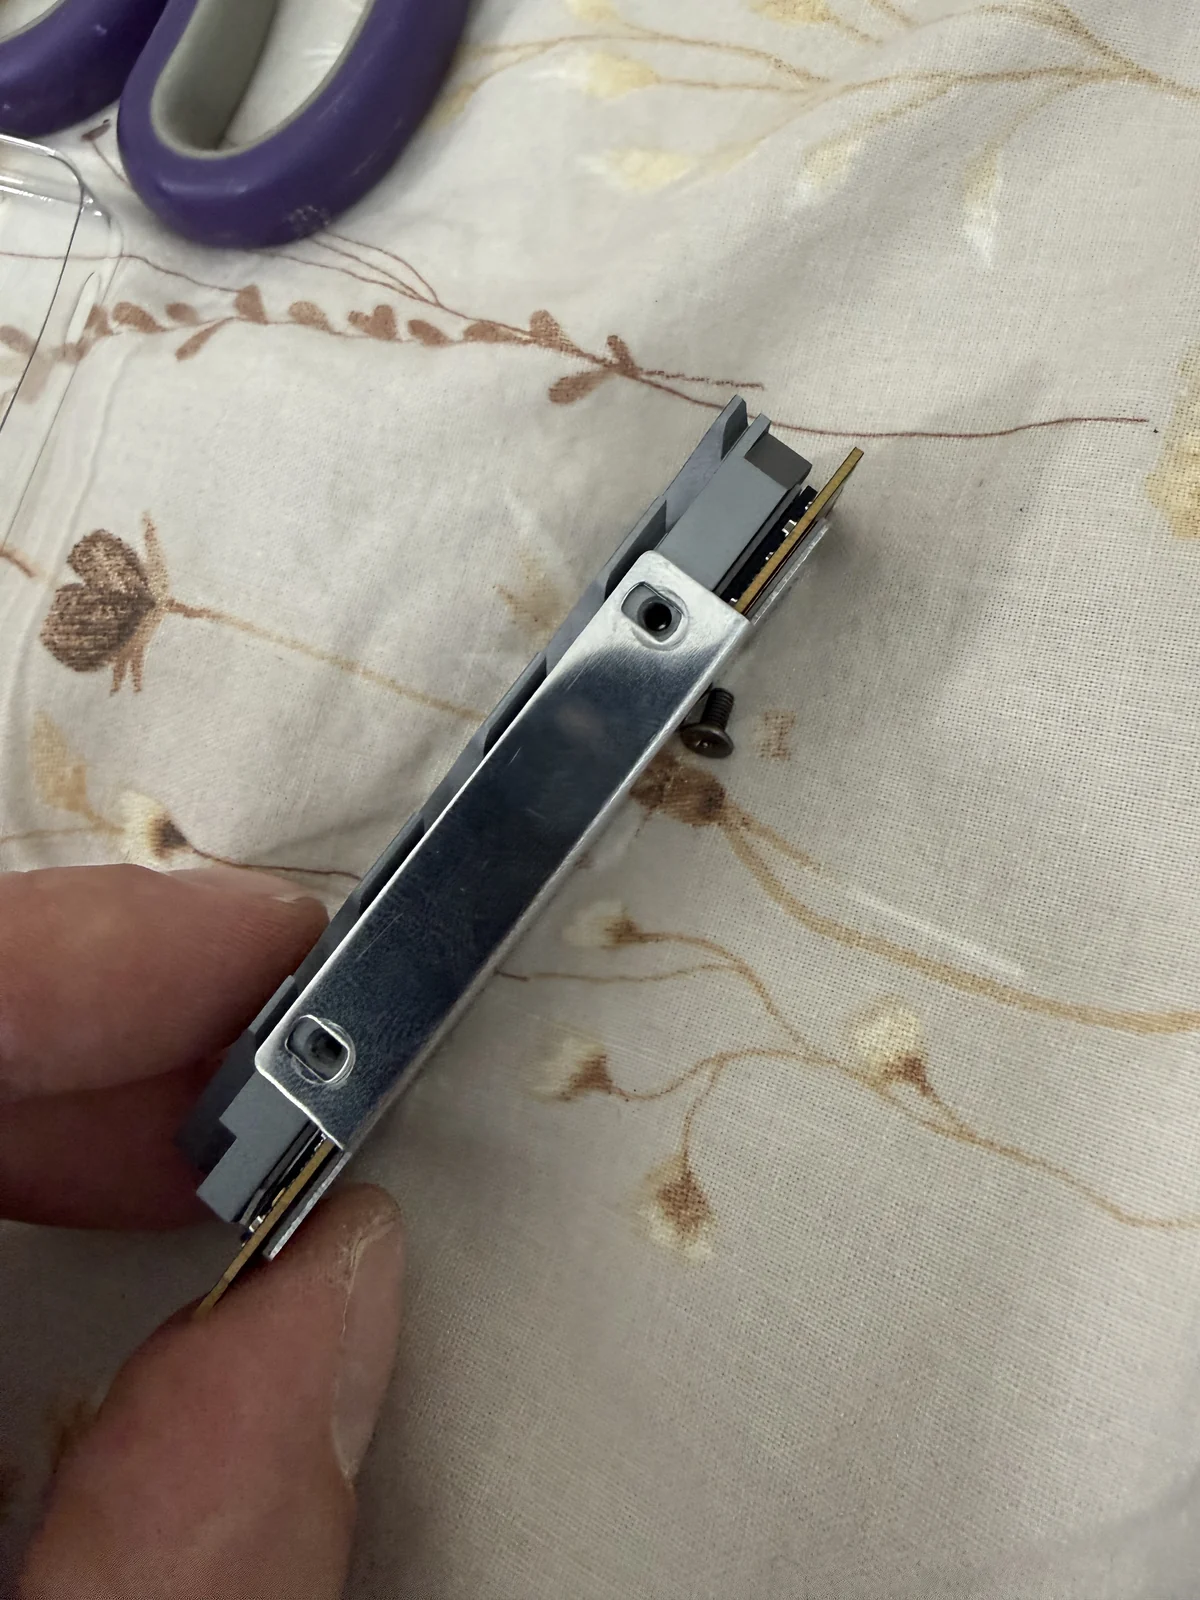
Instead of fighting the motherboard’s top plate and rubber blocks, I left the stock ASUS M.2 heatsink cover off M.2_1 and mounted the Samsung 990 PRO 4 TB inside a dedicated Thermalright M.2 Pro 2280 heatsink.
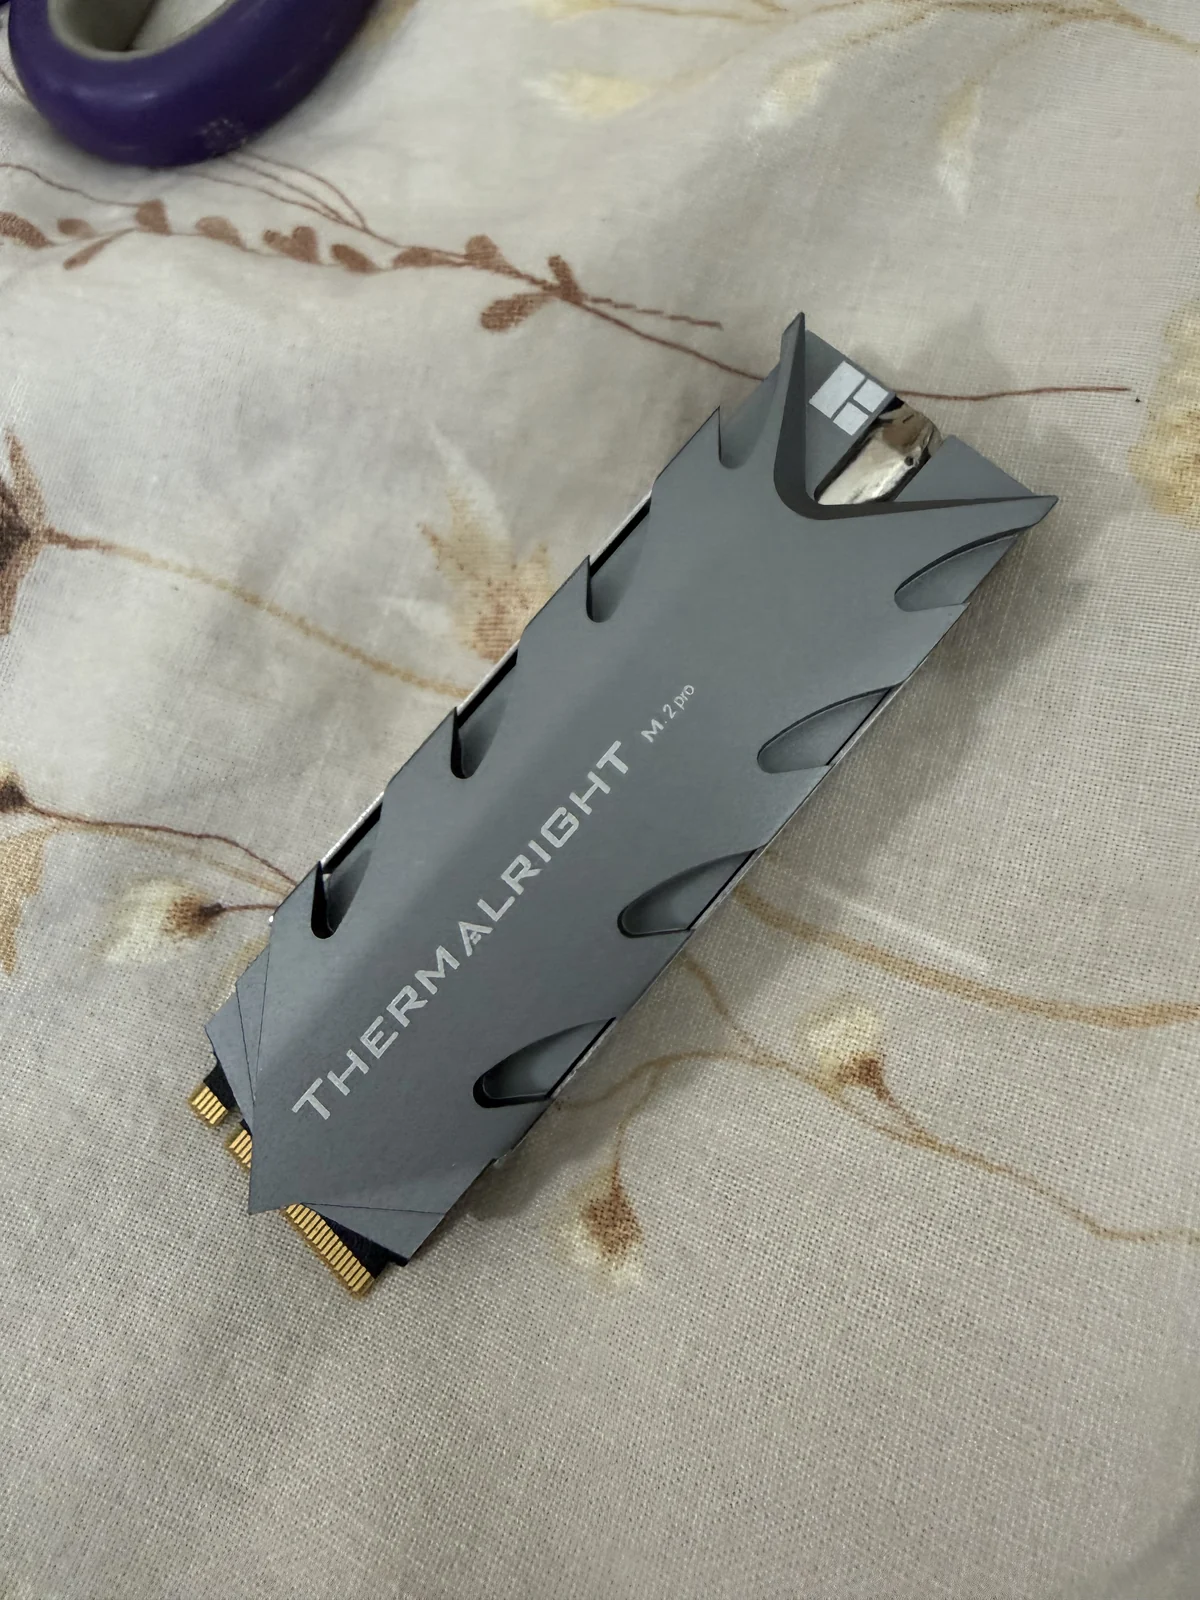
The Thermalright M.2 Pro solves the bending problem because it uses a full-length rigid metal frame:
- A stainless steel bottom tray runs underneath the entire 2280 PCB.
- The top finned aluminum heatsink block clamps onto that bottom tray via four machine screws along the sides of the frame, rather than pushing down against the motherboard PCB.
- Sandwiched between two even thermal pads inside that rigid frame, the single-sided Samsung 990 PRO 4 TB stays completely flat from end to end, and the whole assembly clicks cleanly into the ASUS M.2 Q-Latch with zero downward flex.
Hardware Gotcha #2: Why Proprietary Motherboard Wi-Fi Antenna Connectors Are a Terrible Idea
If you look at the interior build photo above, you might wonder why I installed a dedicated TP-Link Archer TBE550E PCIe Wi-Fi 7 card into an ASUS TUF GAMING B850-PLUS WIFI motherboard that already comes with onboard Wi-Fi.
The reason is one of the dumbest hardware trends on recent motherboards: proprietary plastic push-on antenna connectors.
For decades, every Wi-Fi-equipped motherboard used standard threaded brass RP-SMA jacks on the rear I/O shield. You could screw in compact stubby antennas, run low-loss coax extension cables, or attach any third-party high-gain antenna you already owned. On current-generation boards, almost every major motherboard vendor ditched that standard and invented its own proprietary snap-on connector: ASUS uses Q-Antenna, Gigabyte has EZ-Plug, and MSI uses EZ Antenna.
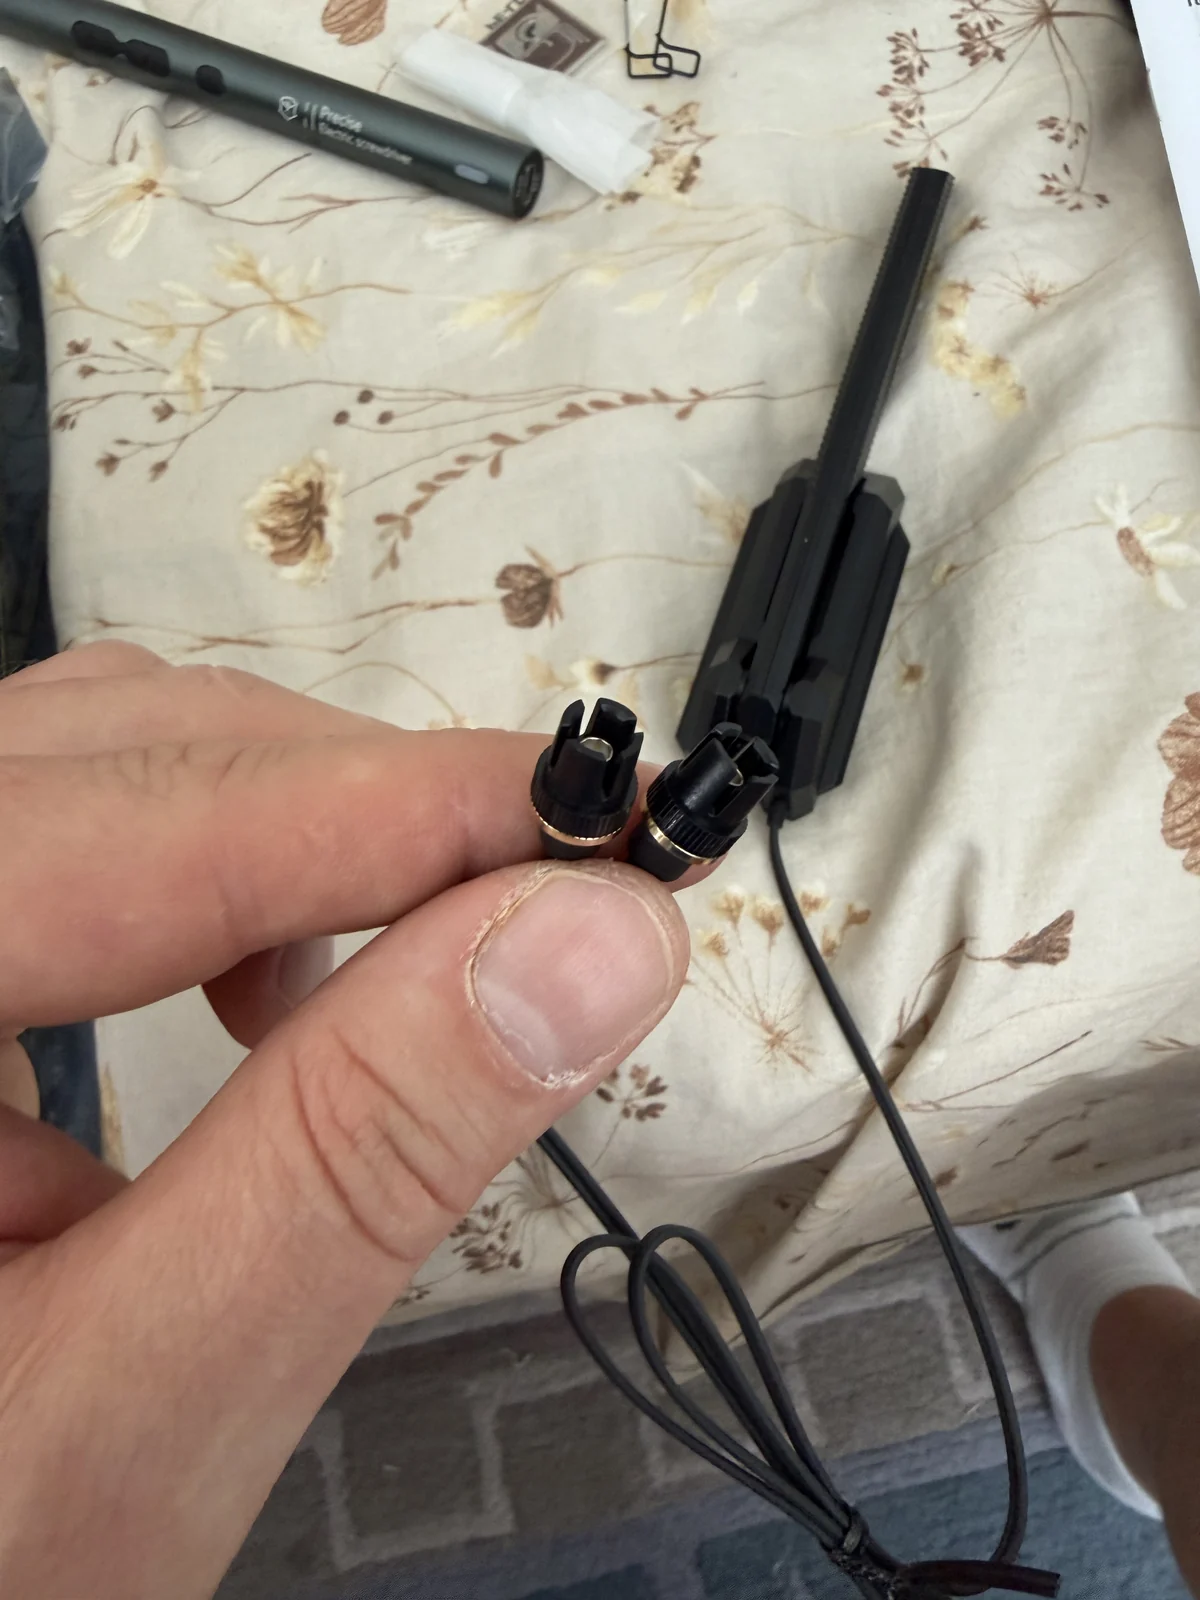
Vendors market these as a “one-click convenience feature”, but in practice they are fragile and lock you into proprietary hardware:
- You are stuck with the cheap plastic shark-fin antenna bundled in the motherboard box.
- The push-on friction clips have much weaker mechanical grip than threaded brass RP-SMA nuts and pop loose whenever you move cables behind the PC.
- You cannot attach standard RP-SMA antennas or proper coax leads without buying third-party pig-tail adapters that add signal loss at 5 GHz and 6 GHz.
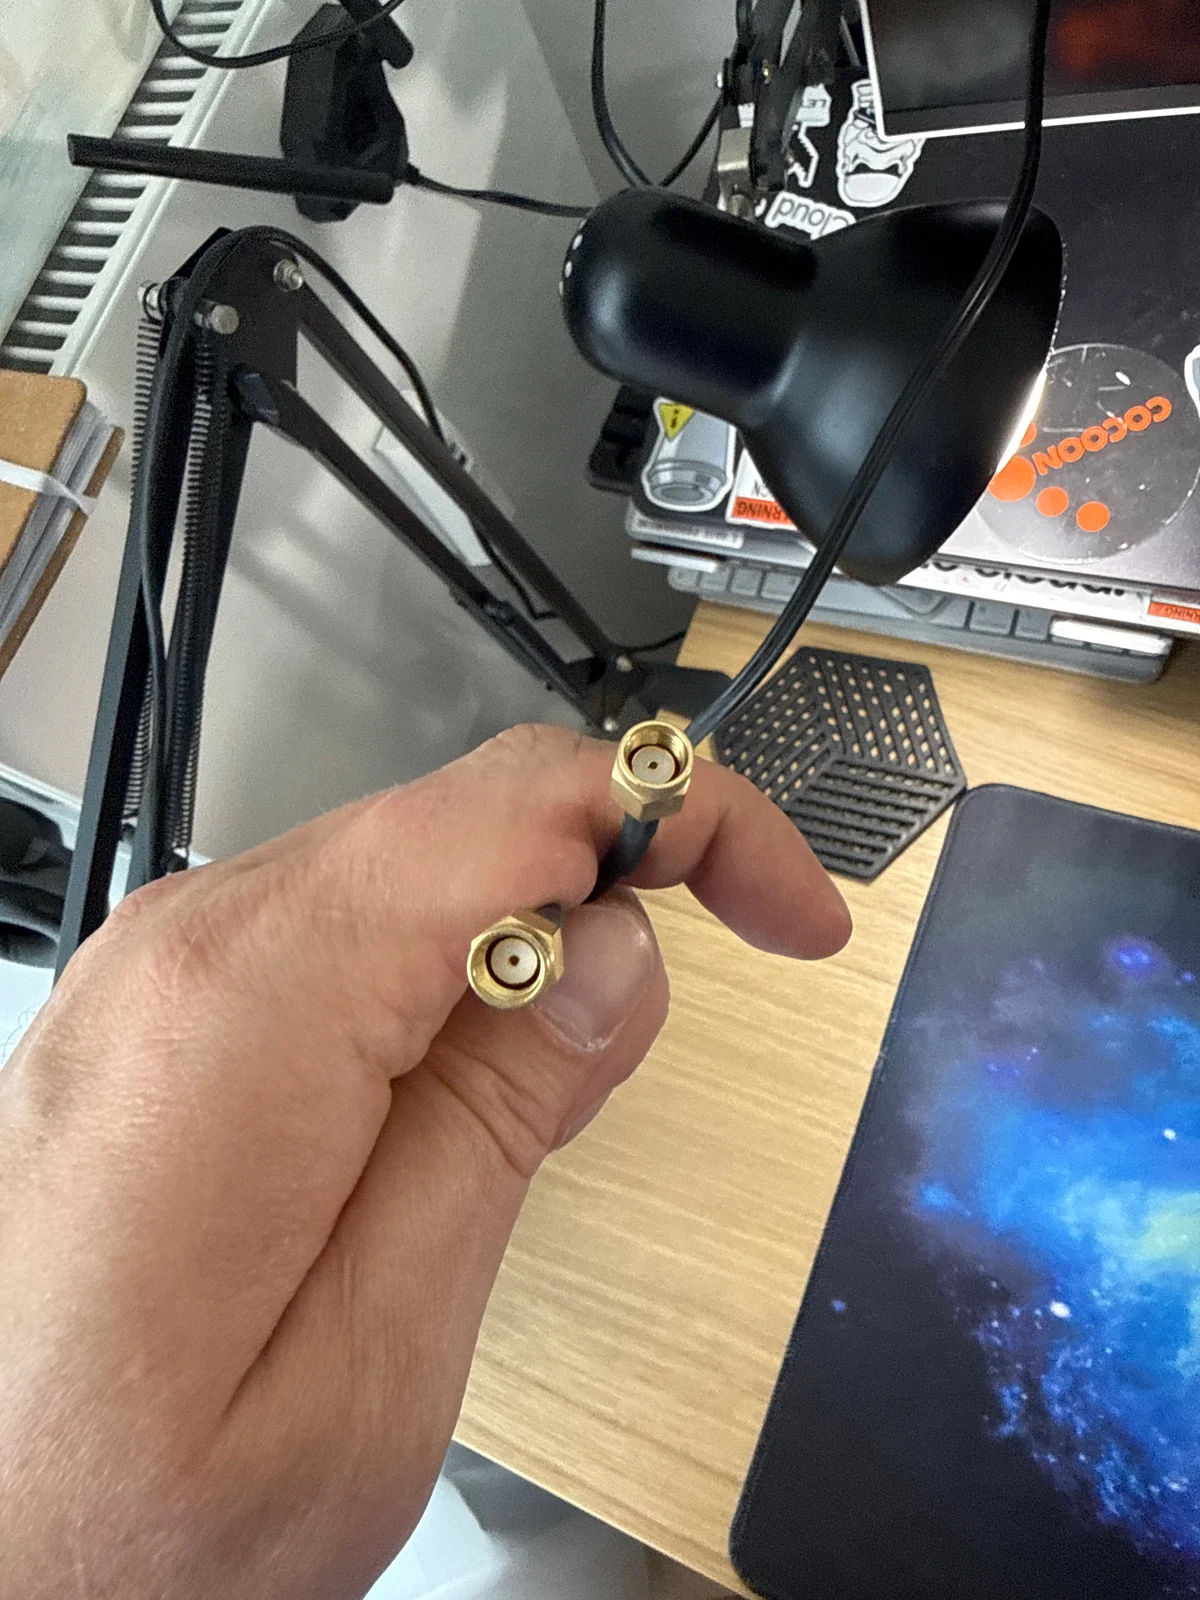
Rather than dealing with ASUS’s proprietary Q-Antenna plugs and the onboard Realtek RTL8922AE chip, I disabled the onboard controller in UEFI BIOS and installed a TP-Link Archer TBE550E PCIe Wi-Fi 7 + Bluetooth 5.4 card with standard threaded RP-SMA connectors on the PCIe bracket.
Hardware Warning for AMD AM5 Builders: Do not buy a PCIe Wi-Fi 7 card based on the Intel BE200 chip for an AMD AM5 motherboard. Because of a PCIe/CNVi handshake issue on AMD chipsets, an Intel BE200 will prevent an AM5 board from POSTing at all. Stick to Intel AX210 (Wi-Fi 6E) or MediaTek MT7927 (Wi-Fi 7, which powers the TP-Link Archer TBE550E).
Storage Migration & Moving the Extra Drives to Unraid
I wanted to test CachyOS thoroughly before wiping my main NVMe drive, so I used my spare SATA and mechanical drives as staging storage before moving them into my NAS:
- Initial Trial on SATA SSD: I shrunk a partition on a 4 TB SanDisk SATA SSD and installed CachyOS there, leaving the original Windows 11 installation on the 4 TB Samsung 990 PRO NVMe untouched for two weeks.
- Prepping Windows for NVMe-to-SATA Migration: Once I knew CachyOS handled all of my daily work, I swapped the drives so Linux owned the fast 7,450 MB/s NVMe and Windows lived temporarily on the slower SATA SSD. Before cloning Windows from NVMe to SATA, watch out for a classic boot trap: a Windows installation created on NVMe uses
stornvme.sysand disables the SATA AHCI boot driver (storahci.sys). If you clone it straight to a SATA drive, it crashes at boot withINACCESSIBLE_BOOT_DEVICE. Running these three commands in an elevated Windows prompt before shutdown prevents that:1 2 3powercfg -h off reg add "HKLM\System\CurrentControlSet\Services\storahci" /v Start /t REG_DWORD /d 0 /f reg add "HKLM\System\CurrentControlSet\Services\storahci\StartOverride" /v 0 /t REG_DWORD /d 0 /f - Cloning & Flipping the Drives: I backed up the CachyOS
@and@homesubvolumes to an 8 TB WD Black staging drive usingbtrfs send | zstd, cloned the Windows NTFS partition from the NVMe to the SATA SSD usingntfsclone, verified that Windows booted from SATA, and then formatted the Samsung 990 PRO NVMe asBtrfs(zstd). Restoring CachyOS to the NVMe took less than five minutes:1 2 3 4 5zstd -dc cachyos_root.btrfs.zst | sudo btrfs receive /mnt/nvme_target/ zstd -dc cachyos_home.btrfs.zst | sudo btrfs receive /mnt/nvme_target/ # Important: btrfs receive sets subvolumes to read-only by default! sudo btrfs property set -ts /mnt/nvme_target/@ ro false sudo btrfs property set -ts /mnt/nvme_target/@home ro false - Moving the SATA SSD and HDDs to the Unraid NAS: After running CachyOS on the Samsung 990 PRO 4 TB NVMe and realizing I had zero reason to boot Windows anymore, I cleaned out the case. I pulled the 4 TB SanDisk SATA SSD along with the WD Black 8 TB and WD Blue 4 TB mechanical drives out of the desktop and installed them into my Unraid NAS (
192.168.255.50). The 4 TB SanDisk SSD now serves as a cache drive in Unraid, while the two WD drives expanded the NAS storage array. My workstation now runs on a single NVMe drive (nvme0n1plus 30.5 GB of compressedzram0swap) with no spinning disks in the case, and mounts bulk storage on demand over NFSv4.2.
Hardware Gotcha #3: TPM 2.0 and UEFI Secure Boot Traps
Despite being a tiny cryptographic state machine inside the CPU, AMD fTPM (Firmware TPM 2.0) and UEFI Secure Boot fought me at three separate stages of this build: during the initial dual-boot transition, when enrolling custom UEFI Secure Boot keys for rEFInd and CachyOS, and right after swapping the CPU and motherboard from AM4 to AM5.
Trap #1: BitLocker’s PCR 4 & PCR 7 Lockout When Chainloading from Linux
During the two-week transition period while Windows 11 still lived alongside CachyOS, setting rEFInd or GRUB as the primary UEFI boot manager immediately tripped BitLocker. Every time I selected Windows Boot Manager from the Linux bootloader menu, Windows threw a blue screen demanding my 48-digit BitLocker recovery key.
Most forum posts tell you to decrypt your Windows drive (manage-bde -off), which takes hours on a multi-terabyte SSD and defeats the purpose of disk encryption. The real cause lies in TPM Platform Configuration Registers (PCRs):
- By default on native UEFI systems, Windows seals the BitLocker Volume Master Key against PCR 0, 2, 4, and 11 (or
0, 2, 4, 7, 11). - PCR 4 measures the cryptographic hash of the initial UEFI boot loader binary and the exact boot path (
UEFI -> Windows Boot Manager). When UEFI bootsrEFIndorGRUBfirst and chainloadsbootmgfw.efi, the hash extended into PCR 4 changes, and the TPM refuses to unseal the BitLocker key. - PCR 7 measures the UEFI Secure Boot policy and enrolled certificates, which also changes as soon as you append custom Linux Secure Boot keys.
To fix this without decrypting the drive, I opened gpedit.msc (Computer Configuration -> Administrative Templates -> Windows Components -> BitLocker Drive Encryption -> Operating System Drives -> Configure TPM platform validation profile for native UEFI firmware configurations), enabled the policy, and checked only PCR 0 (CRTM/BIOS), PCR 2 (Option ROM code), and PCR 11 (BitLocker Access Control), leaving PCR 4 and PCR 7 unchecked. Then I forced Windows to delete and re-bind its TPM key protector against the new PCR profile:
|
|
Trap #2: Appending Custom UEFI Secure Boot Keys (DB Management) Without Breaking GPU Option ROMs
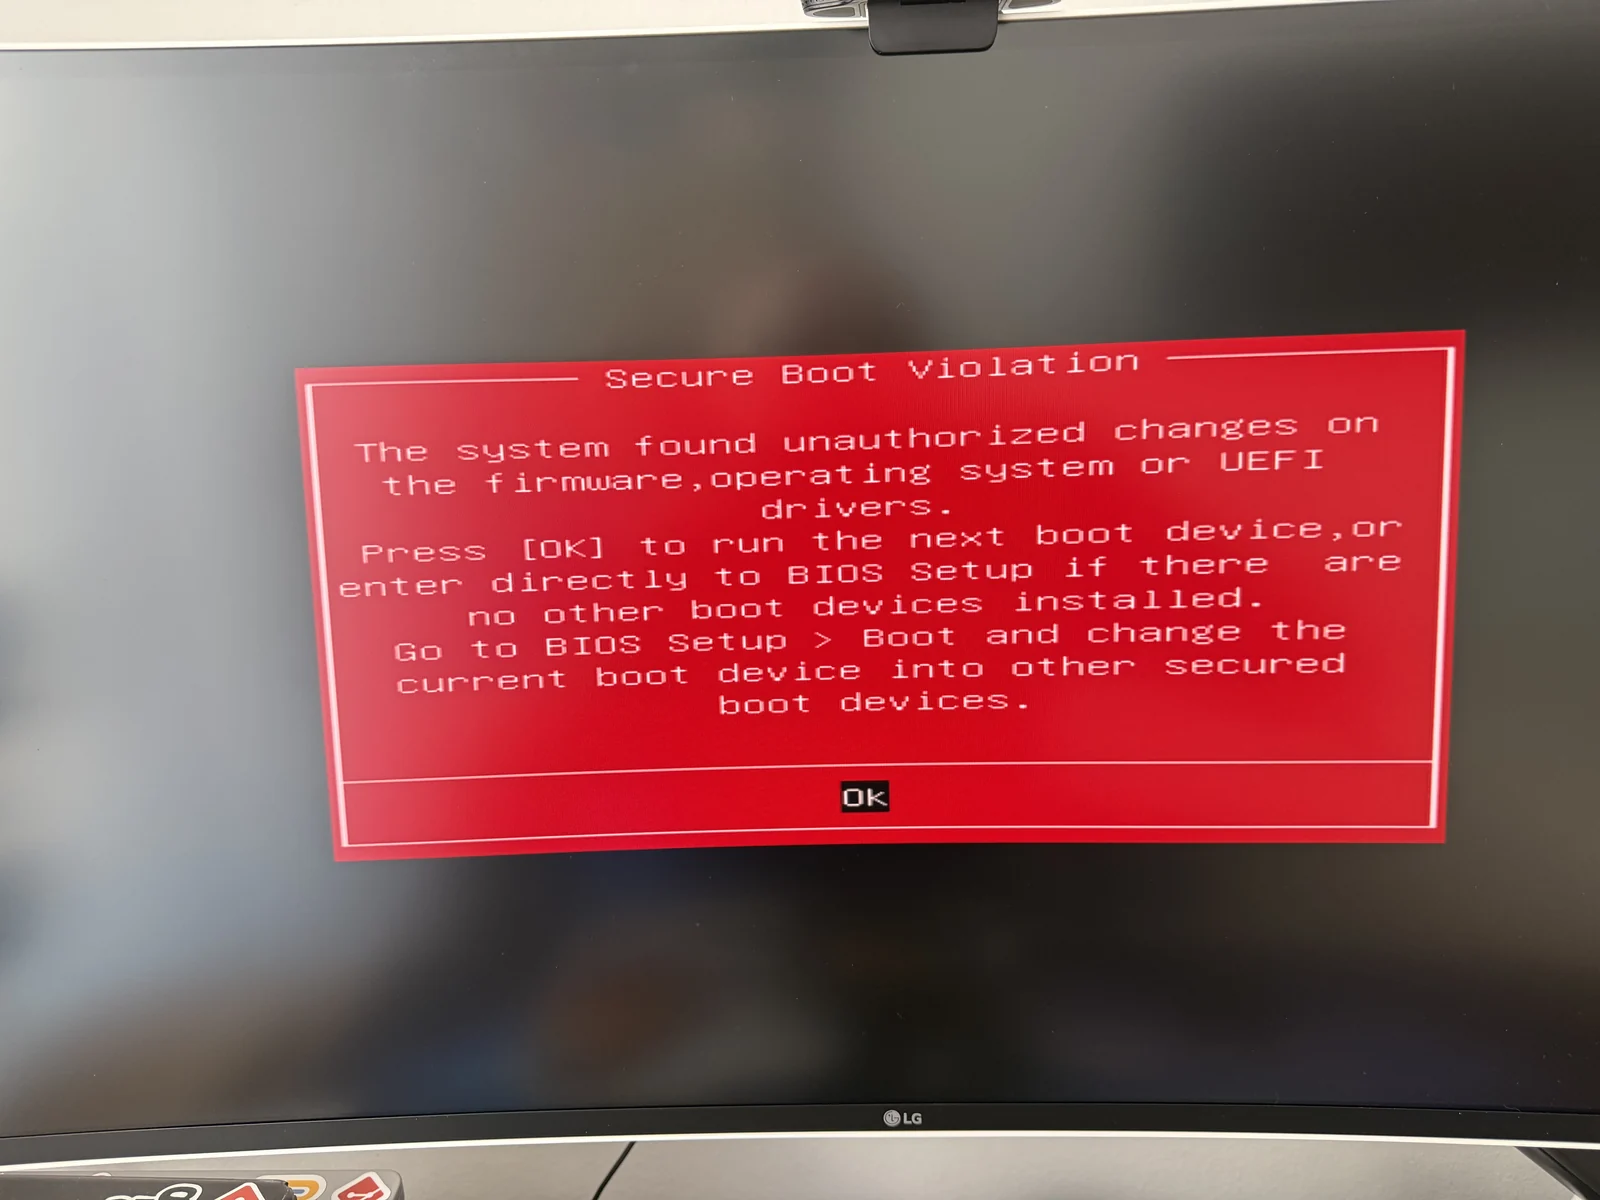
Because CachyOS’s linux-cachyos kernel, grubx64.efi, and refind_x64.efi are not signed by Microsoft’s default keys, booting them with UEFI Secure Boot enabled triggers the red Secure Boot Violation screen shown above.
Do not wipe the factory UEFI Signature Database (DB) and enroll only your own custom key. If you remove Microsoft’s Third-Party UEFI CA certificates, the UEFI GOP Option ROM inside your PCIe graphics card (like my ASUS TUF Radeon RX 7900 XTX) or NVMe controller can fail signature verification during POST and leave you with a black screen before you even reach the BIOS.
On the ASUS TUF GAMING B850-PLUS WIFI, you can either run sbctl enroll-keys -m from Linux (in Setup Mode) or append your DER-encoded public key certificate (cachyos-db.cer) directly inside the ASUS UEFI BIOS while keeping all 11 factory Microsoft/OEM certificates intact:
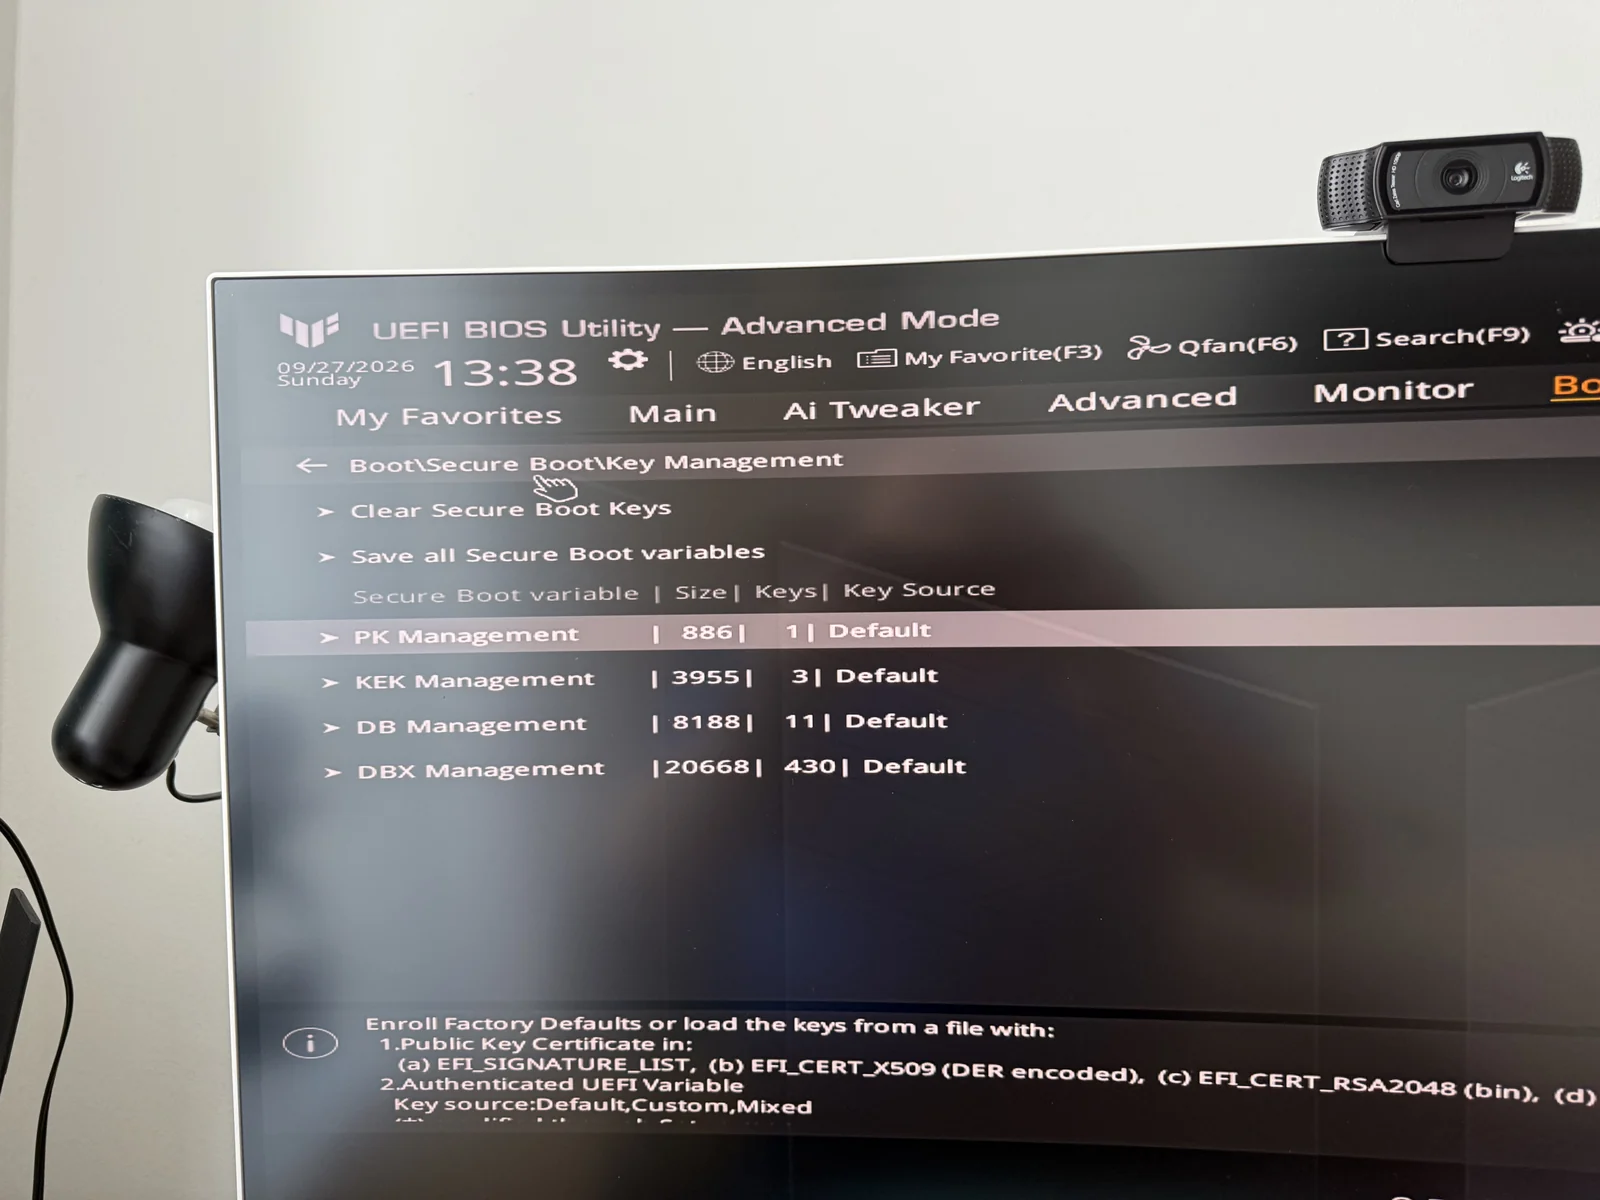
- Copy your generated
.cerpublic certificate onto the FAT32 EFI System Partition (/boot/EFI/). - Enter UEFI BIOS Utility -> Boot -> Secure Boot -> Key Management.
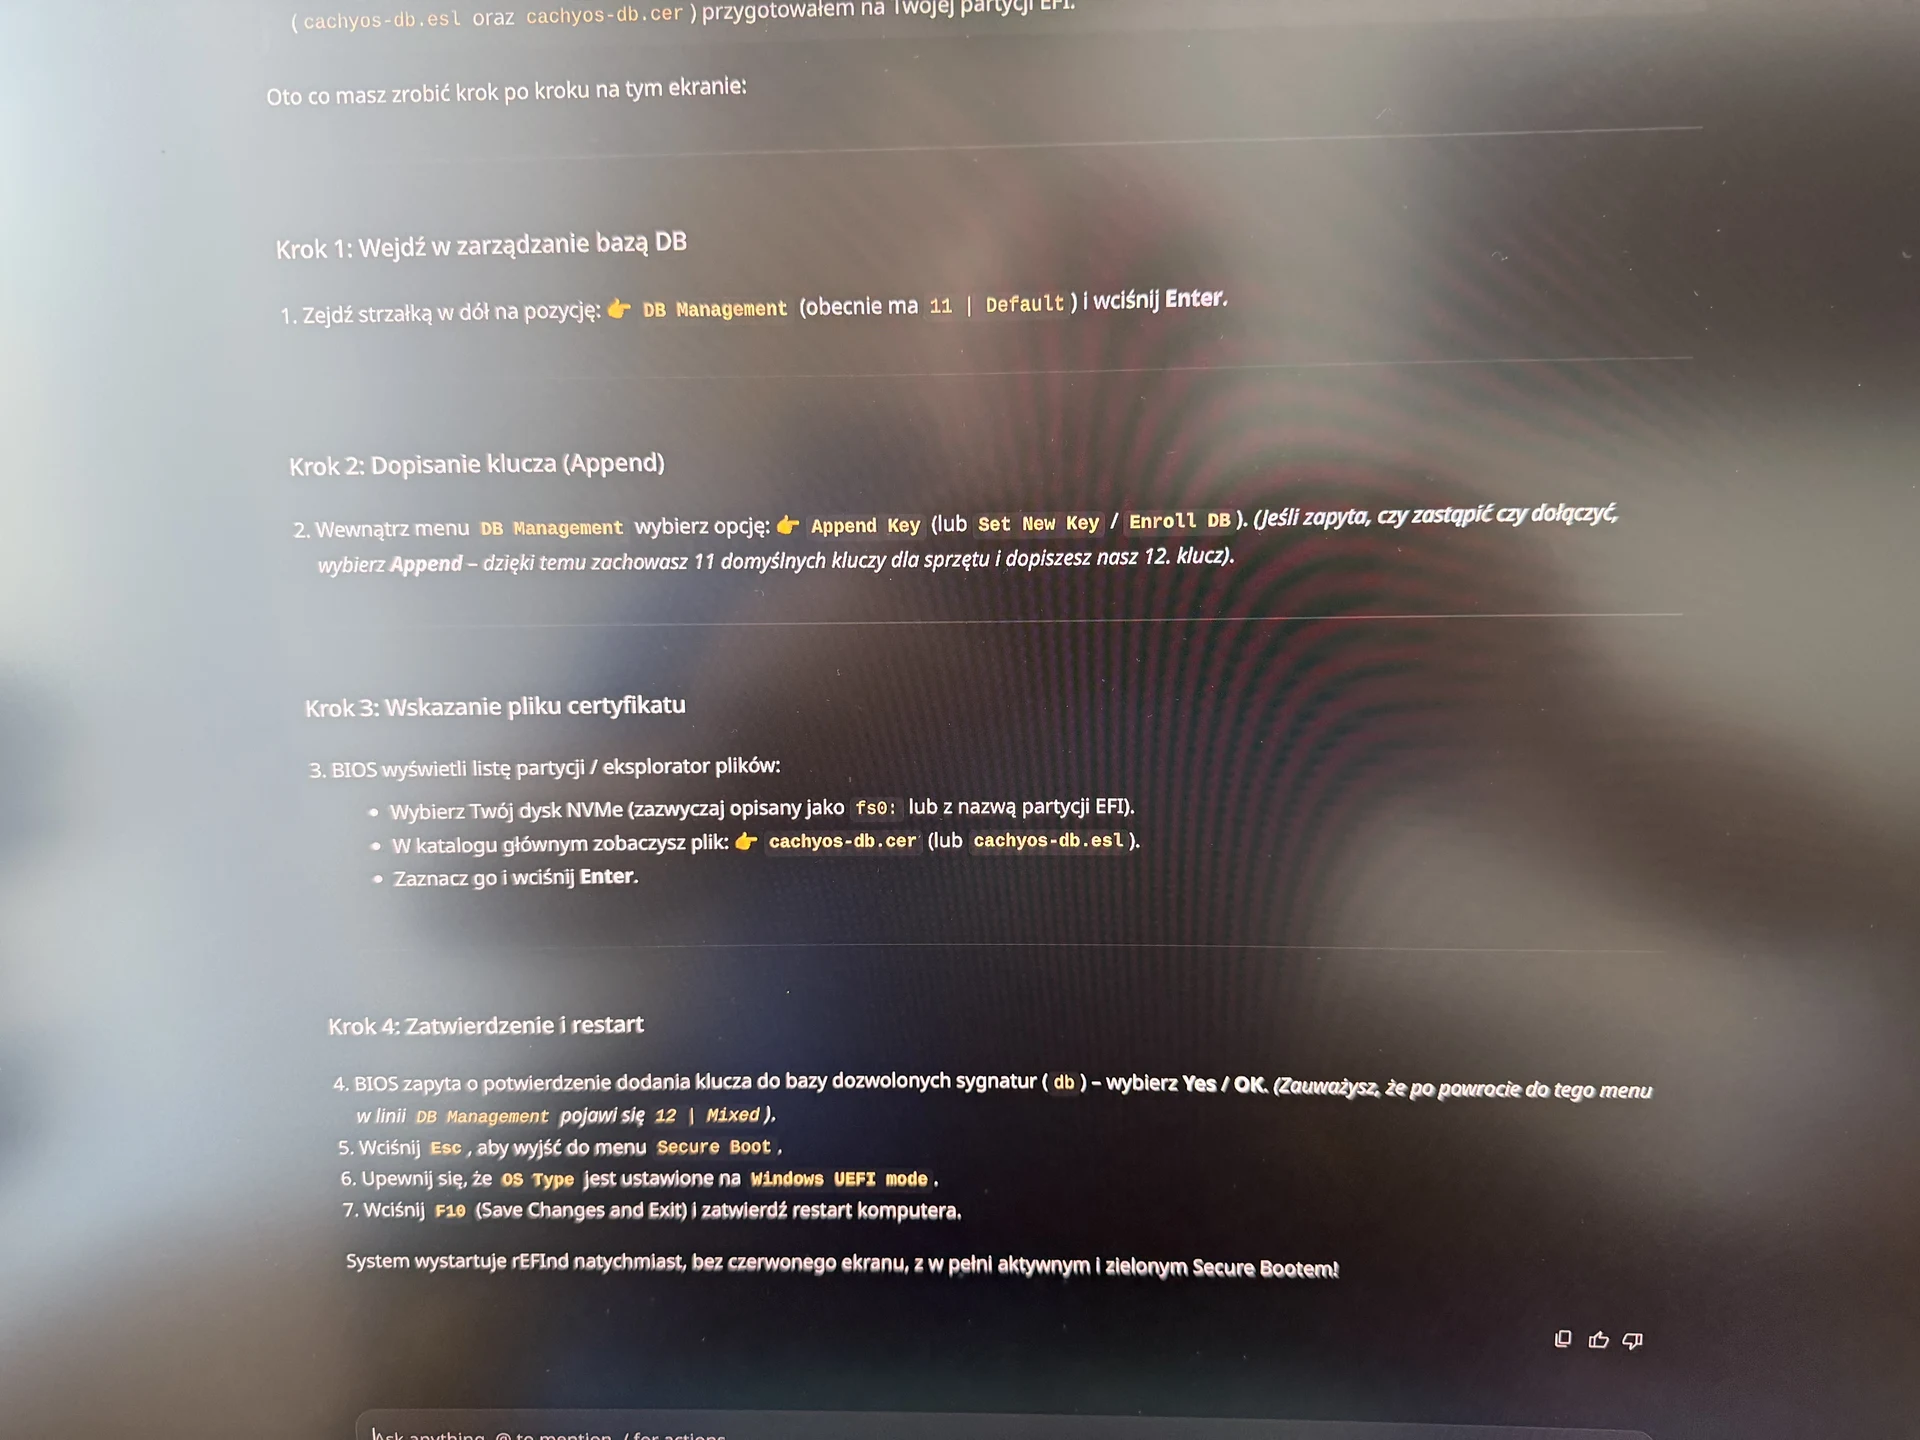
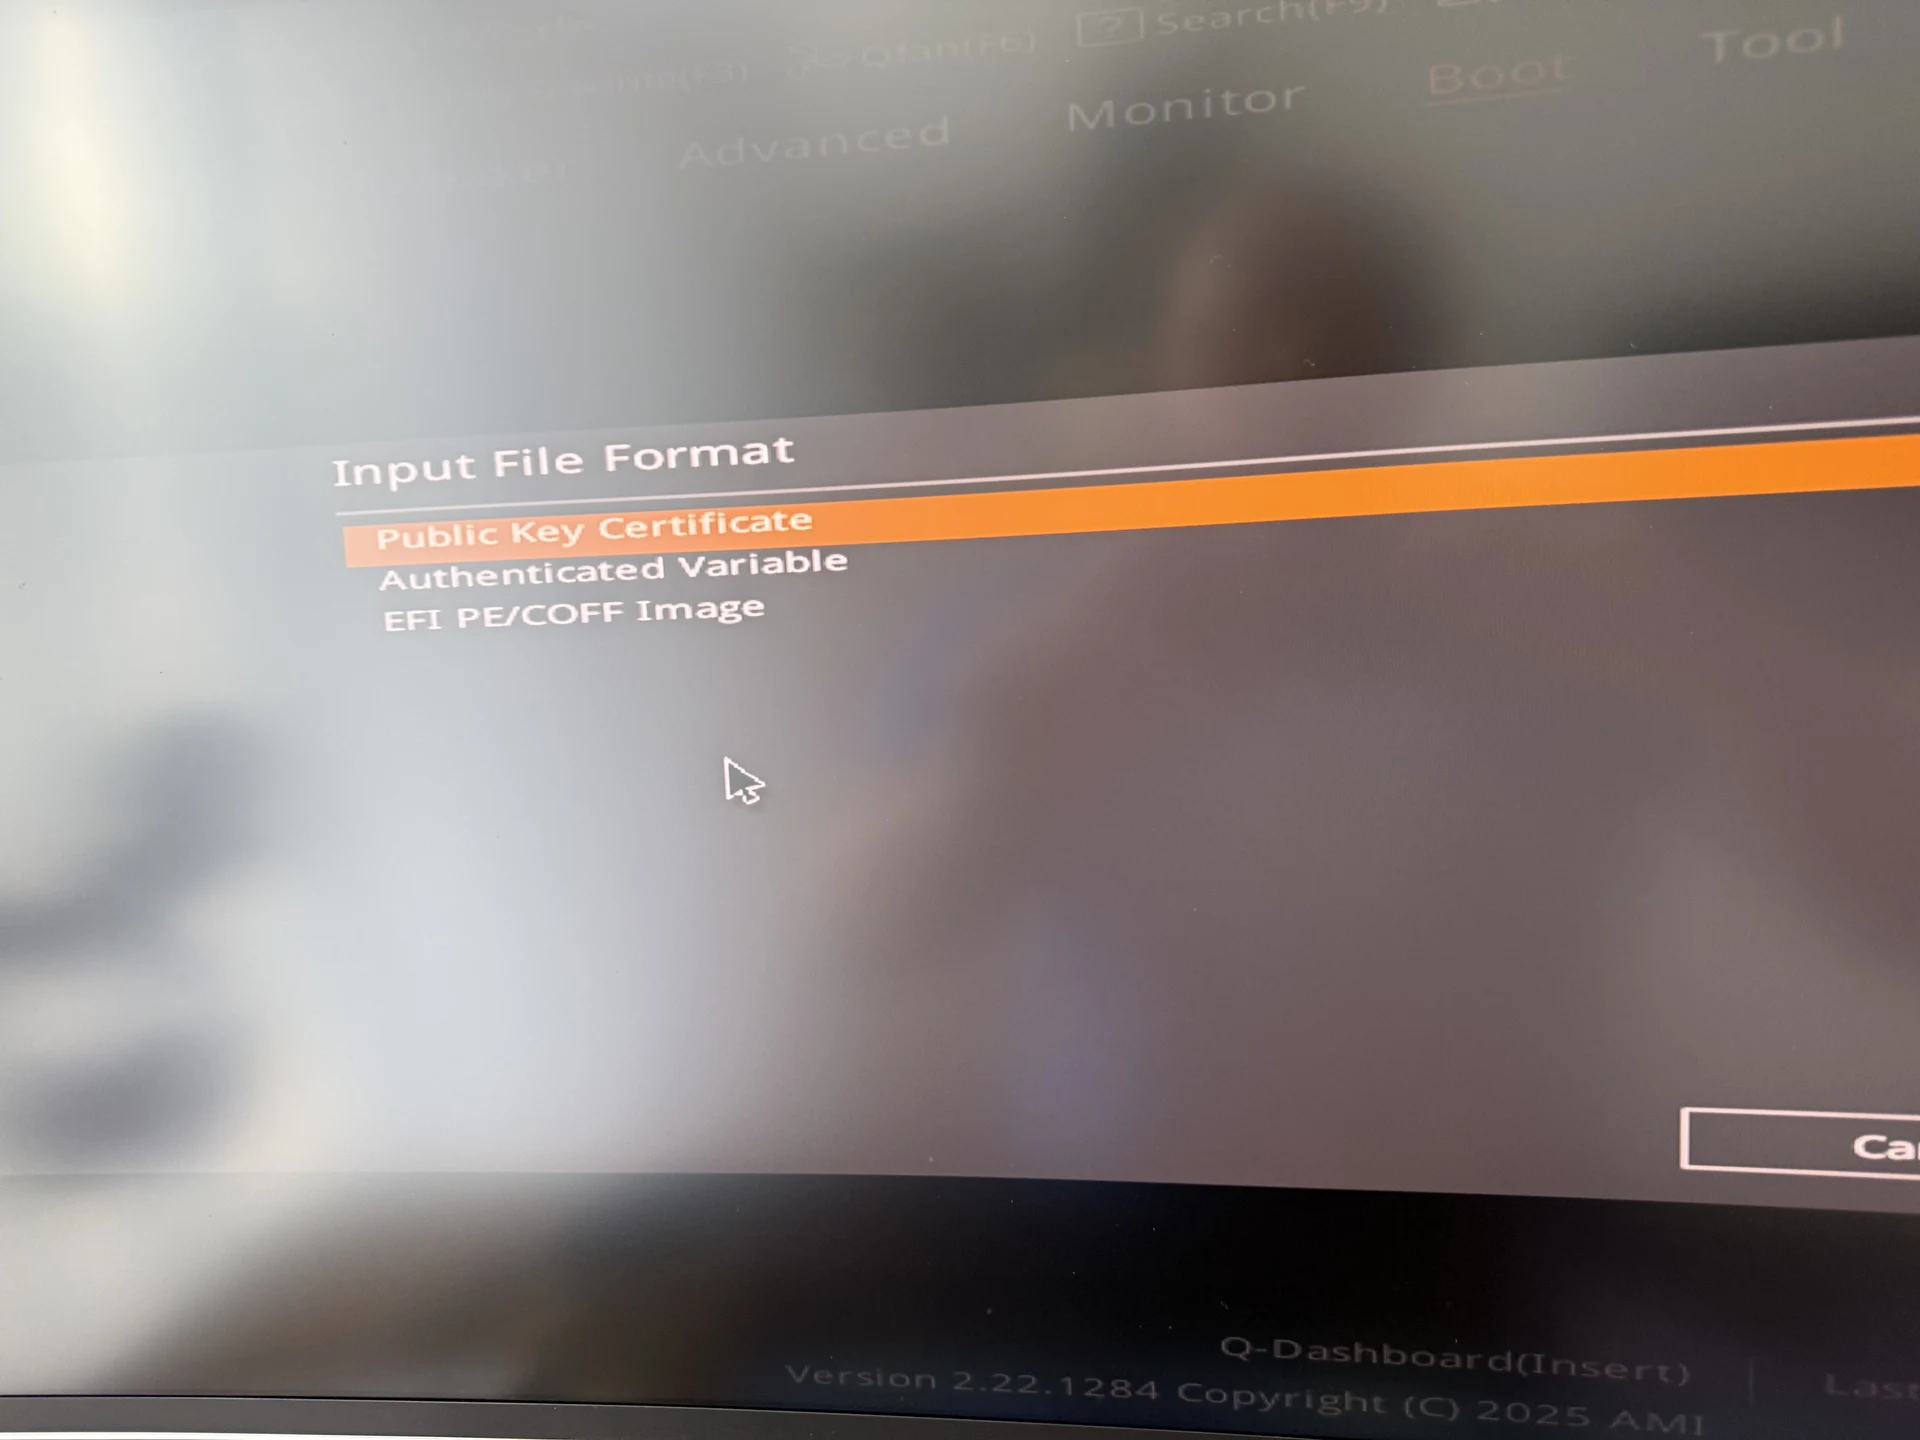
- Select DB Management -> Append Key, choose your EFI System Partition, select the
.cerfile, and choose Public Key Certificate when prompted for the key format.
Once appended, DB Management switches from 11 | Default to 12 | Mixed, keeping every factory Microsoft and OEM certificate required by PCIe Option ROMs alongside your custom Linux signing certificate:
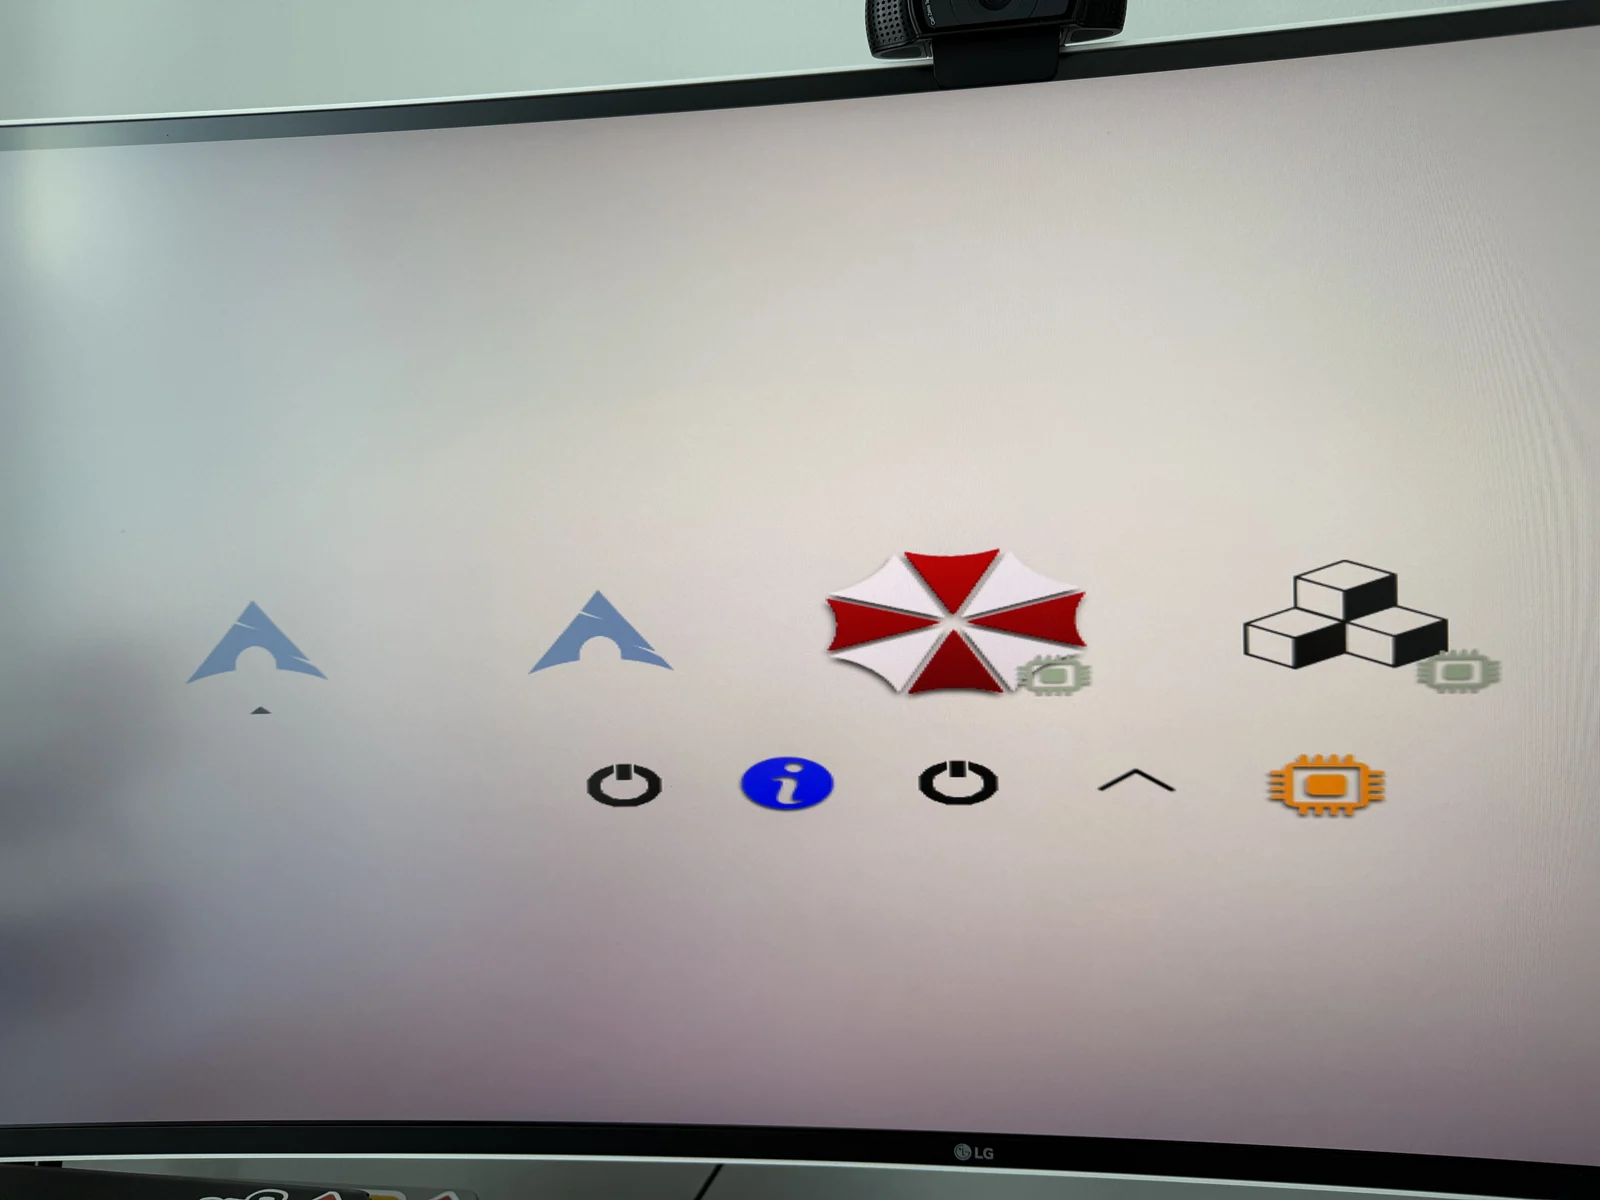
With the custom certificate enrolled in DB and sbctl signing refind_x64.efi, grubx64.efi, and vmlinuz-linux-cachyos automatically on every pacman -Syu upgrade, the PC boots straight into the graphical rEFInd boot manager with UEFI Secure Boot enabled:
Summary & What’s Next in Part 2
Building the AM5 Zen 5 workstation and migrating away from Windows 11 went smoothly once I worked around the physical motherboard quirks: putting the single-sided Samsung 990 PRO 4 TB inside a rigid Thermalright M.2 Pro heatsink to stop the PCB from bowing, replacing ASUS’s proprietary Q-Antenna Wi-Fi with a standard RP-SMA PCIe card, and appending custom Secure Boot certificates (12 | Mixed) instead of wiping the factory Option ROM keys.
In Part 2, I will cover the Linux software stack: how CachyOS’s znver4 packages perform in daily use, fixing the MediaTek MT7927 Wi-Fi 7 & Bluetooth 5.4 drivers, recovering from the AMD fTPM 0x000001df CPU-swap lockout in Gaze biometric face authentication, 9-zone OpenRGB lighting, KDE Plasma 6 on 5K2K Wayland, and running my Antigravity AI + MCP homelab workflow natively on Linux.